

Before You Start
- Sites & Cameras, and Builder within it, requires the Manager role or above. If your navigation only shows Monitoring, you won’t have access.
- You don’t need to complete every object type at once. Start with cameras, then add calibration, points of interest, geofences, and facilities as your use cases call for them.
Step 1: Select or Create a Site
Under Sites, you’ll see every site in your organization that you have permission to view, listed down the left side. Click the New Site button at the top to create a new site, or select an existing one. Selecting a site zooms the map to that location.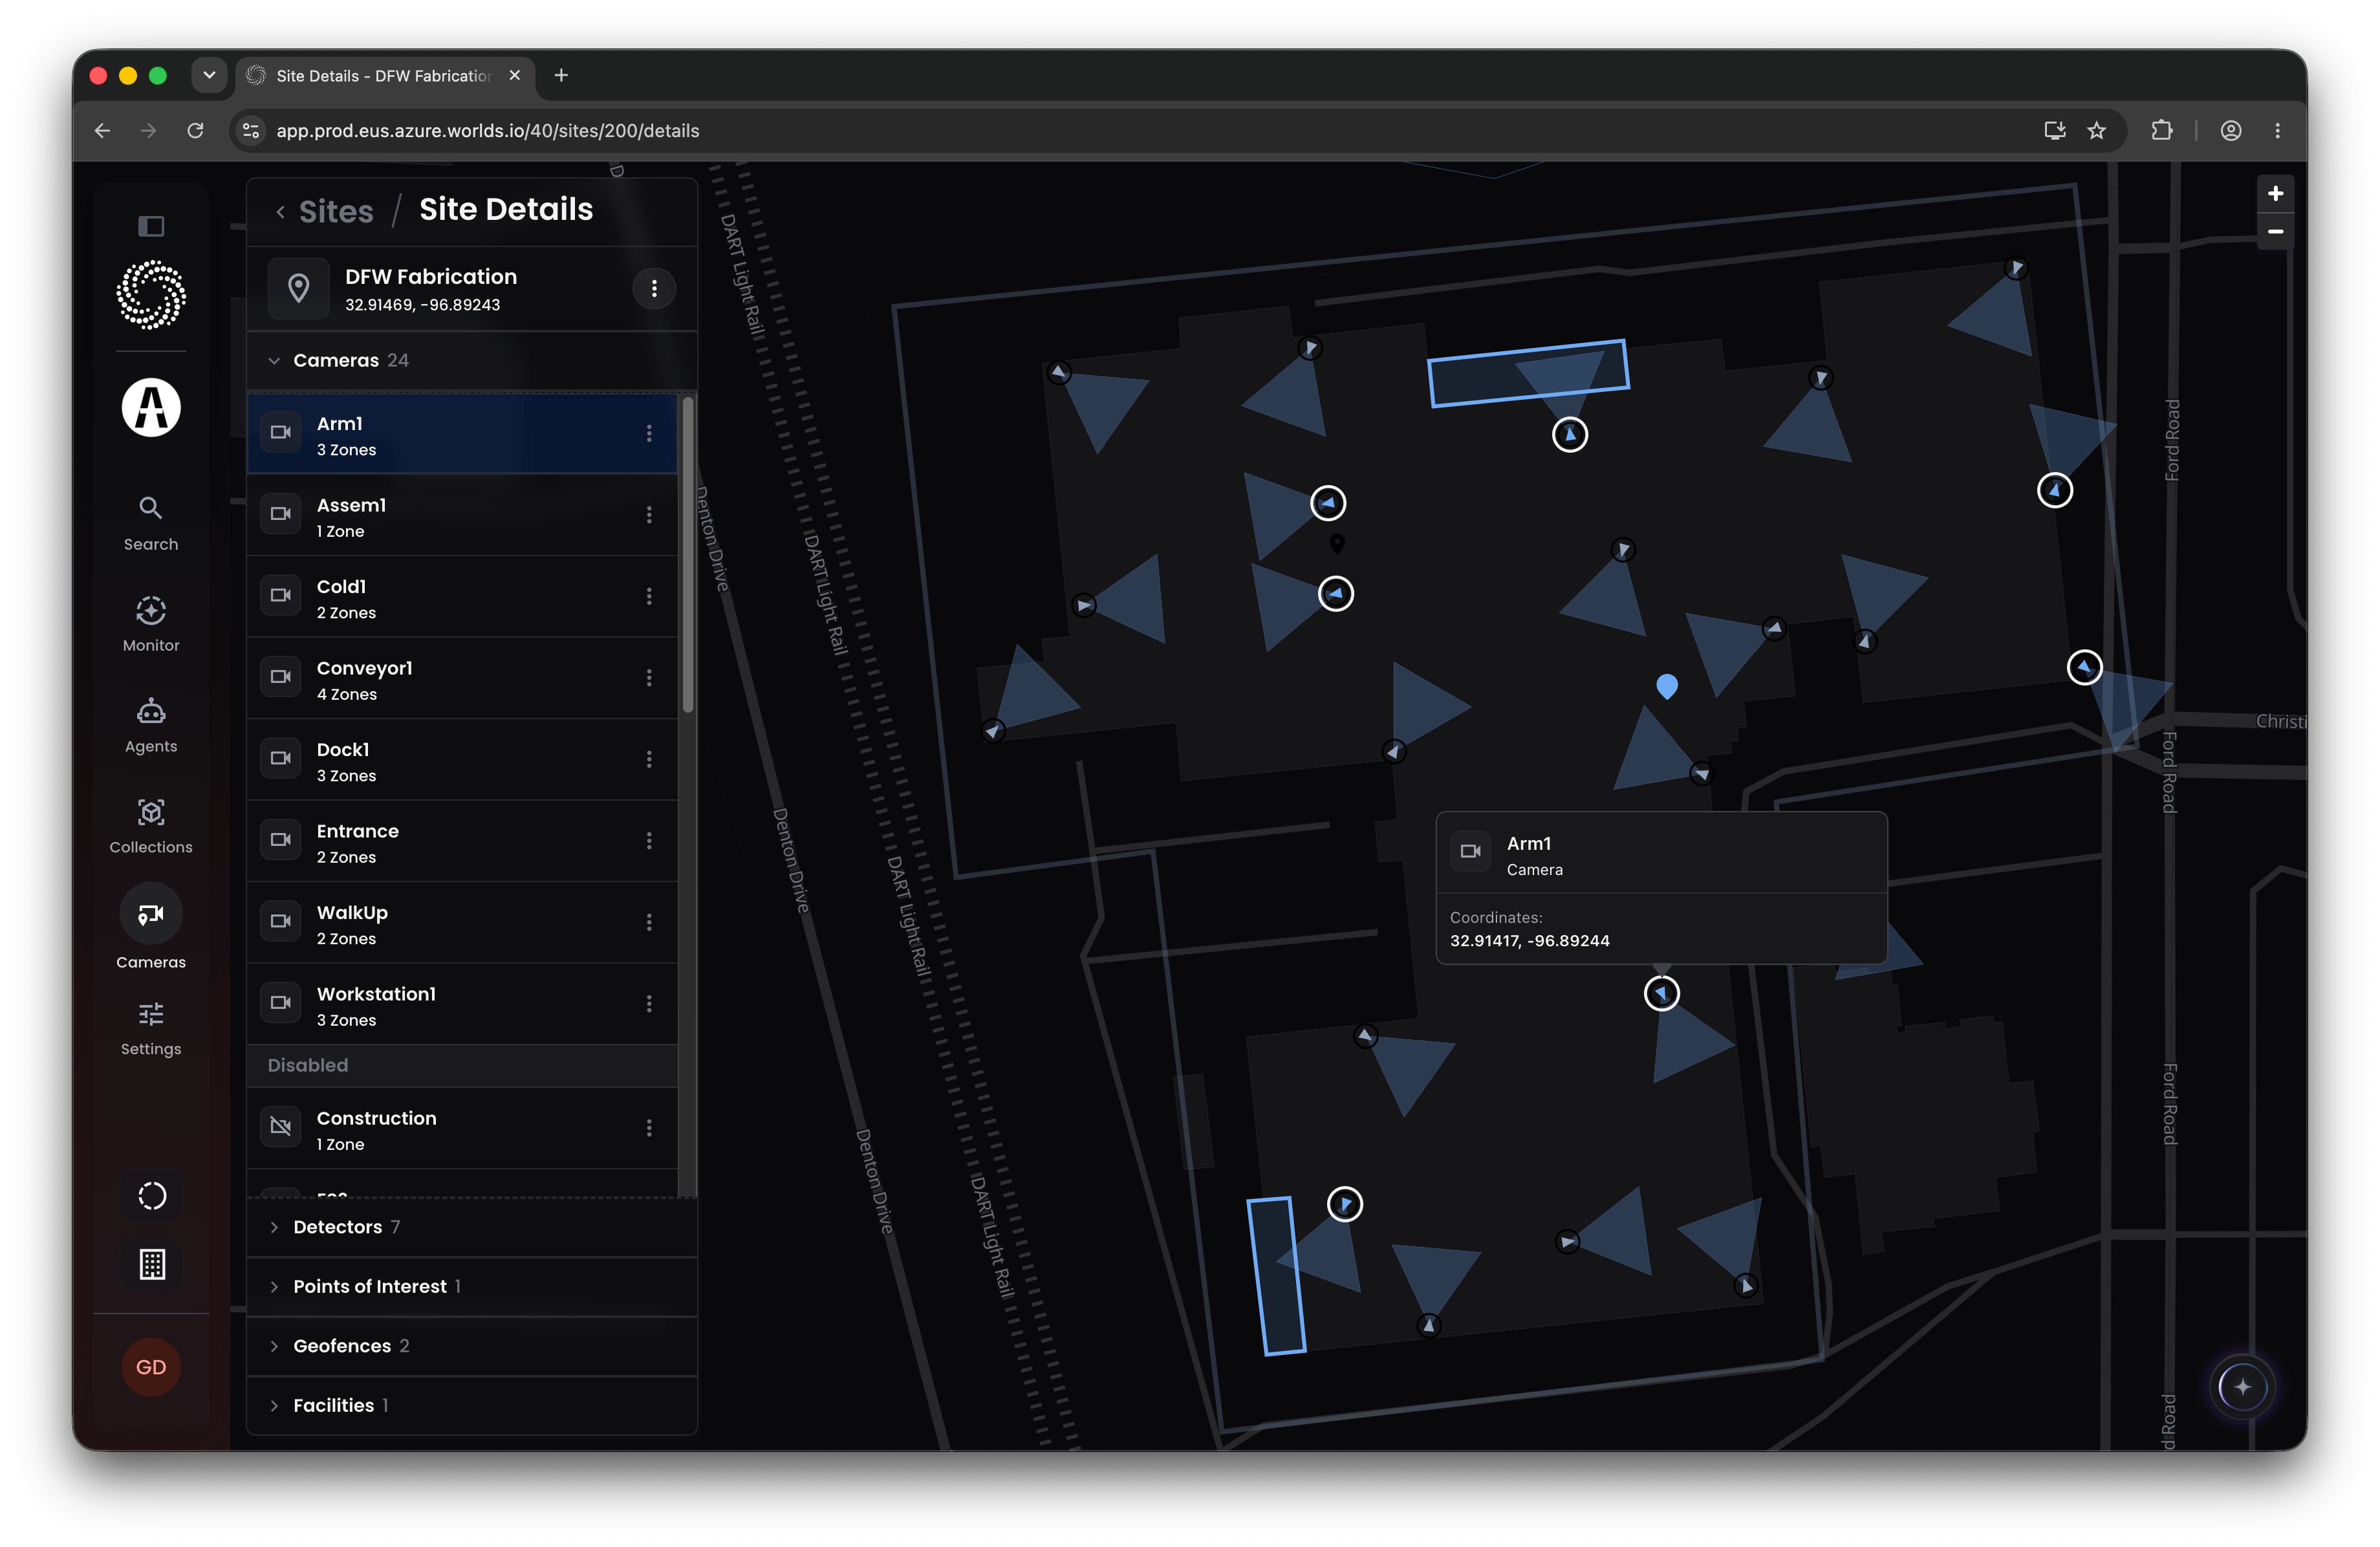
- Cameras - the video sources connected to the space
- Detectors - the live models running inference across the site’s cameras
- Points of Interest - geospatial points that group cameras together
- Geofences - polygons in lat/long space used to trigger workflow logic
- Facilities - floor plans for buildings at the site, useful today for camera calibration reference and mapped data visualization elsewhere in the product
Step 2: Edit Site Info or Launch Builder
Click the ellipses icon next to the site name for two options: Edit Site and Launch Builder.- Edit Site covers basic site information: name, location (by lat/long or by searching an address), and which storage account the site uses. Assigning storage accounts per site is useful if you want to separate storage costs by facility.
- Launch Builder is where the actual spatial configuration happens, and typically where you’ll create and calibrate cameras.
Step 3: Navigate the Builder Map
Inside Builder, the same object menu (Cameras, Detectors, Points of Interest, Geofences, Facilities) sits on the left to find, select, and edit existing objects. Use the Insert button at the top of the map to create a new camera, point of interest, geofence, or facility. Tip: Scroll to zoom, left-click and drag to pan, and hold Ctrl while dragging to rotate the map. Getting the right vantage and zoom level makes placing objects and calibrating cameras much easier.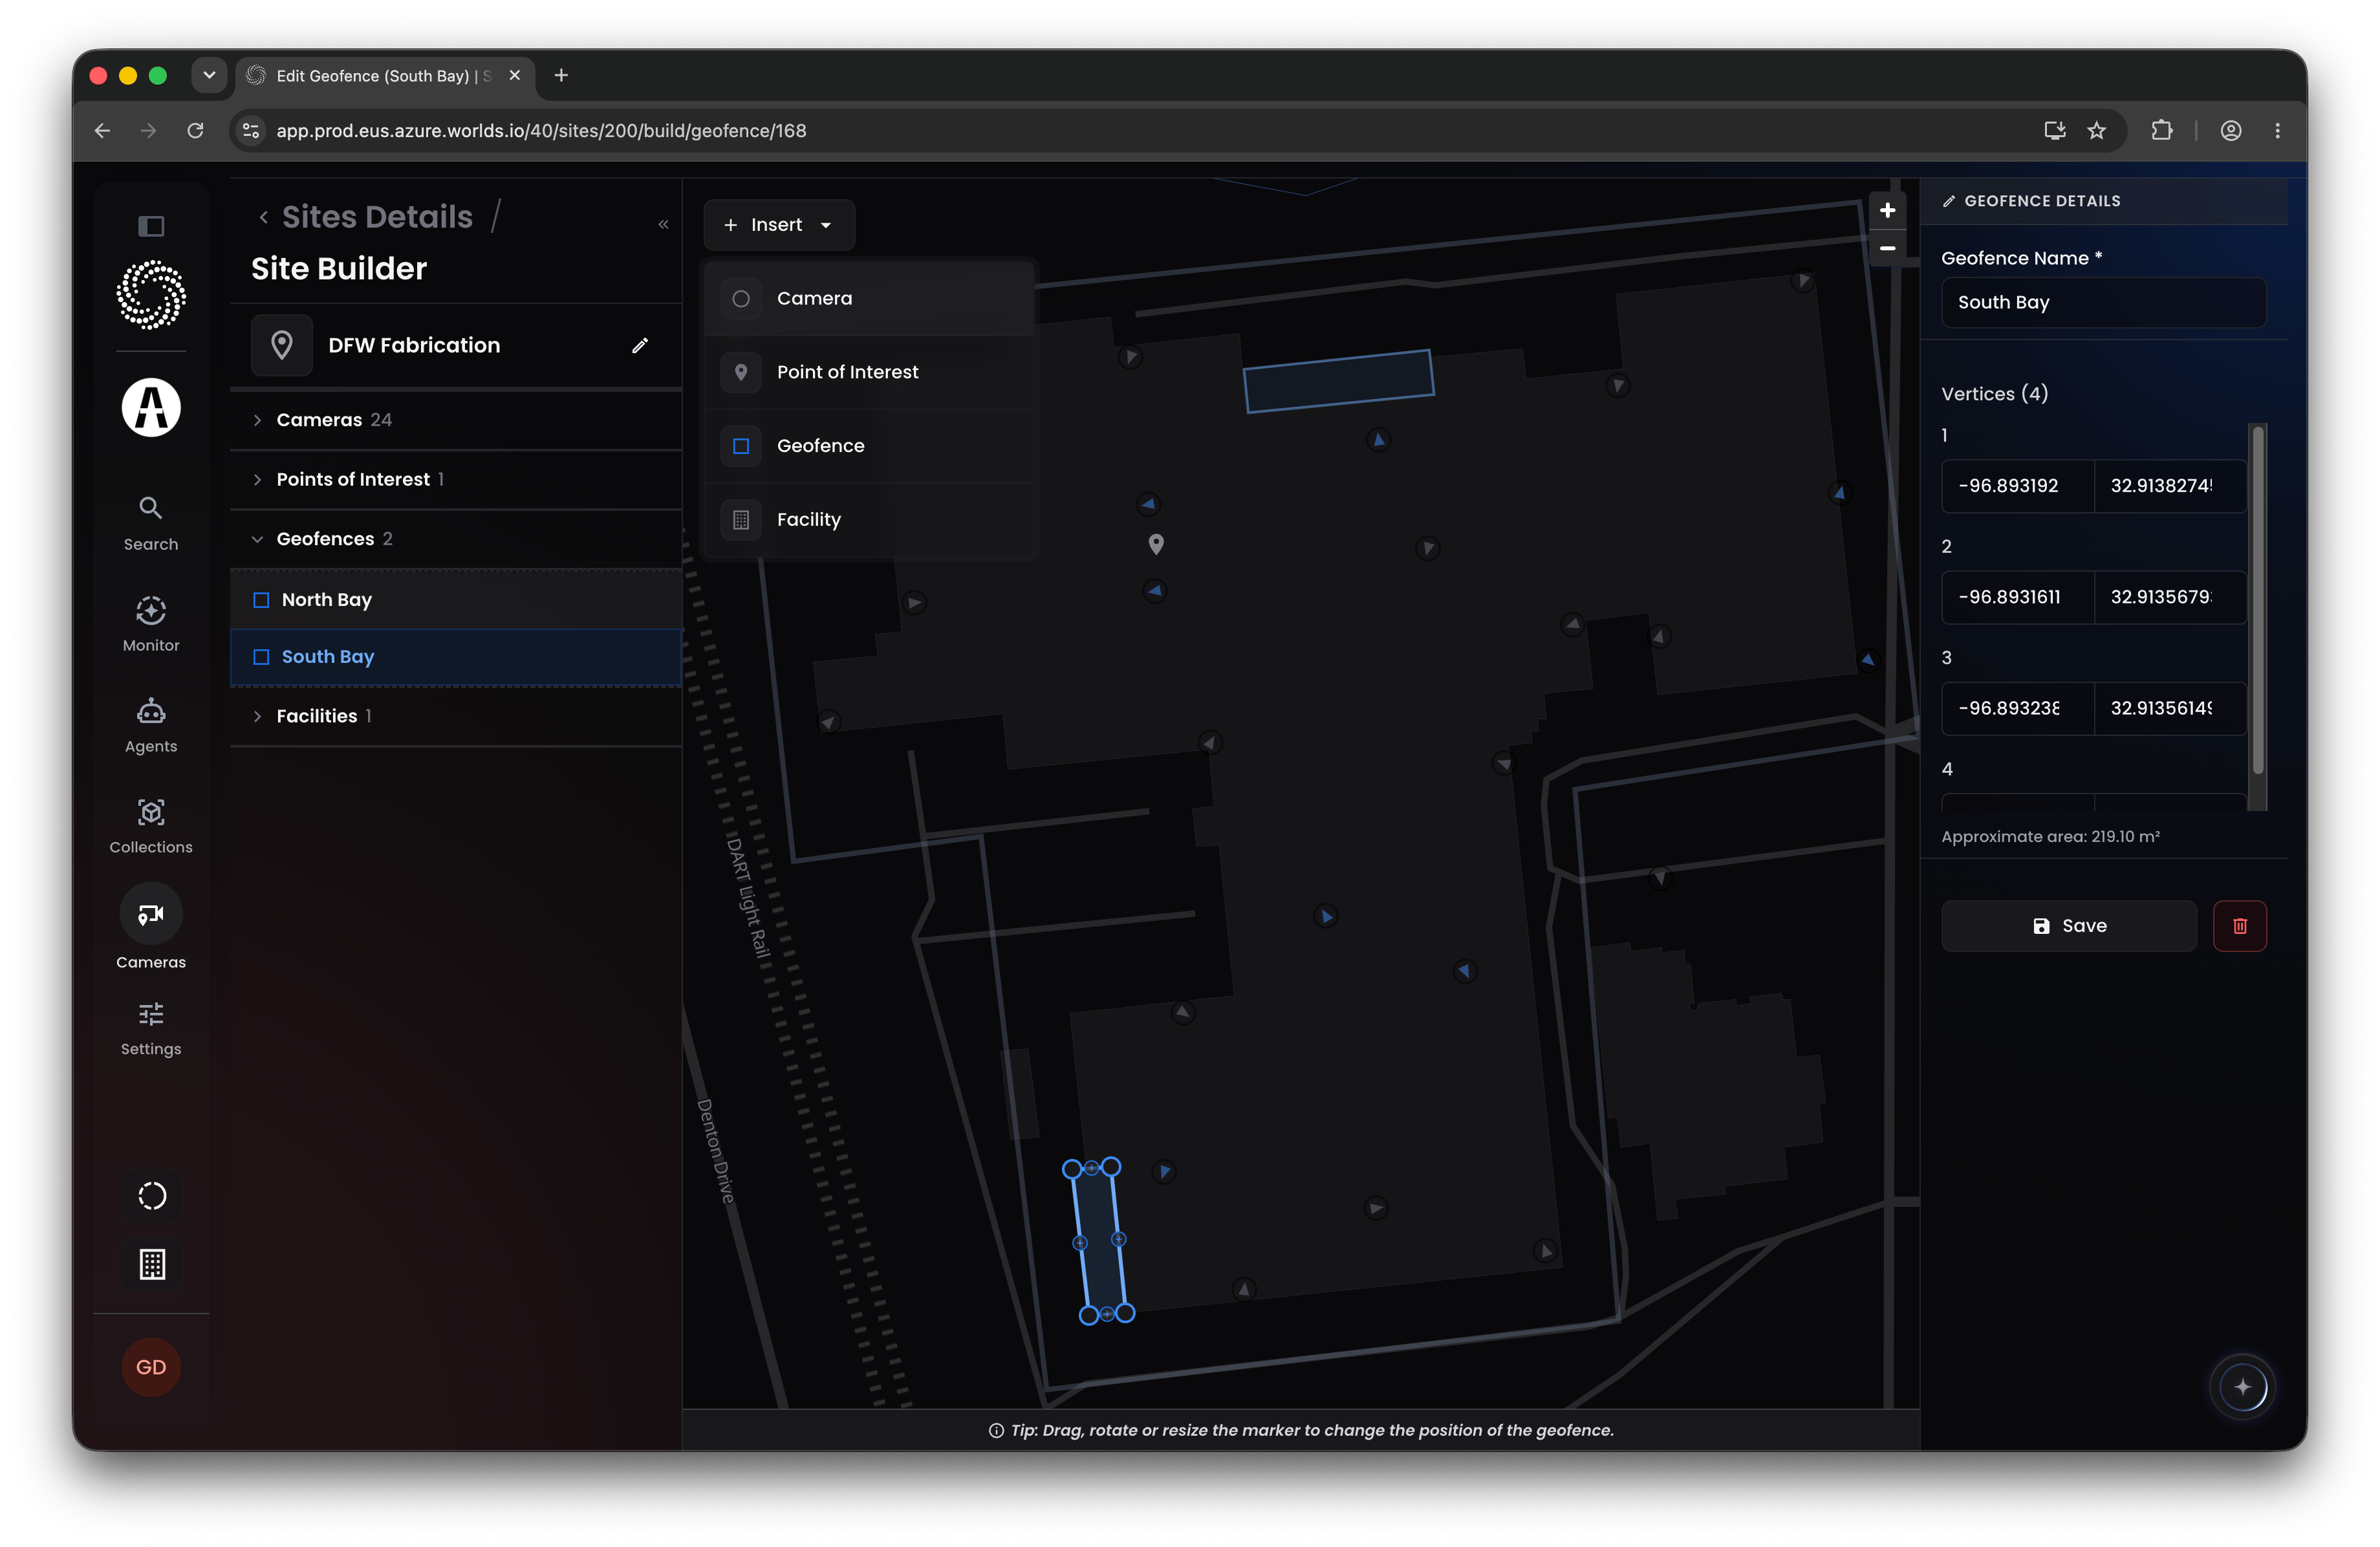
Step 4: Add and Position a Camera
Selecting or inserting a camera opens a right-side panel with its basic information: streaming URL, position, and rotation. Tip: Get the position as accurate as possible, either by entering exact latitude and longitude or by clicking and dragging the camera on the map. Rotation only needs a rough estimate at this stage, point-to-point calibration (Step 5) will set a computed rotation value for you afterward. Once a camera is placed, confirm it’s streaming video before moving on to calibration.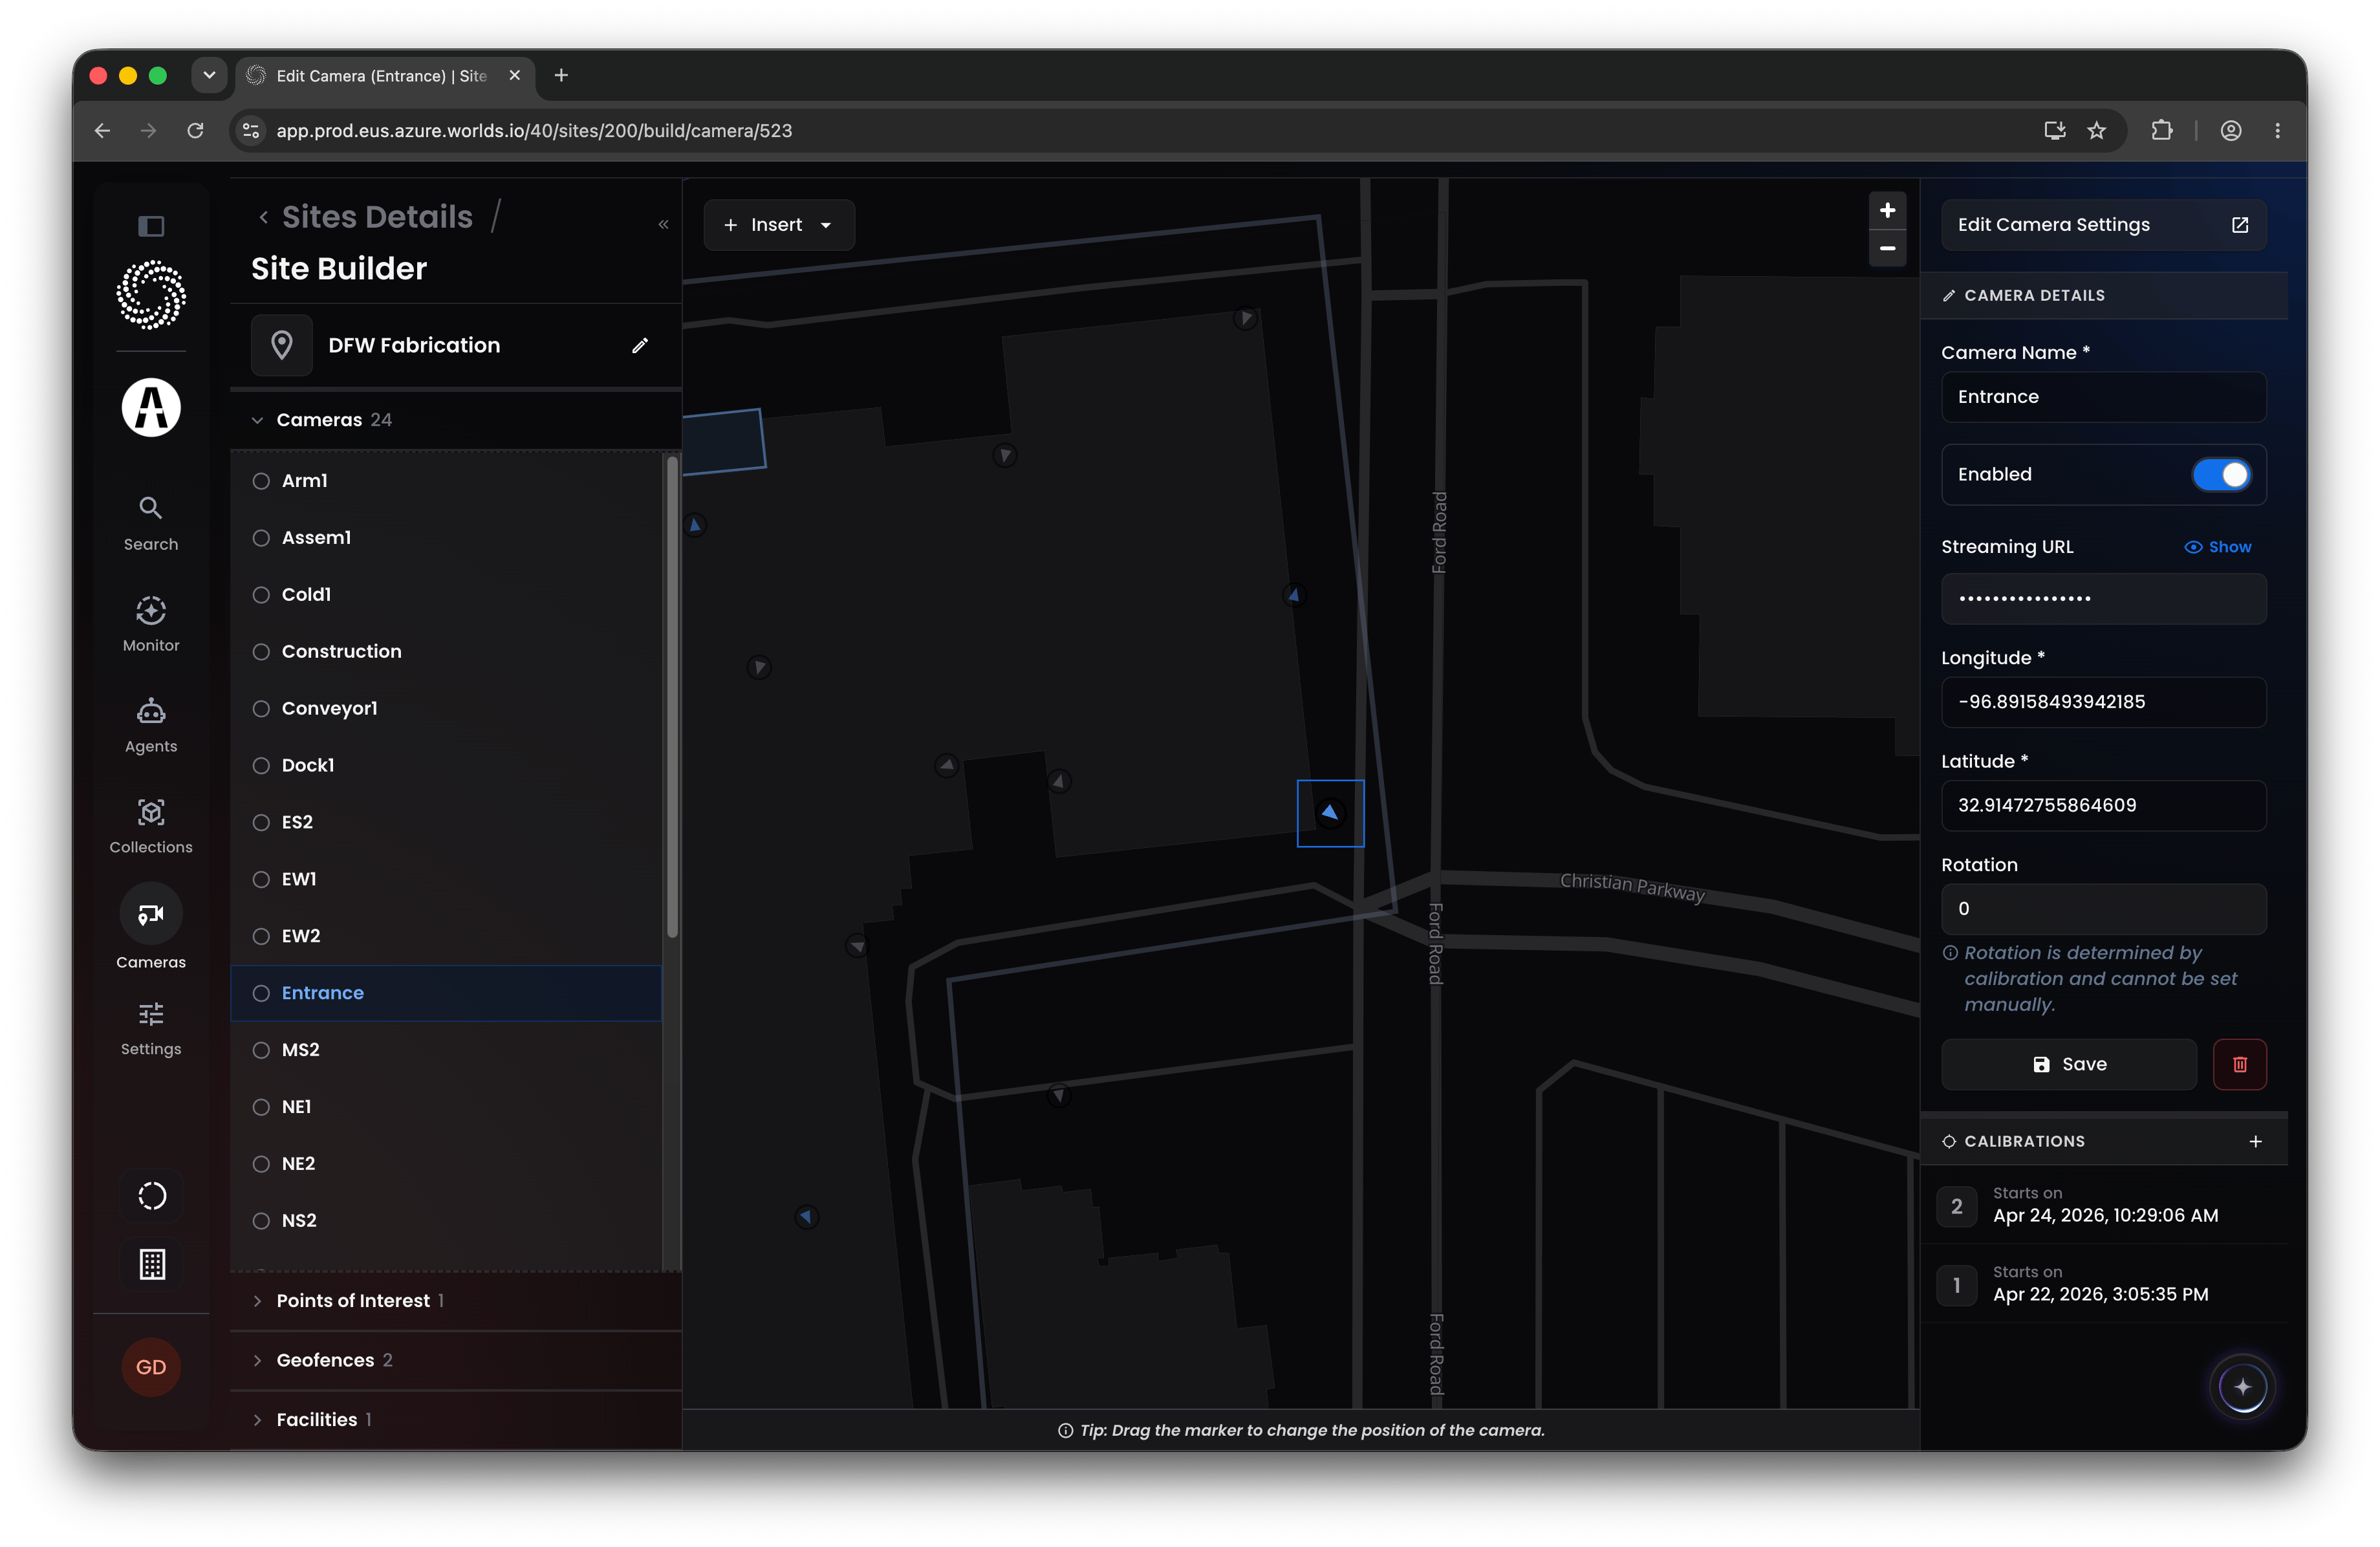
Step 5: Calibrate the Camera
With a camera selected, find Active Calibrations at the bottom of the right panel and click the plus icon to start a new calibration. This pulls up a recent thumbnail from the camera’s live stream in a panel below the map. Use the Add Marker button to place matching points on both the map and the video thumbnail. Then click and drag them into matching positions in both the map and video panels. Tip: An accurate calibration requires at least five to seven markers. Reference static objects and artifacts, corners, doors, pillars, and place them as accurately as you can - if challenging to locate in the map panel, create a Facility and upload a floor plan image to place on the map for reference. Calibration is what lets Worlds translate detections from that camera into real-world locations. Once all markers are placed, click Quick Save to start the calibration job. When it completes, the camera is calibrated, and its detections will begin to carry a lat/long position in addition to the pixel location within the camera frame.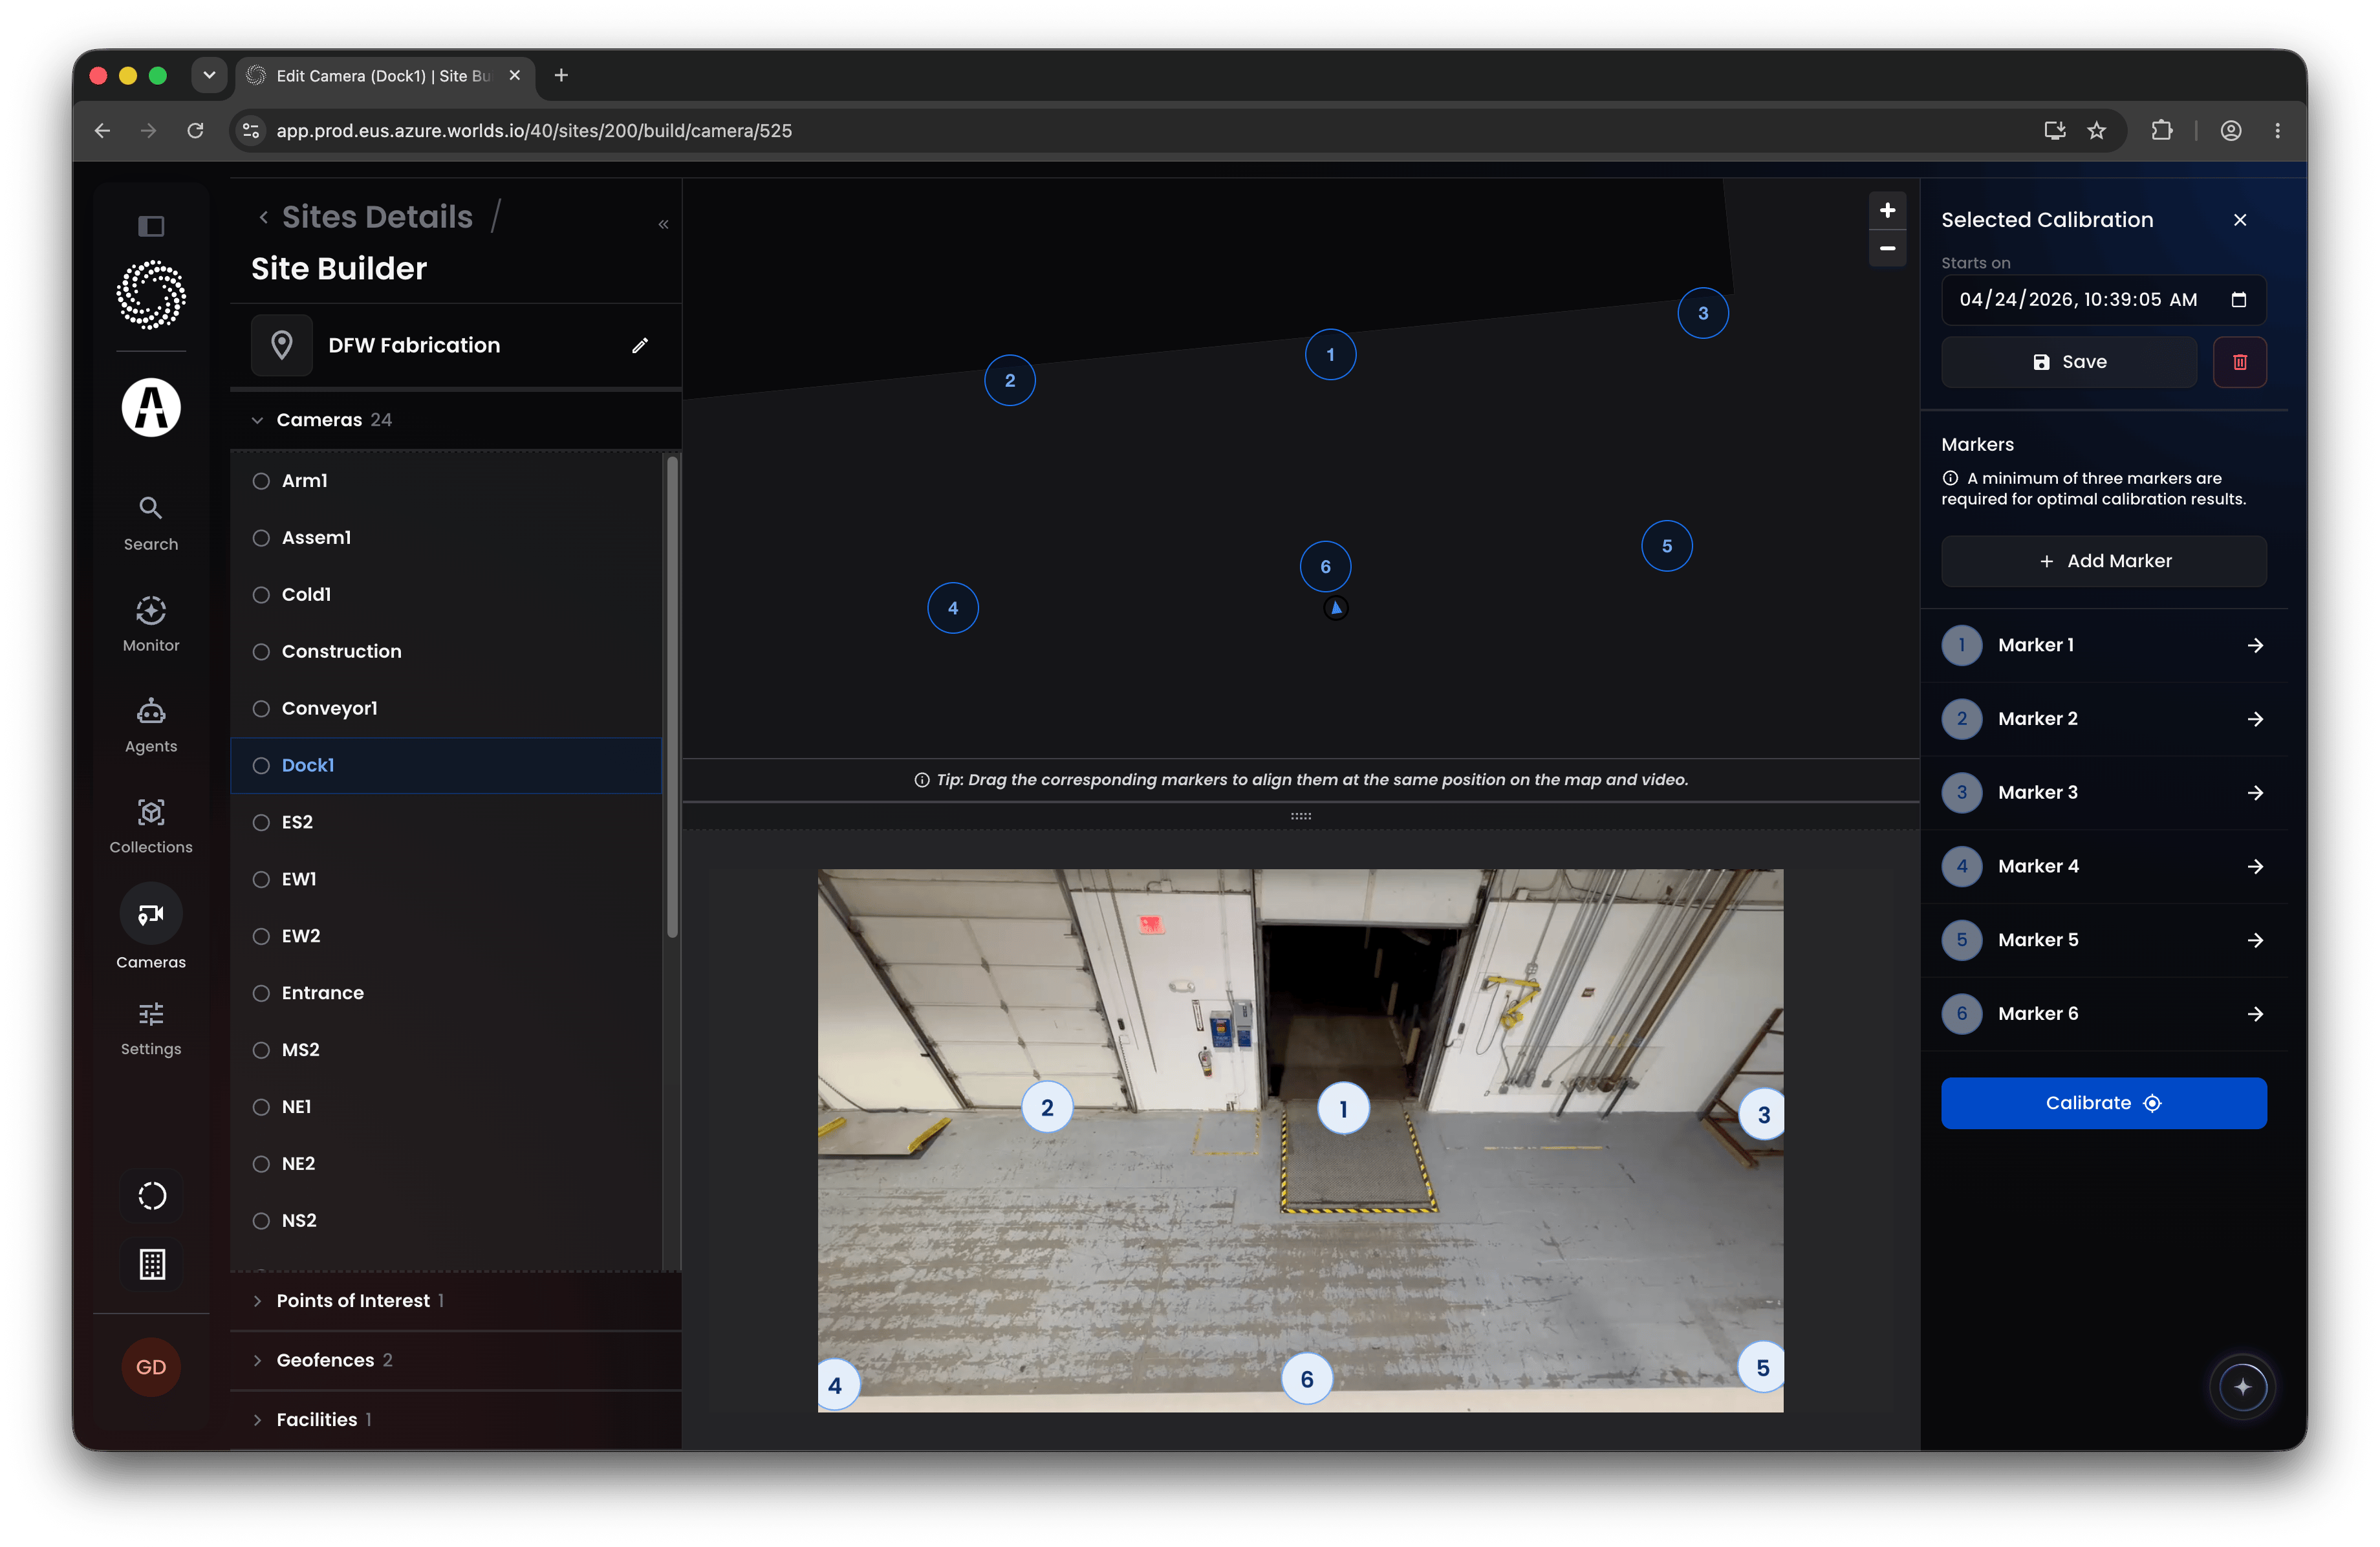
Step 6: Group Cameras with Points of Interest
Insert a point of interest from the top menu. It appears on the map as a point you can click and drag, similar to a camera. Use the right-side panel to select which cameras should be associated with it from a dropdown. Tip: Points of interest aren’t commonly needed, but they can be valuable when several cameras share a single mount facing different directions, or to group cameras with overlapping views of the same area (such as lots at a construction site, or work areas in a manufacturing facility).Step 7: Define Areas with Geofences
Insert a geofence from the top menu to create a polygon. Click a point to edit it, click a midway line to add a new point, or click and drag the rotate icon to reposition the whole shape. Geofences define specific areas of physical space. They’re especially useful alongside calibrated cameras with a wide field of view, common in outdoor settings, letting you build workflow logic that triggers when a detected object does or doesn’t intersect the defined area. Tip: Geofences are especially useful if you’re integrating GPS devices into your Worlds data.Step 8: Upload Floor Plans with Facilities
Insert a facility from the top menu and give it a name, typically a building at the site. A single site can contain multiple facilities if it has multiple buildings. Once created, a Floors menu appears on the right. Click to add a floor and you’ll get an upload dialog for a floor plan image. After uploading, the image renders directly onto the map, where you can:- Click the corners to rescale
- Click and drag to reposition or rotate
- Use the Freeform and Locked tabs to either warp the image to match points or scale it proportionally
- Use the opacity slider to see the mapping library’s building outline underneath, to confirm alignment
Quick Reference
- Select or create a site - land on the right location and object list
- Edit Site vs. Launch Builder - basic info vs. actual spatial configuration
- Add a camera - accurate position, rough rotation
- Calibrate - match markers between map and video to translate detections to real-world location
- Points of Interest - group cameras, mainly for multi-camera mounts or large outdoor sites
- Geofences - define areas for workflow triggers, especially useful outdoors
- Facilities - upload and align floor plans for calibration reference and spatial context