

Before You Start
Tip: Define your use case before you touch anything. Know what events or objects you actually need to detect (a forklift entering a zone, inventory leaving storage, a pallet jack in use, etc). That goal shapes every decision below, from how you group cameras to what you tag. Warning: If you’re new to the platform, build and test in a non-production or sandbox collection first. Making changes directly in a live/production environment risks breaking real workflows other teams depend on.Step 1: Organize Cameras into Collections
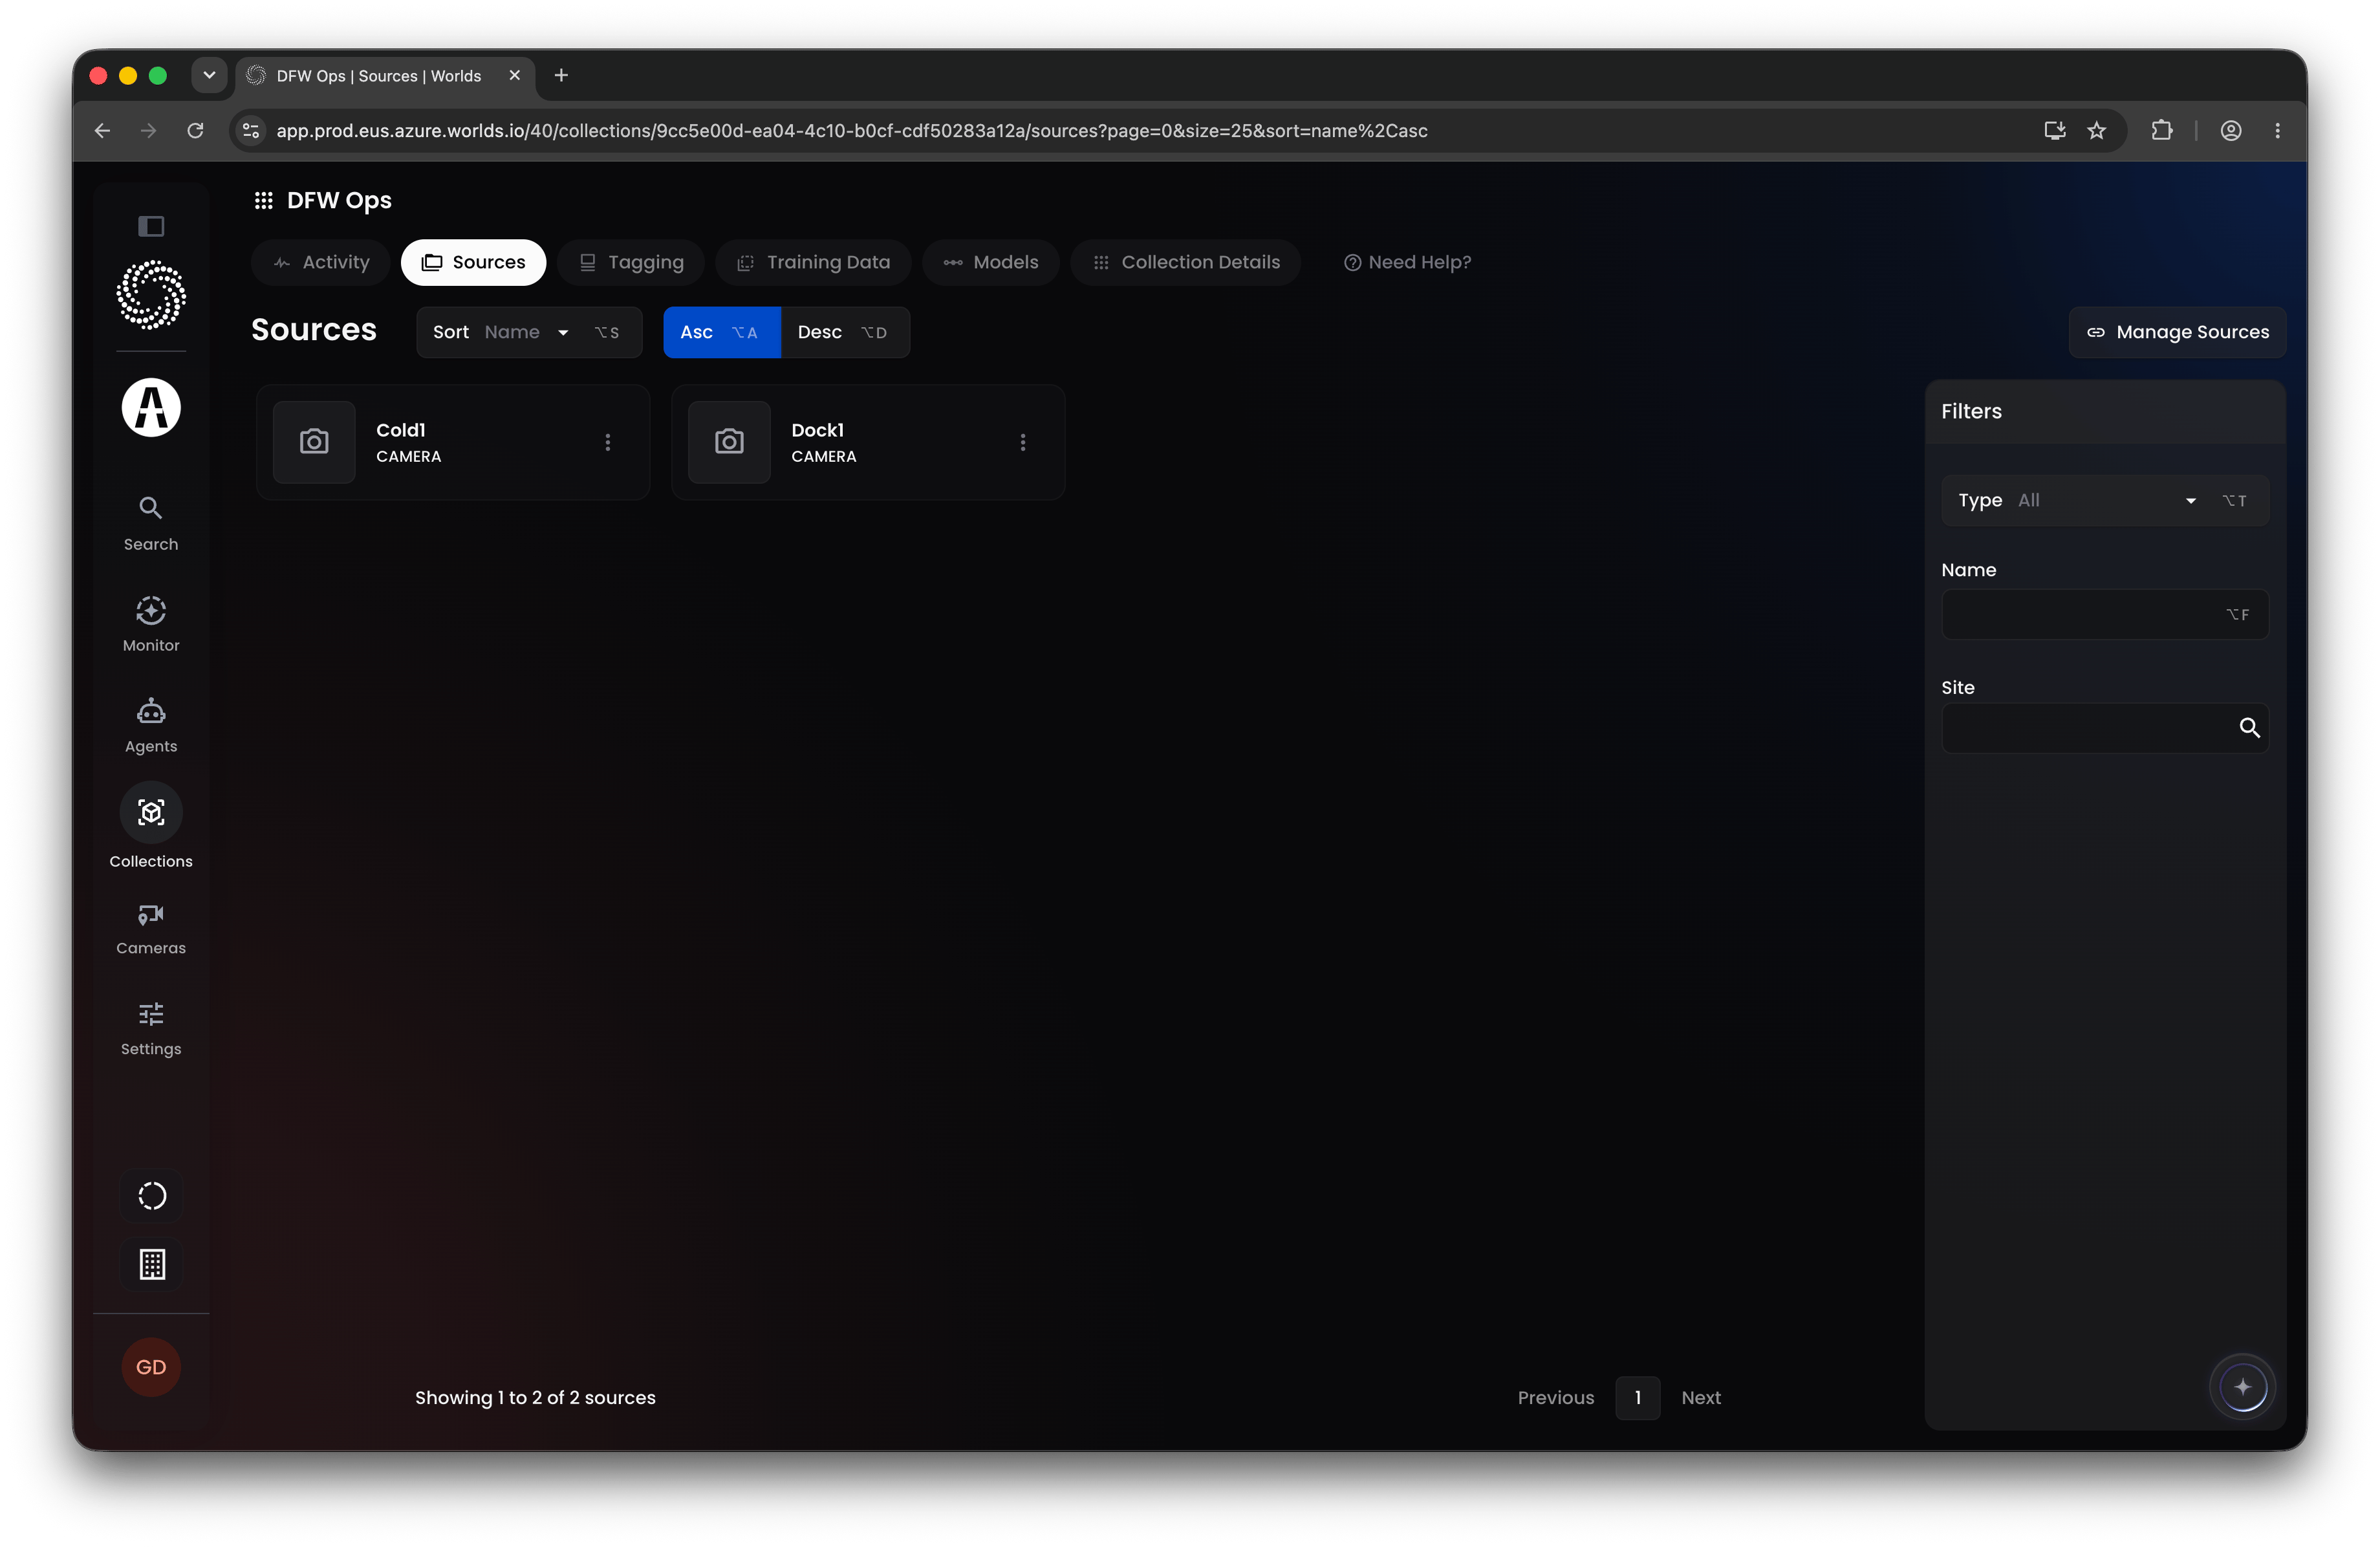
A collection is a folder that groups cameras which will share the same vision model. How to decide what goes together:- Group cameras that share visual context, similar environments, looking for similar things.
- Keep visually distinct feeds separate. An exterior camera and an interior camera will generally perform better as separate collections with separate models rather than one shared model.
- A camera isn’t locked into one collection. The same camera can belong to multiple collections, for example, running a specialized model in one collection while also contributing to a general “people detection” collection.
Step 2: Index Video
Before you can tag anything, you need indexed video to tag it from. From the Sources tab, select any camera associated with the collection, then click Start Indexing for any hour of video streamed from that camera.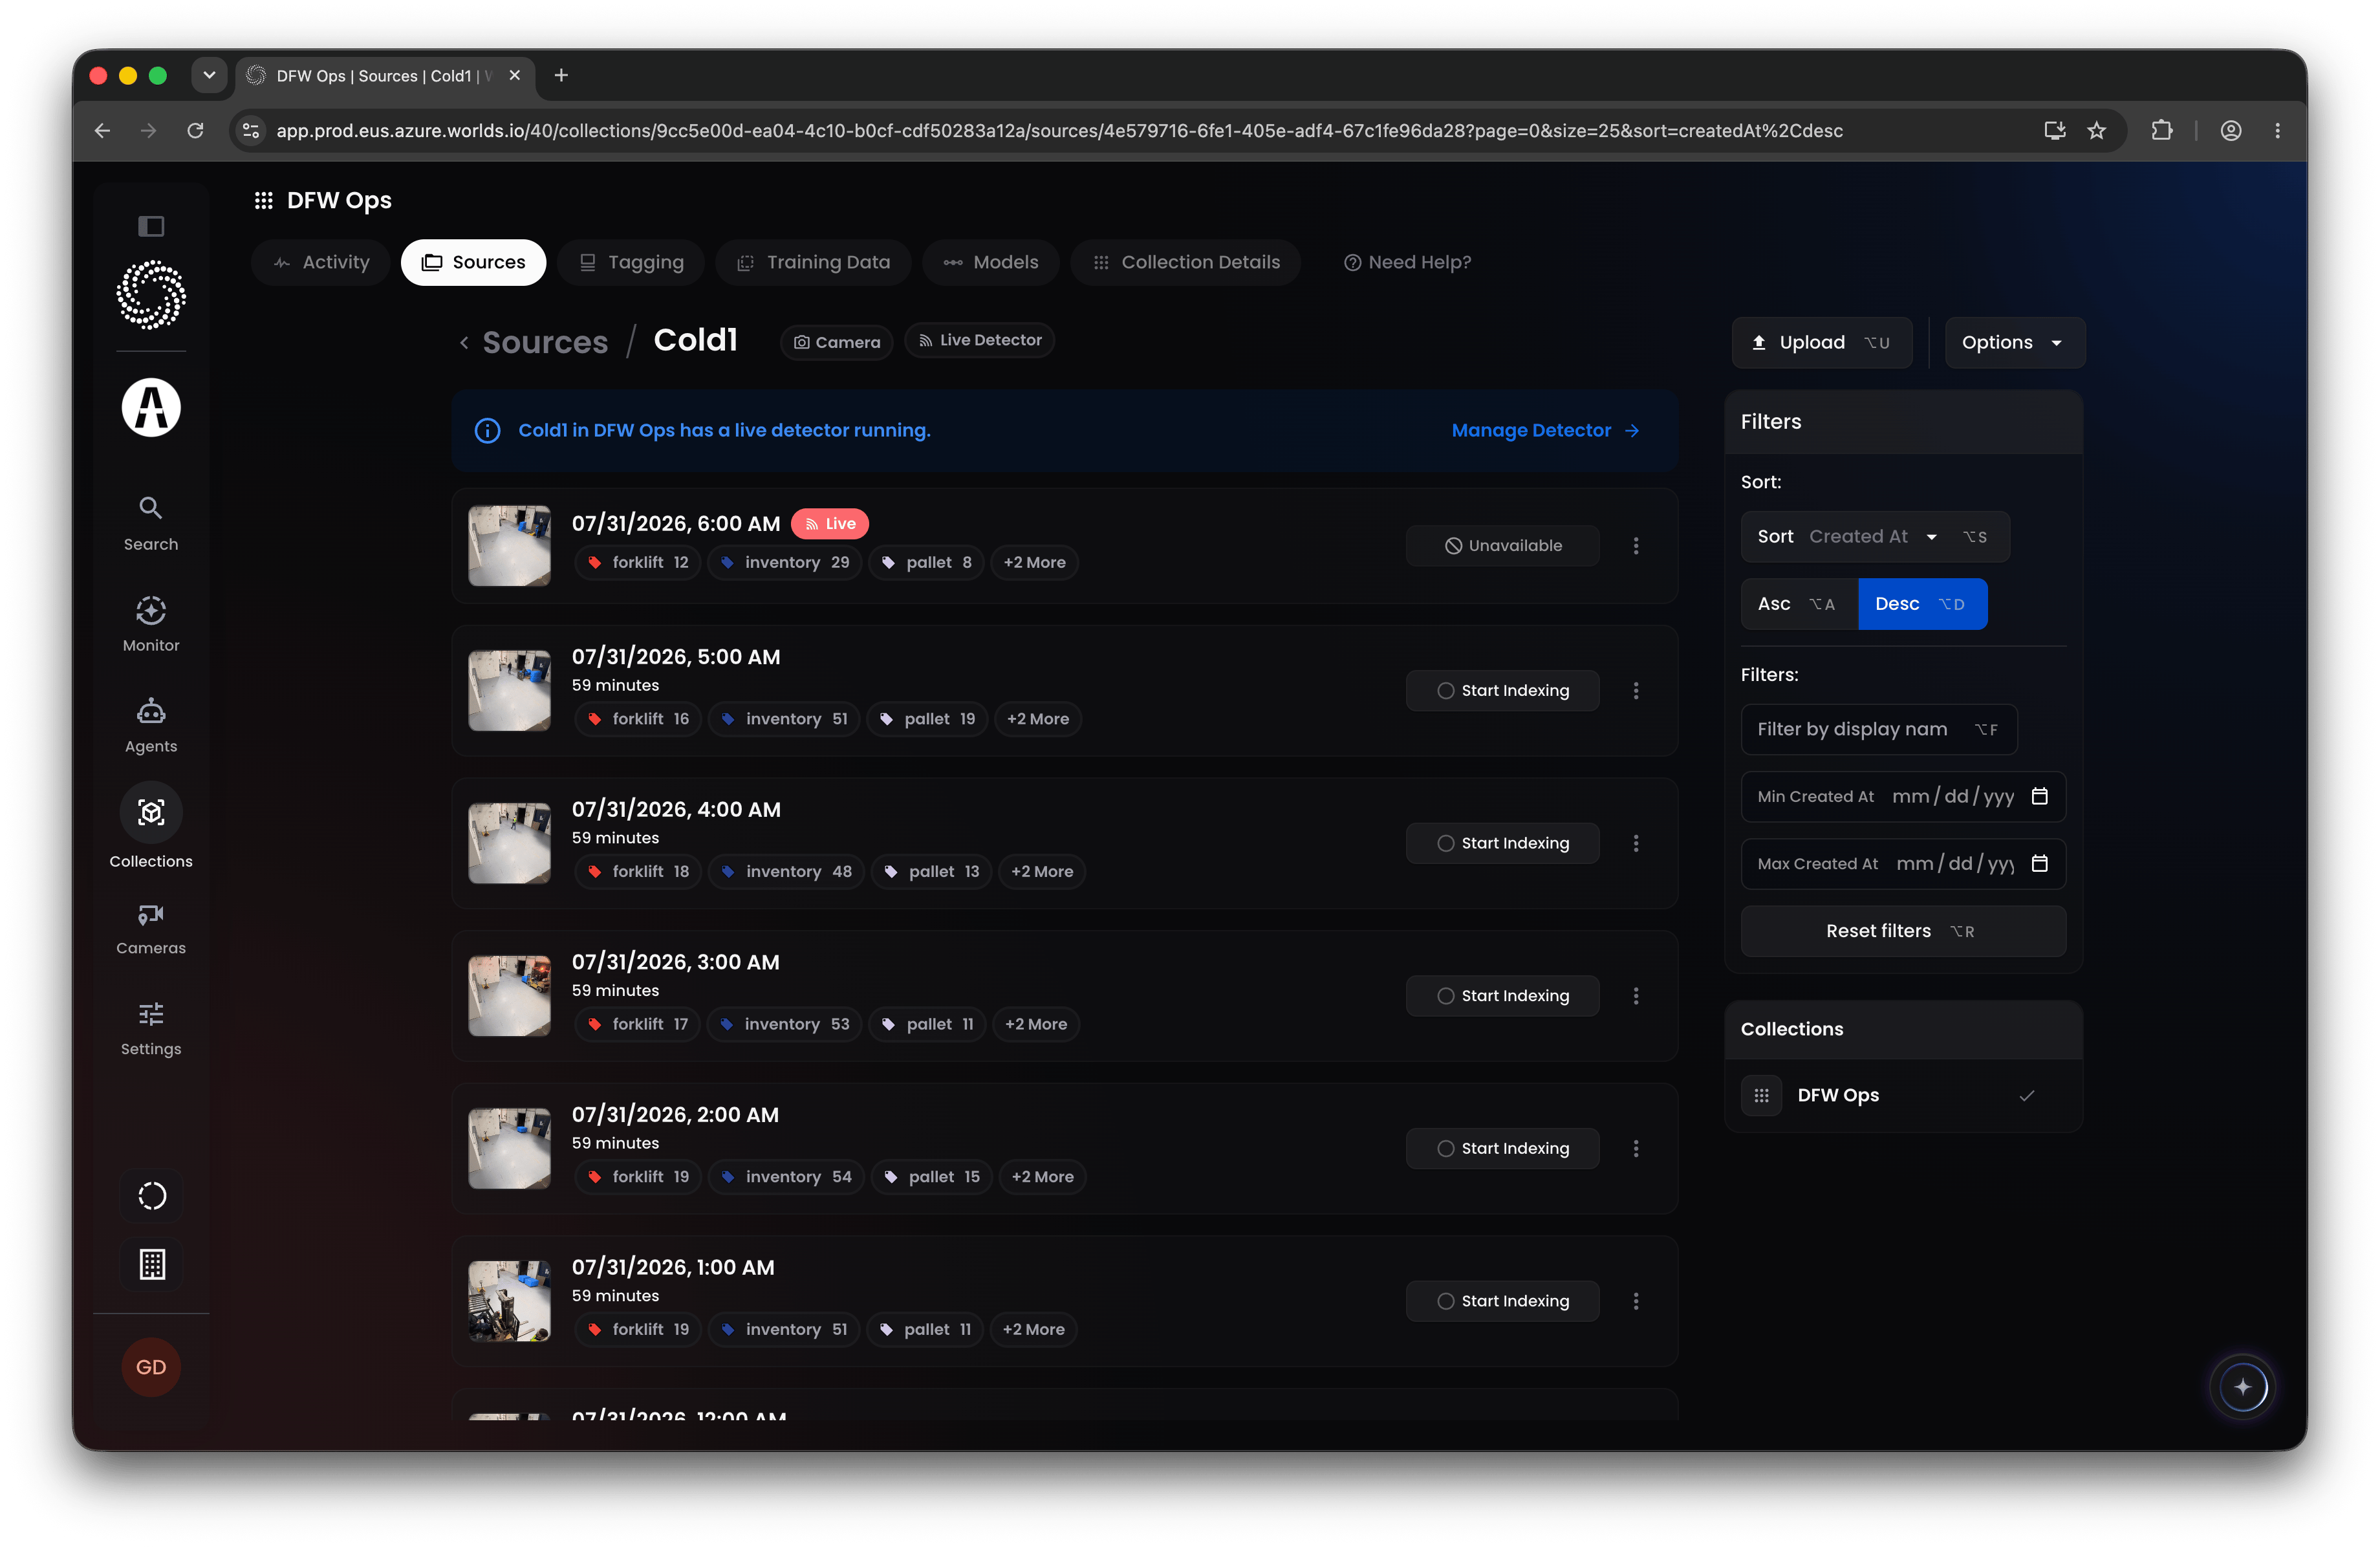
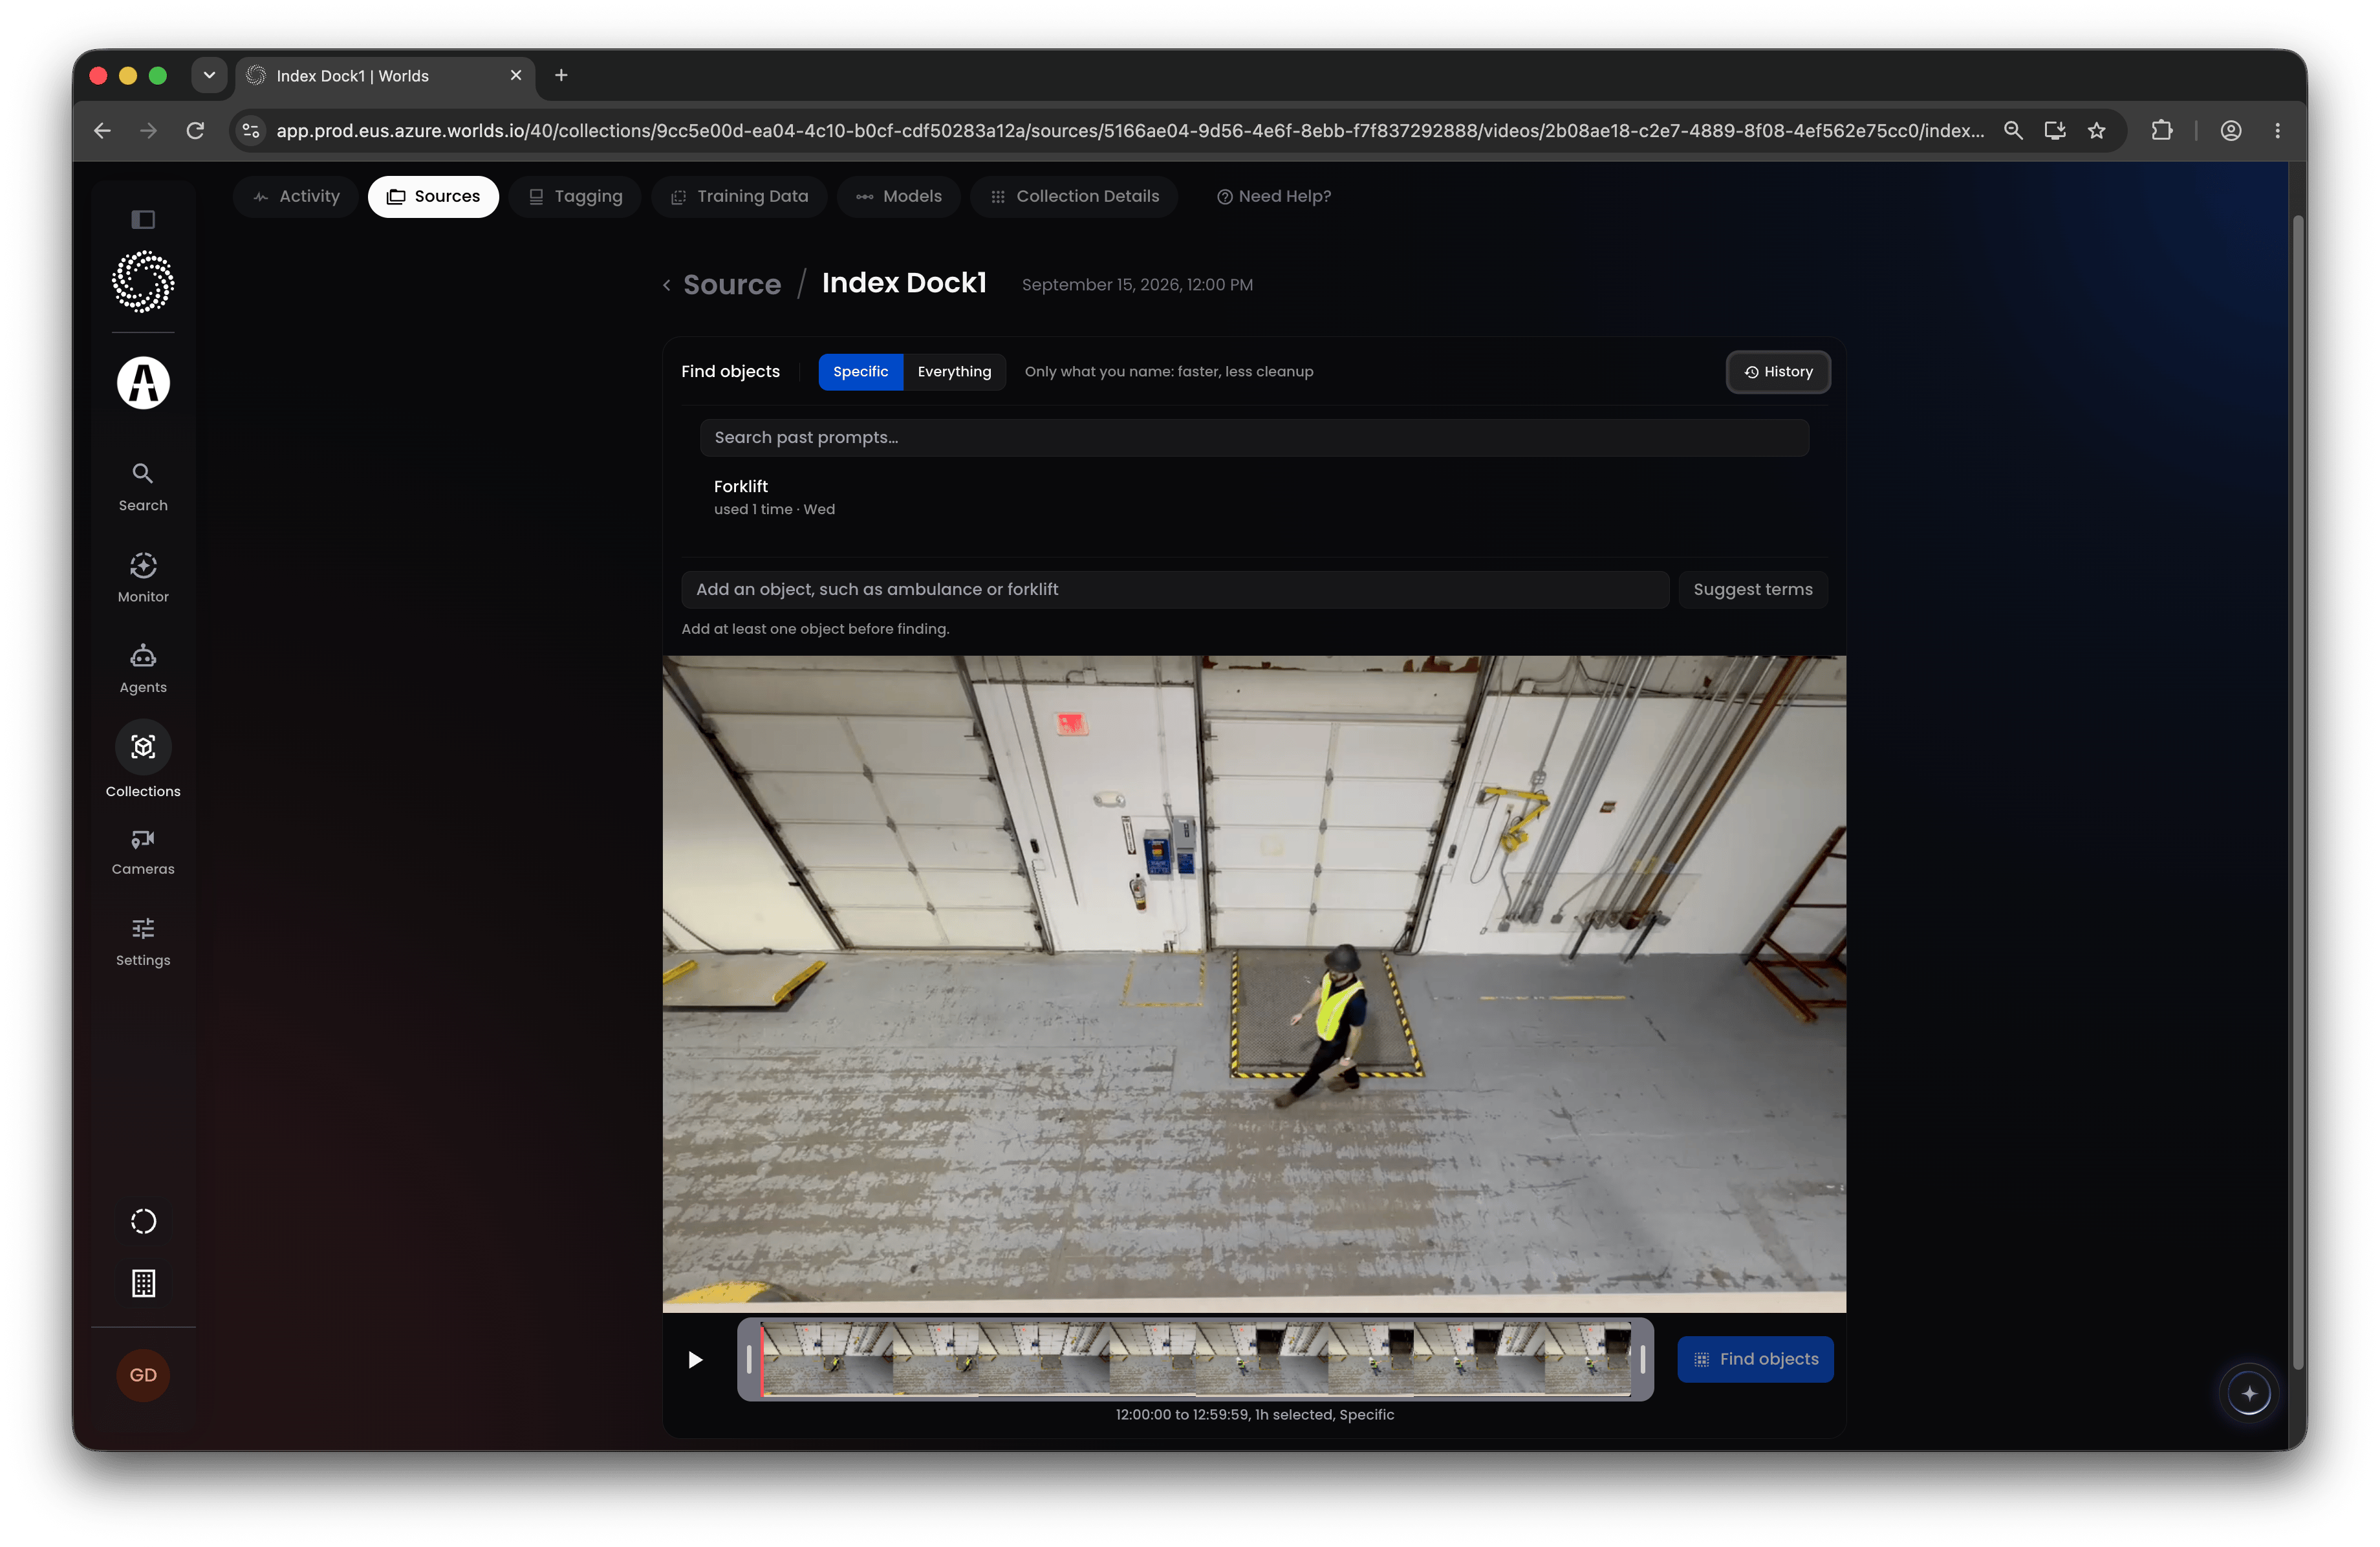
- Specific (default) - enter a prompt in the text box, click the Suggest terms button to commit it (Worlds automatically applies synonymous terms to improve results), then click Find Objects. Worlds will only segment the objects matching your prompt.
- Everything - segments all moving objects in the index, then groups them by visual similarity for you to sort through when tagging.
Step 3: Tag Segments by Class
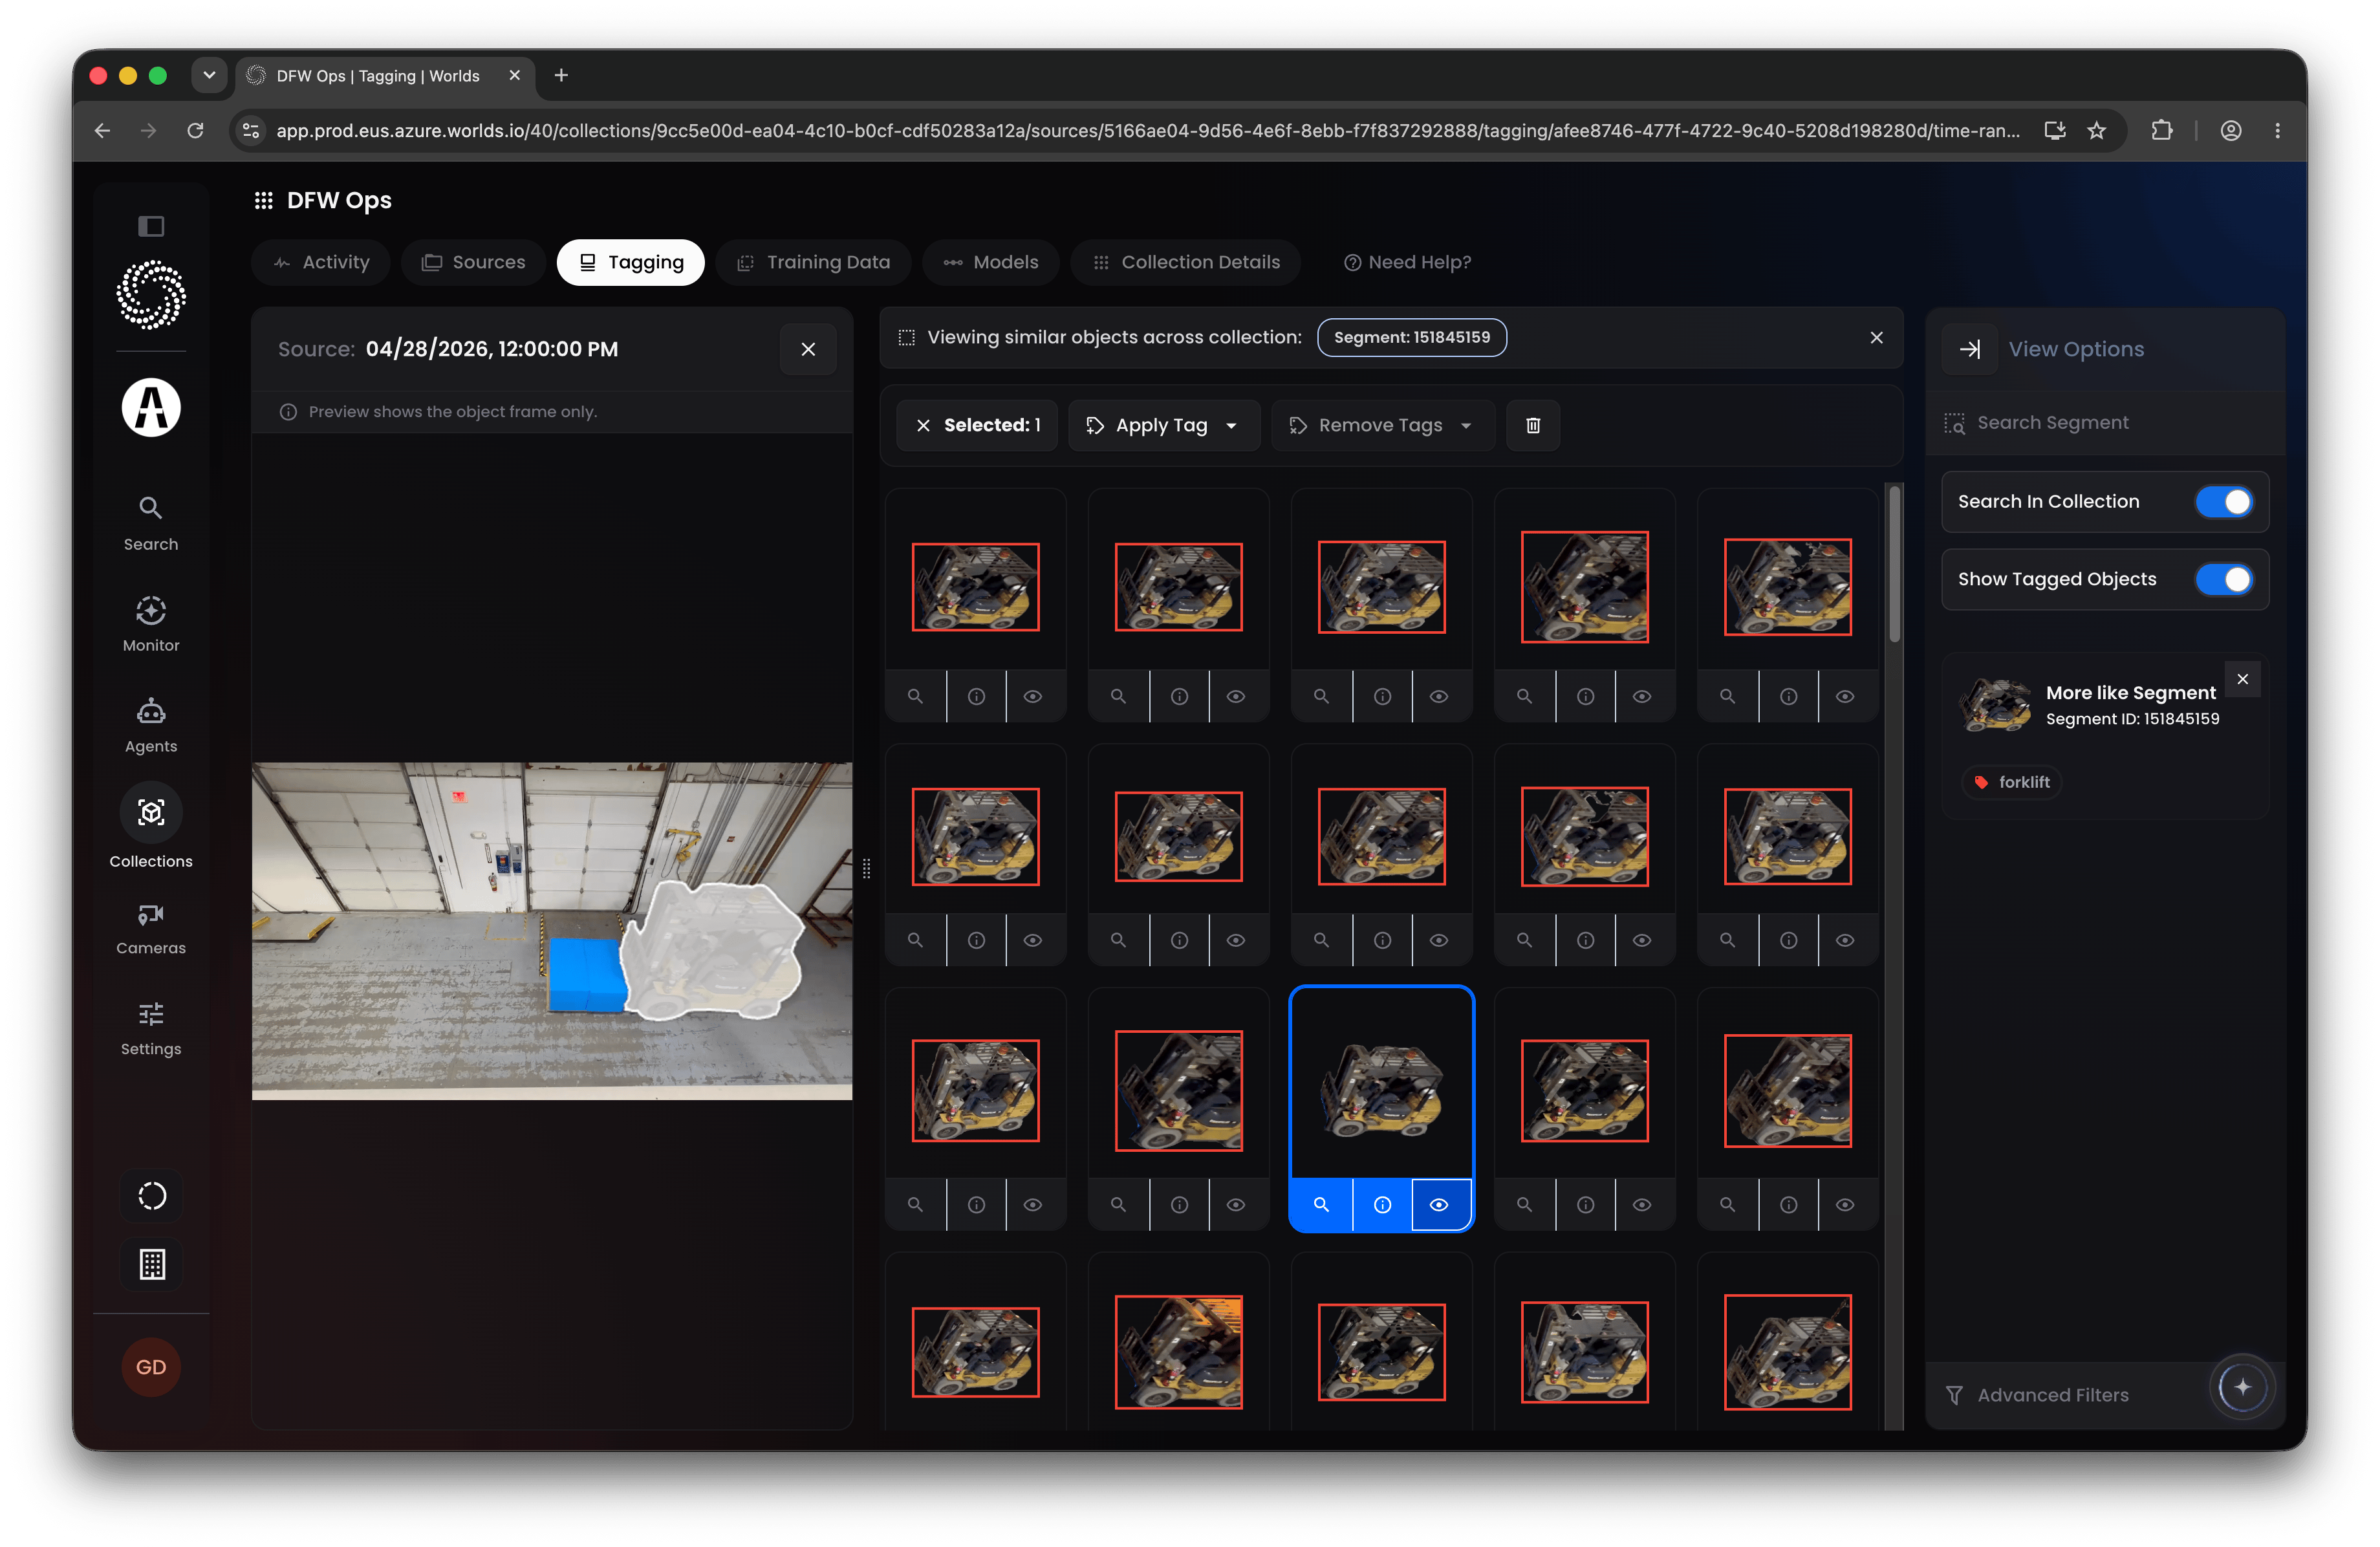
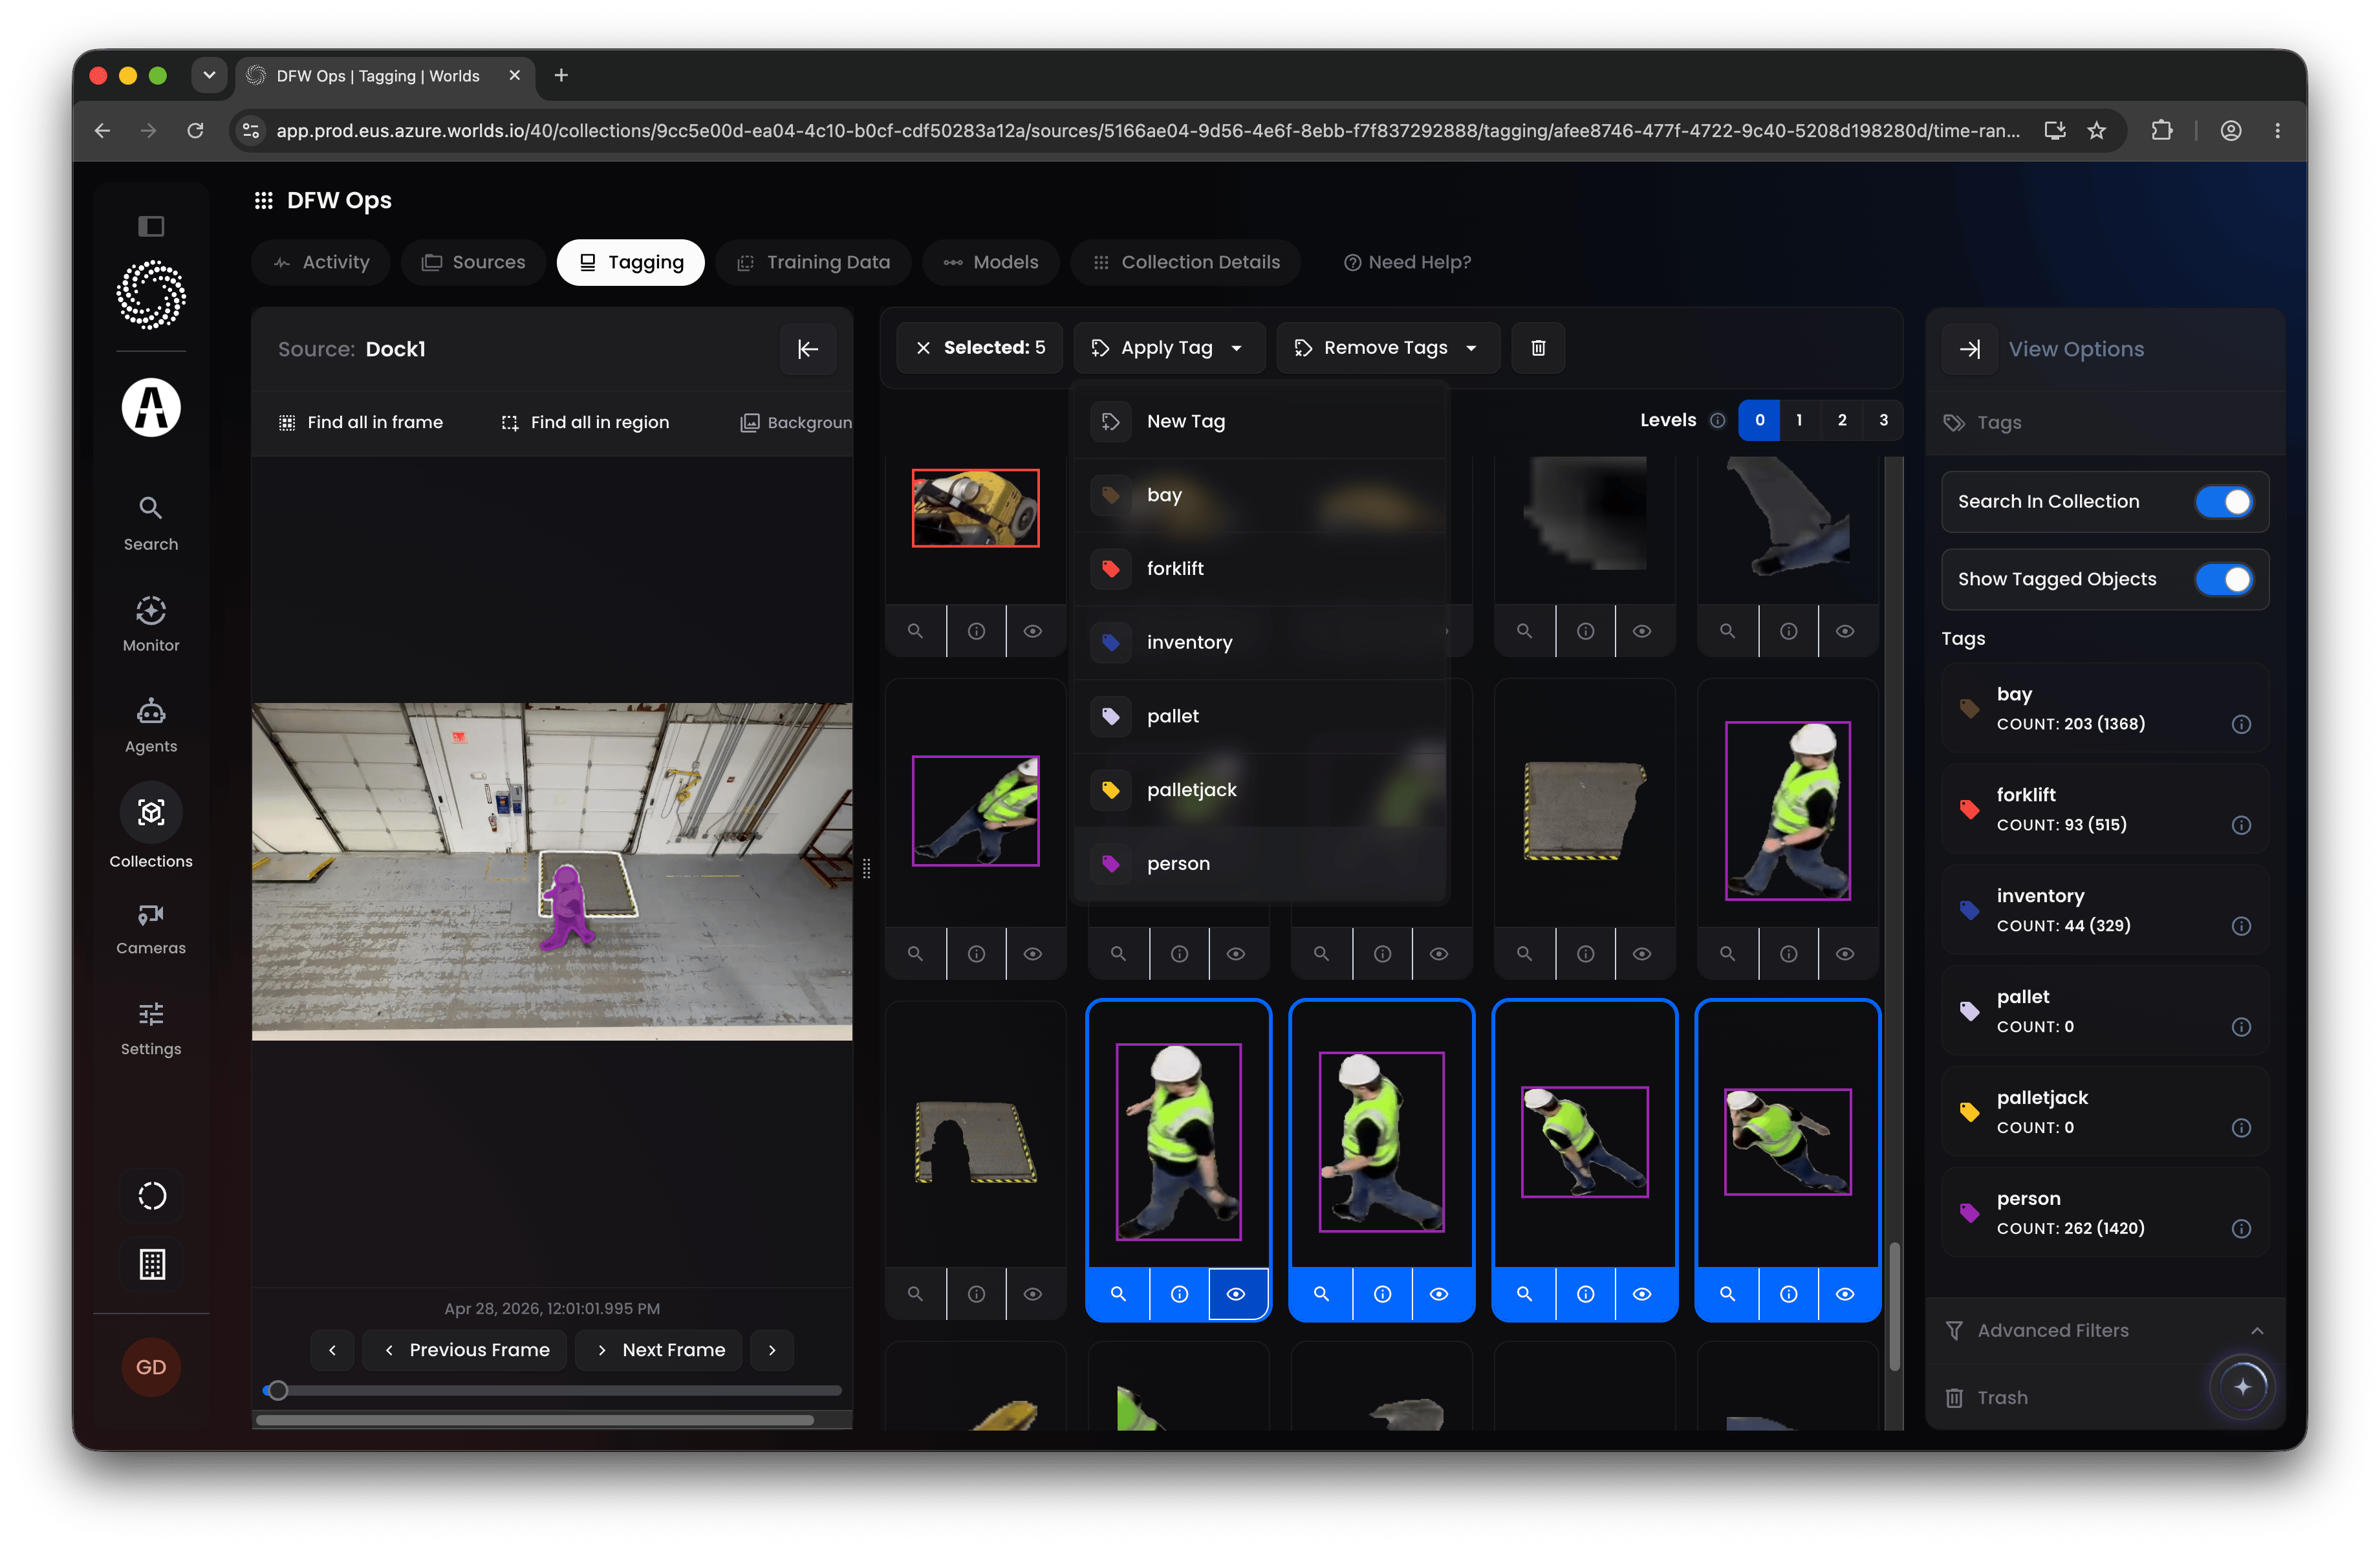
The tagging interface shows your indexed segments in a grid, based on whether you indexed for Specific objects or Everything at the indexing step.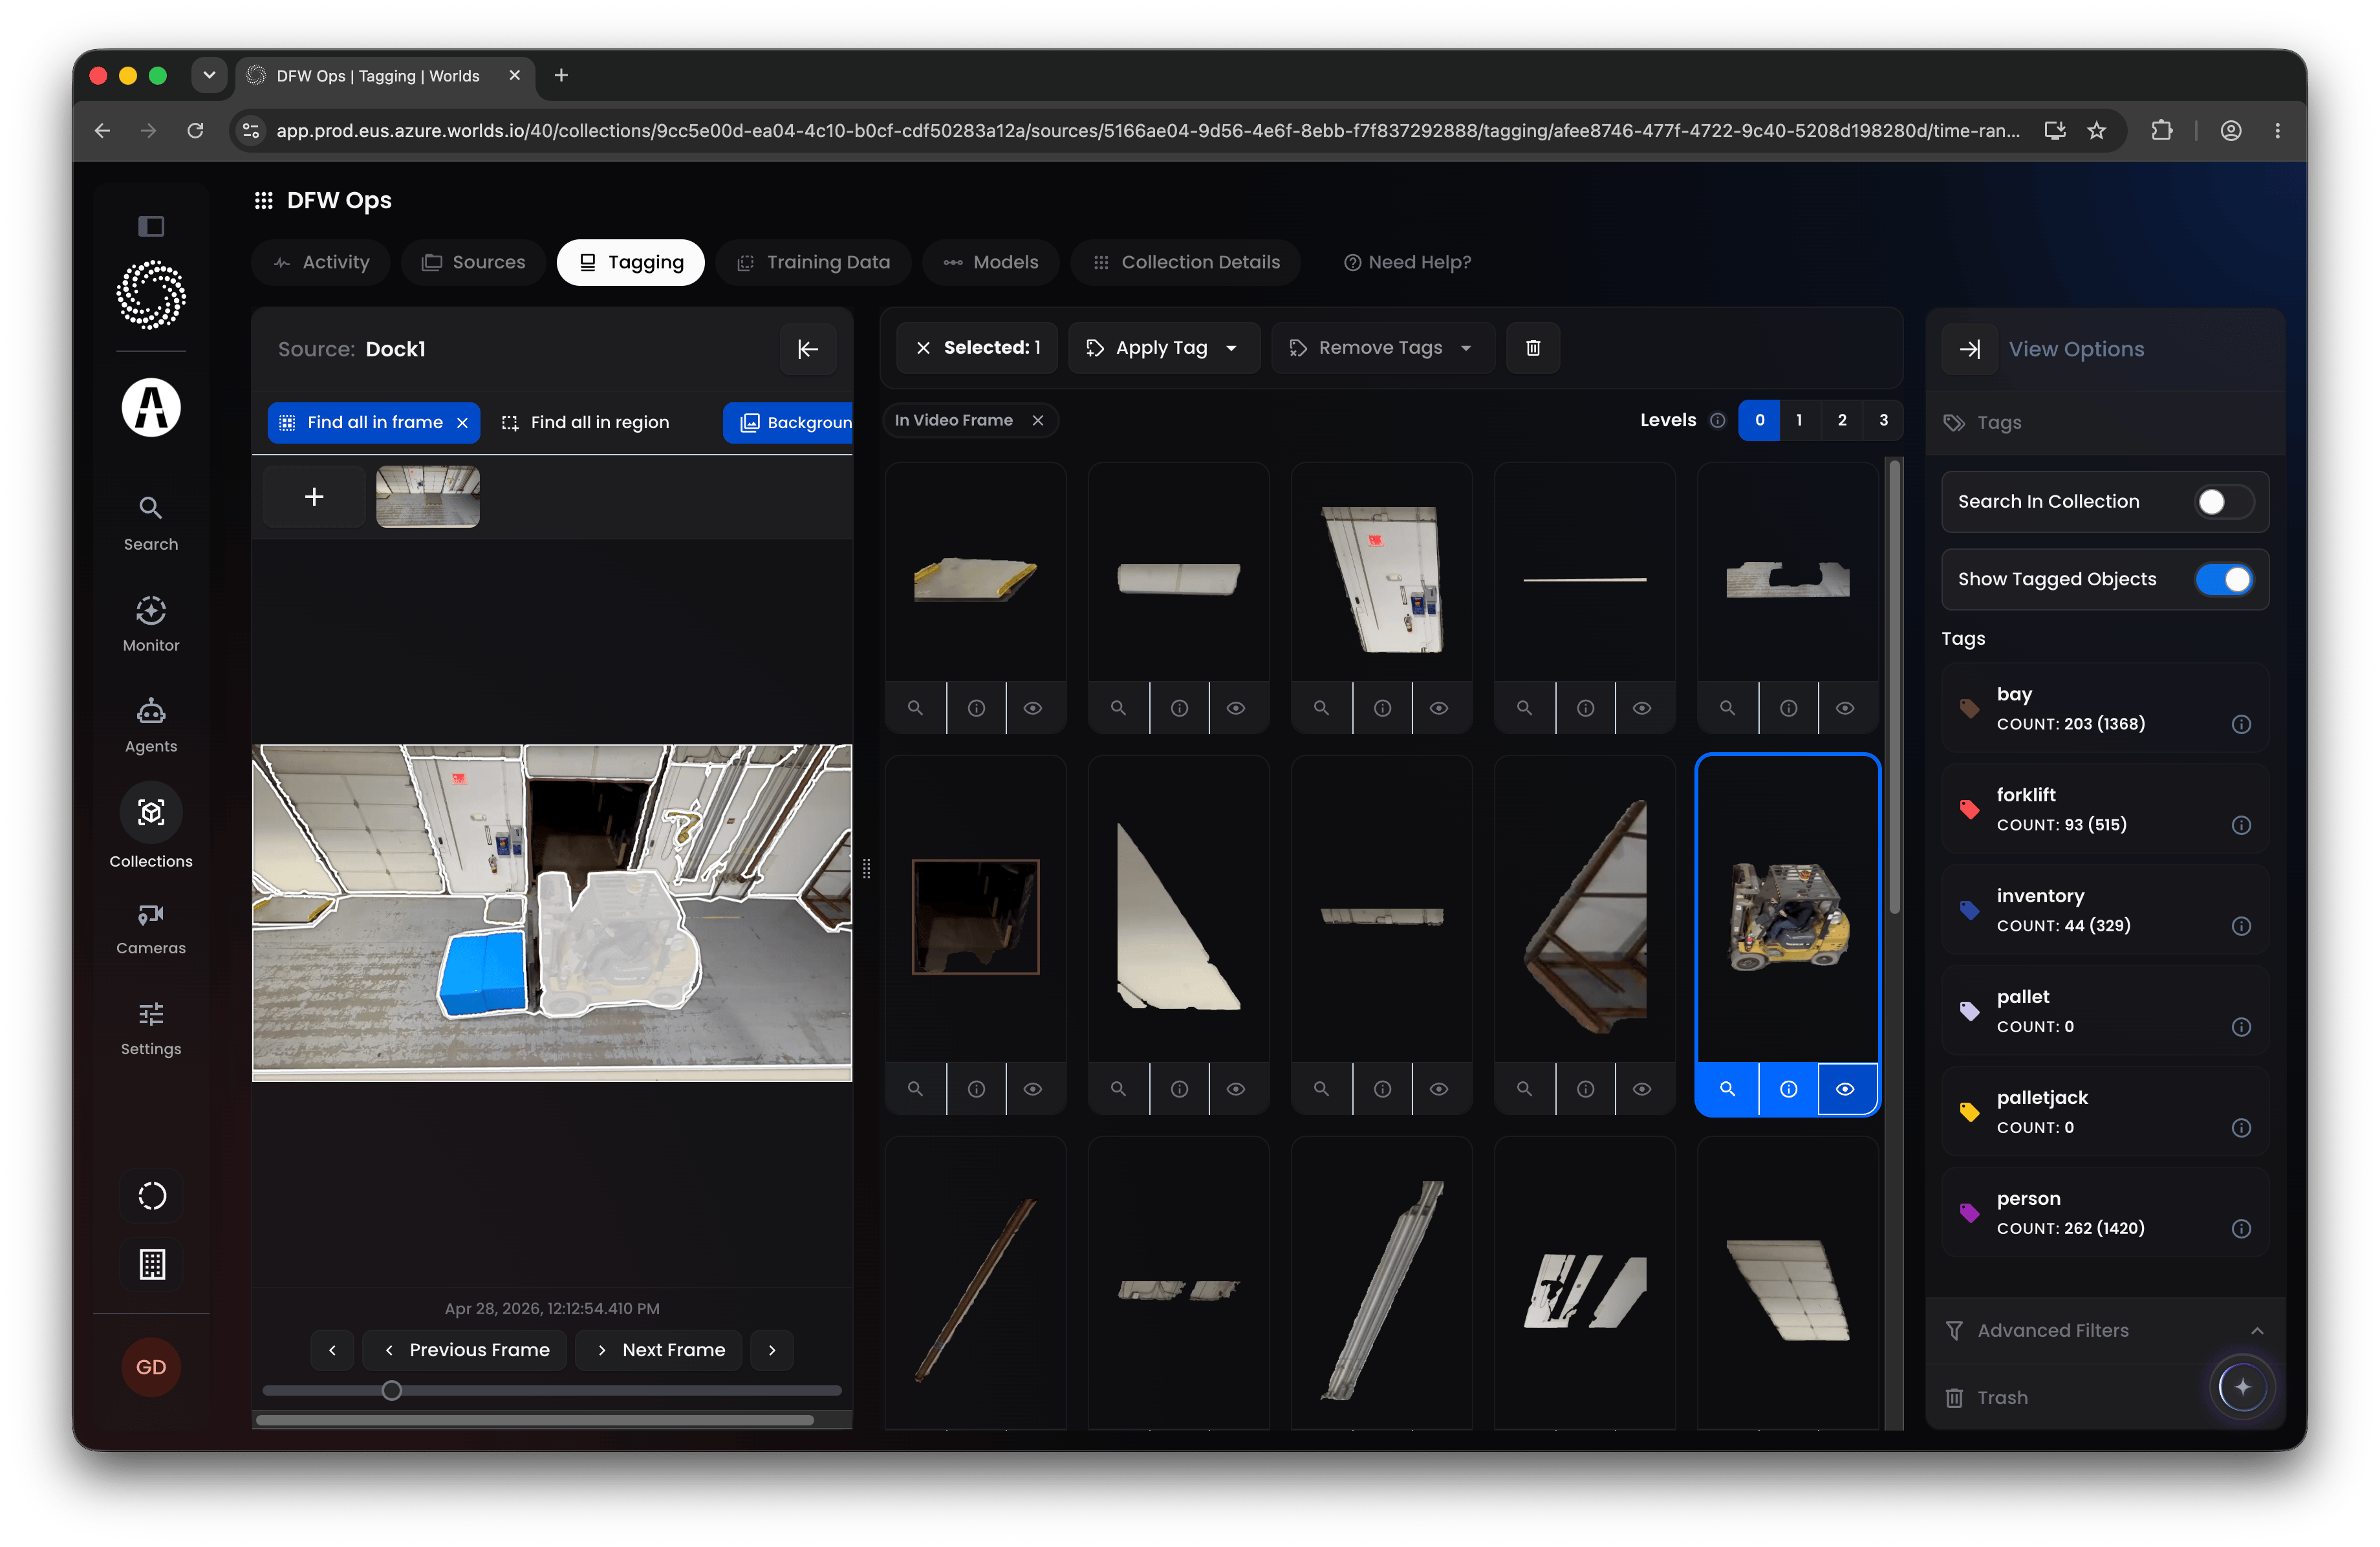
- Find All in Frame - use the slider in the bottom left to move to any frame in the video panel on the left, then click Find All in Frame to see every segment captured at that specific point in the video.
- Find All in Region - draw directly on the video frame to select an area, then it finds every segment captured in that area across the entire length of the indexed video.
- Find Similar - click the magnifying glass icon under any segment to find visually-matching segments from the current index, ranked by similarity.
Step 4: Curate Backgrounds in Background Studio
Background Studio builds clean background plates out of footage that was never empty to begin with. Rather than hunting for a frame with nothing in it, you pick any frame and have Worlds erase the objects out of it. Open the Training Data tab and select Background Studio under Collection Resources.Pick a frame
Video is stored in hourly segments. Browse footage lets you tab through those segments to pick a camera and hour, and Previous and Next jump to the neighbouring hour. Within a segment the player gives you frame-level control, so you can land on exactly the frame you want. Click Use this frame as background when you have it.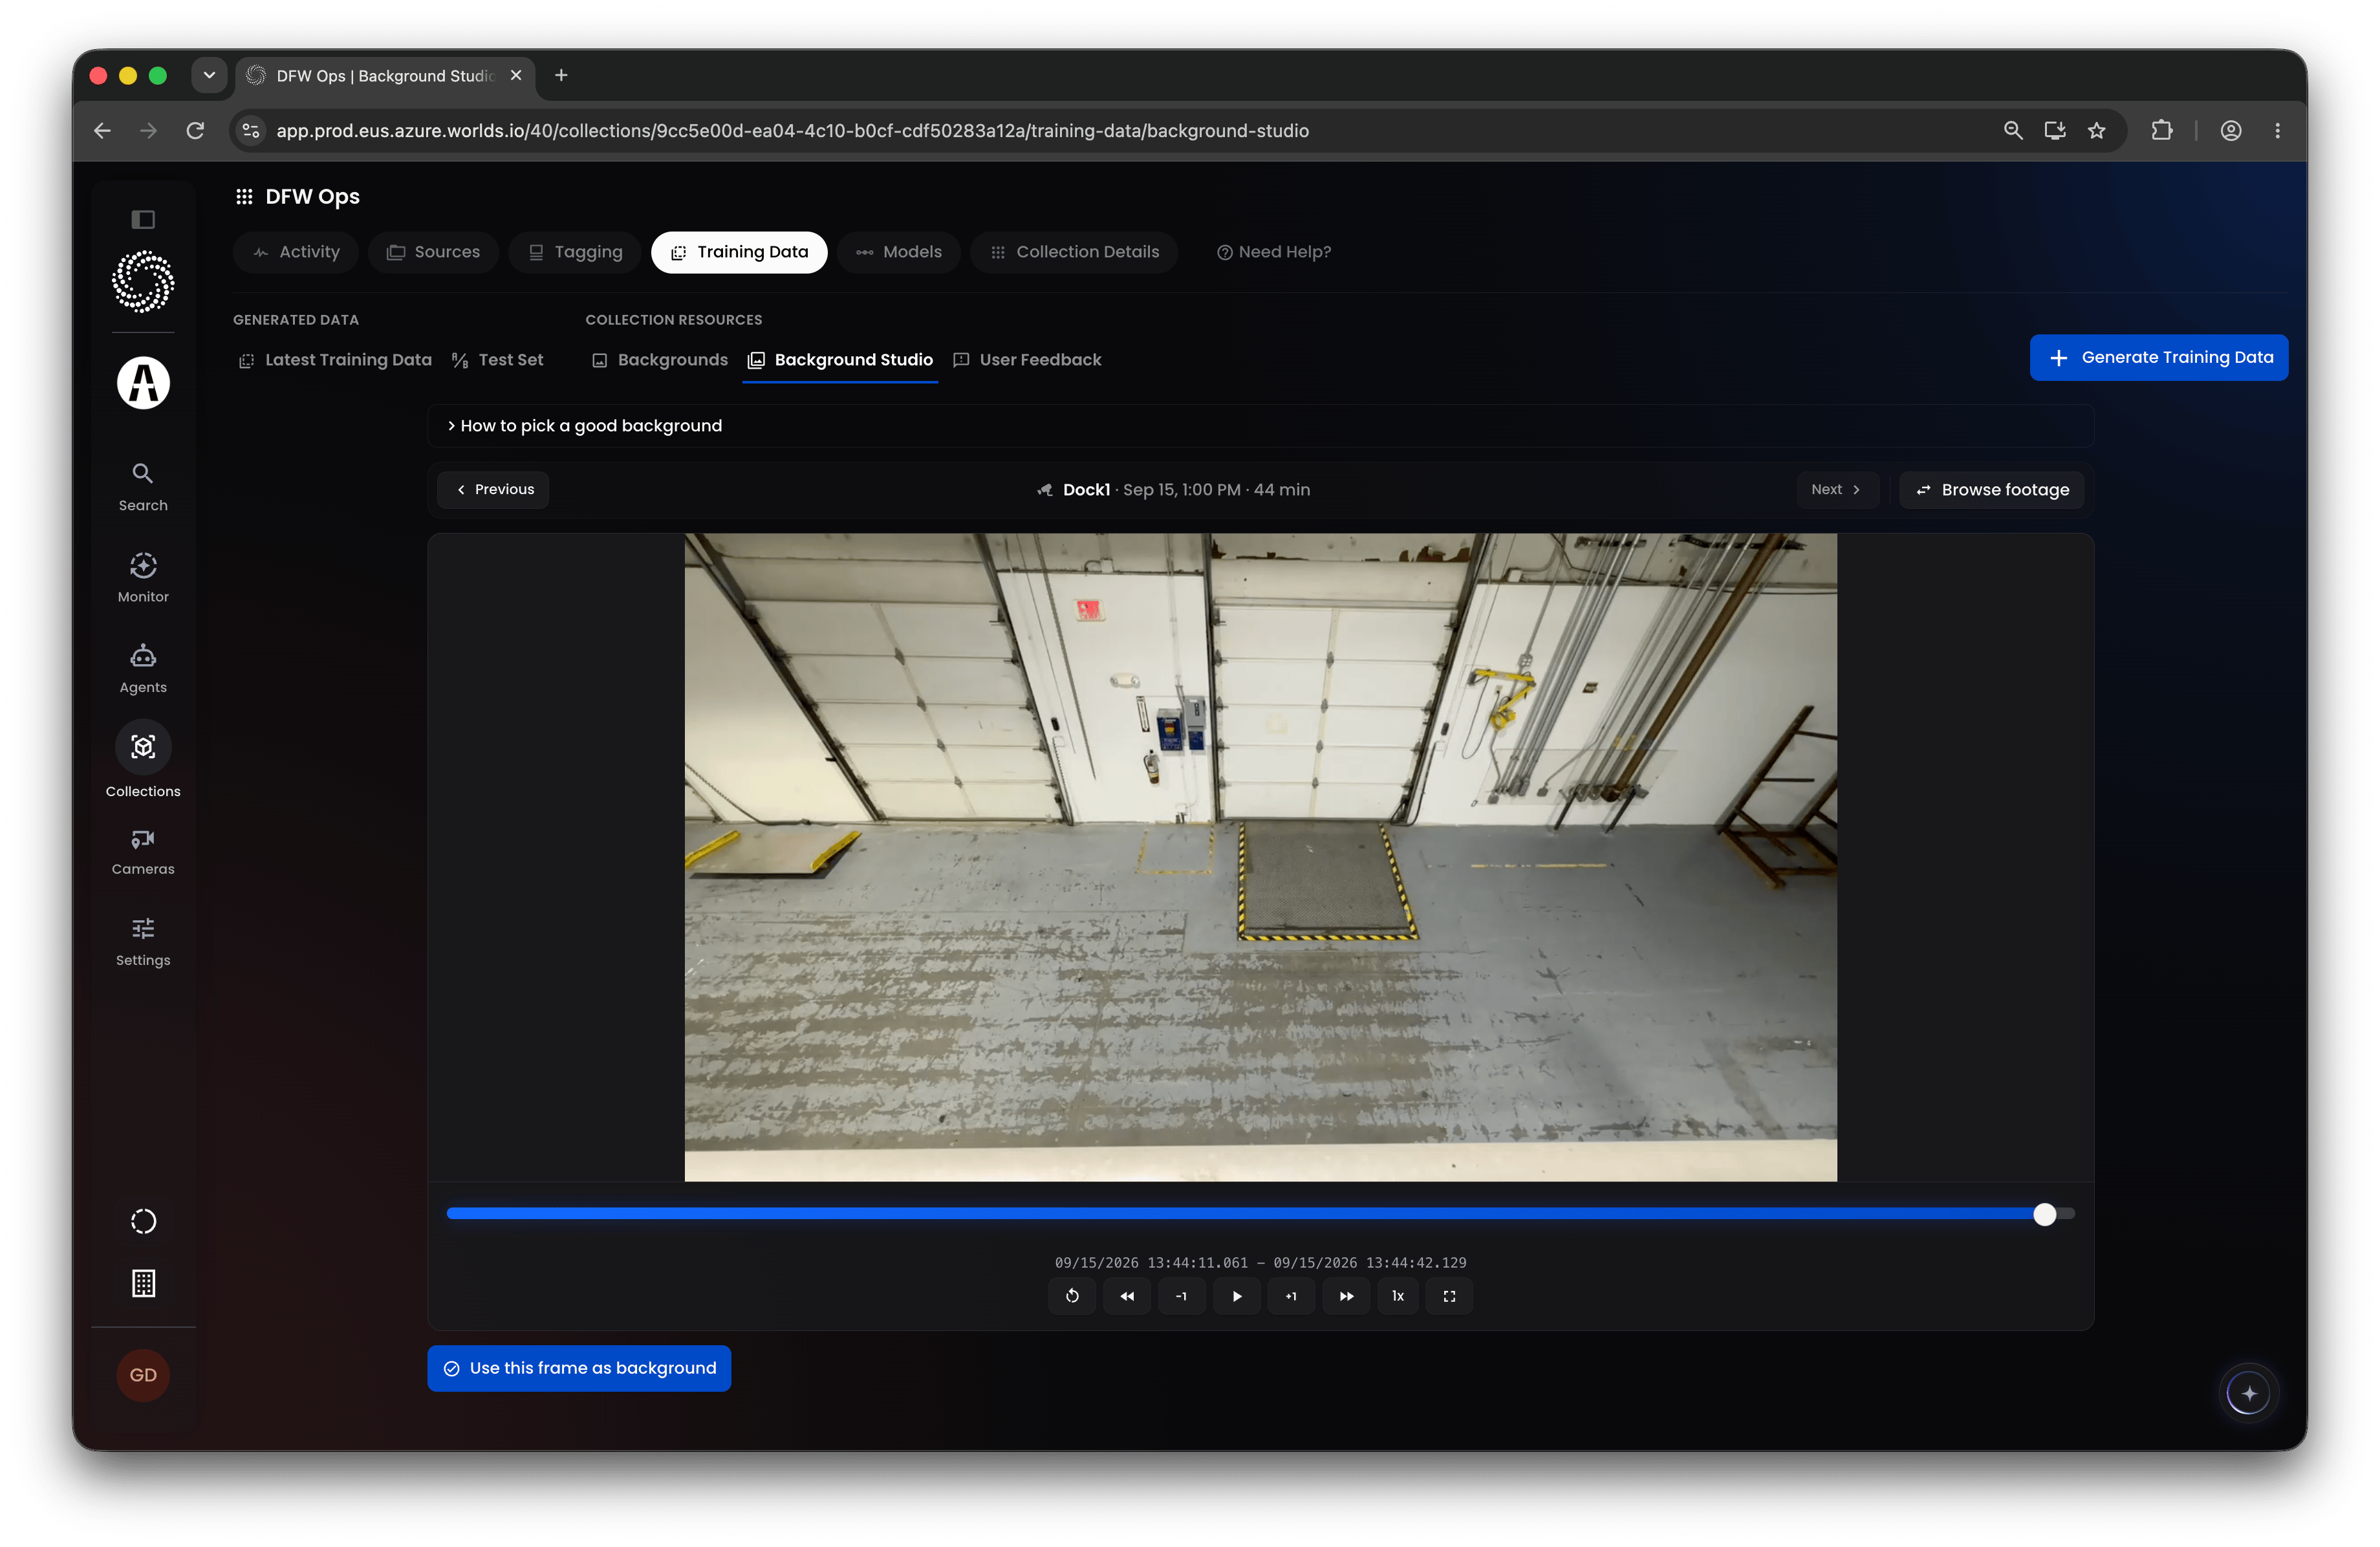
Review what gets erased
Worlds runs detection across the frame and proposes what to remove, grouped by object class. The review screen opens marked Needs approval.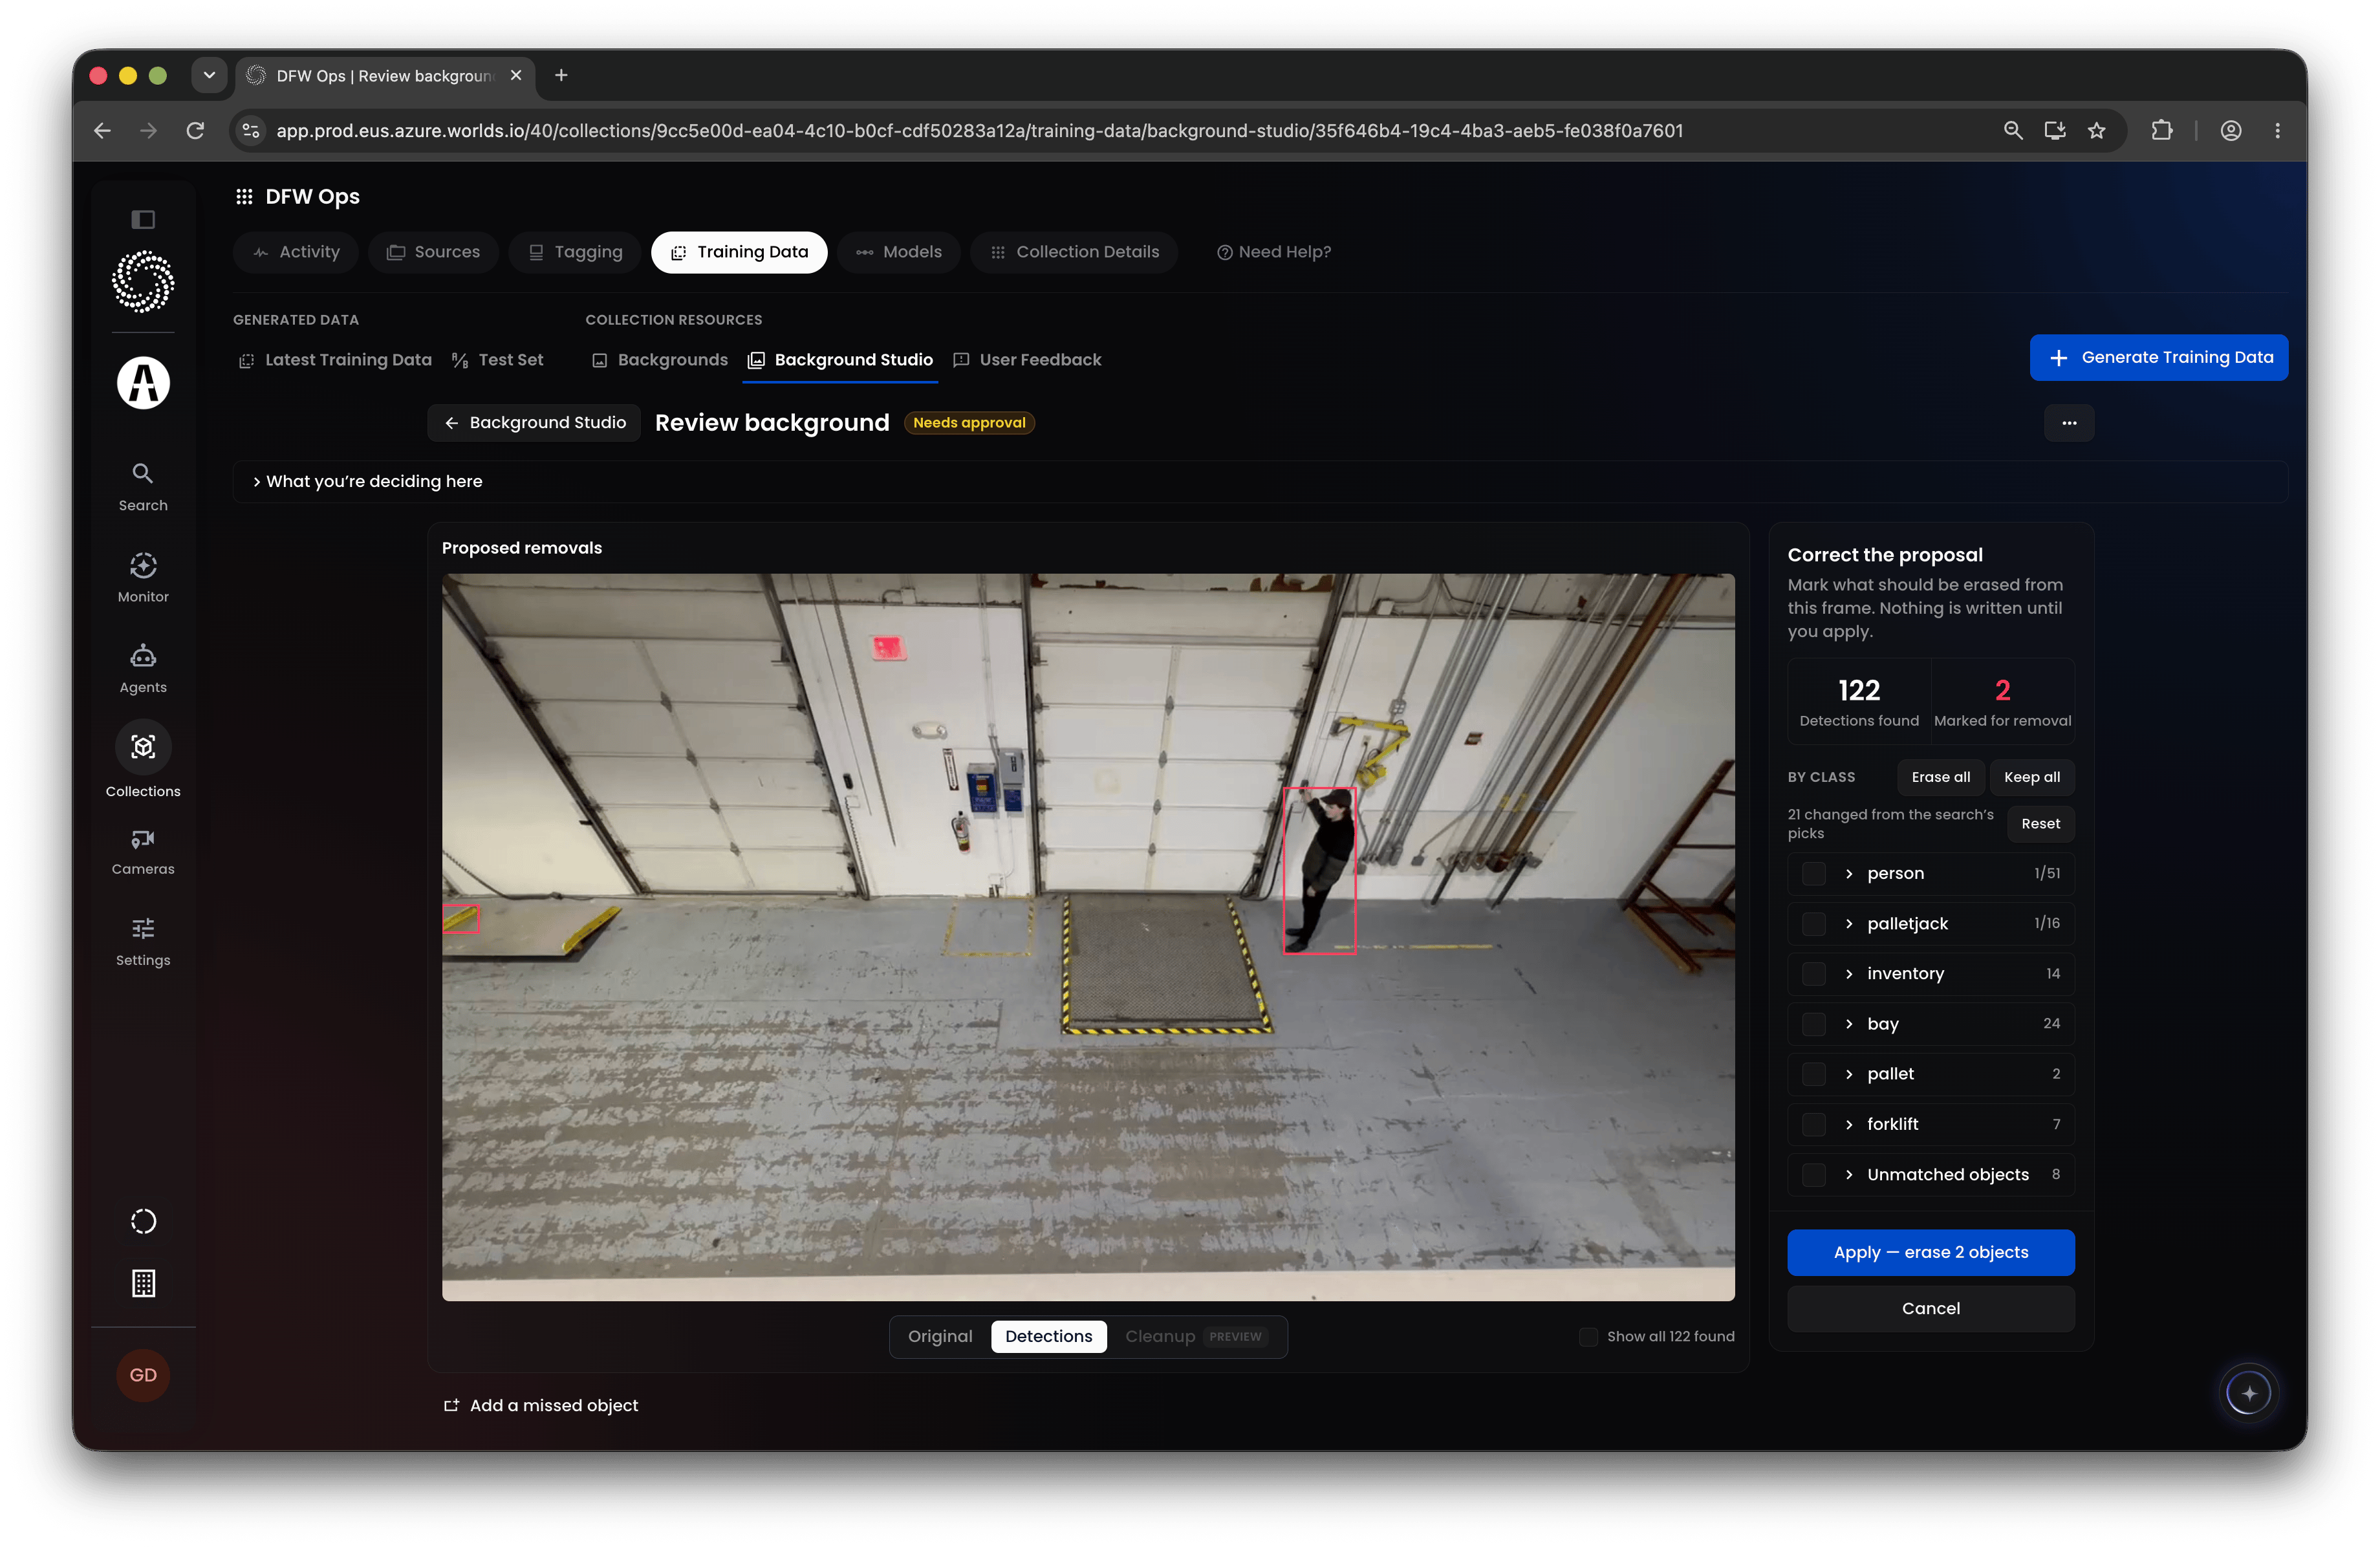
- Original, Detections, and Cleanup below the frame switch between the untouched frame, the detections overlaid on it, and a preview of the cleaned result.
- The right panel lists every class found with its count, and how many objects are currently marked for removal. Tick a class to erase it, or use Erase all and Keep all to set everything at once. Reset returns to the original proposal.
- Add a missed object lets you mark something the detector didn’t catch.
Approve the result
The Cleanup preview shows the frame with those objects removed and the gaps filled in. If it looks right, click Approve background. If it doesn’t, Change what’s marked takes you back to the review step.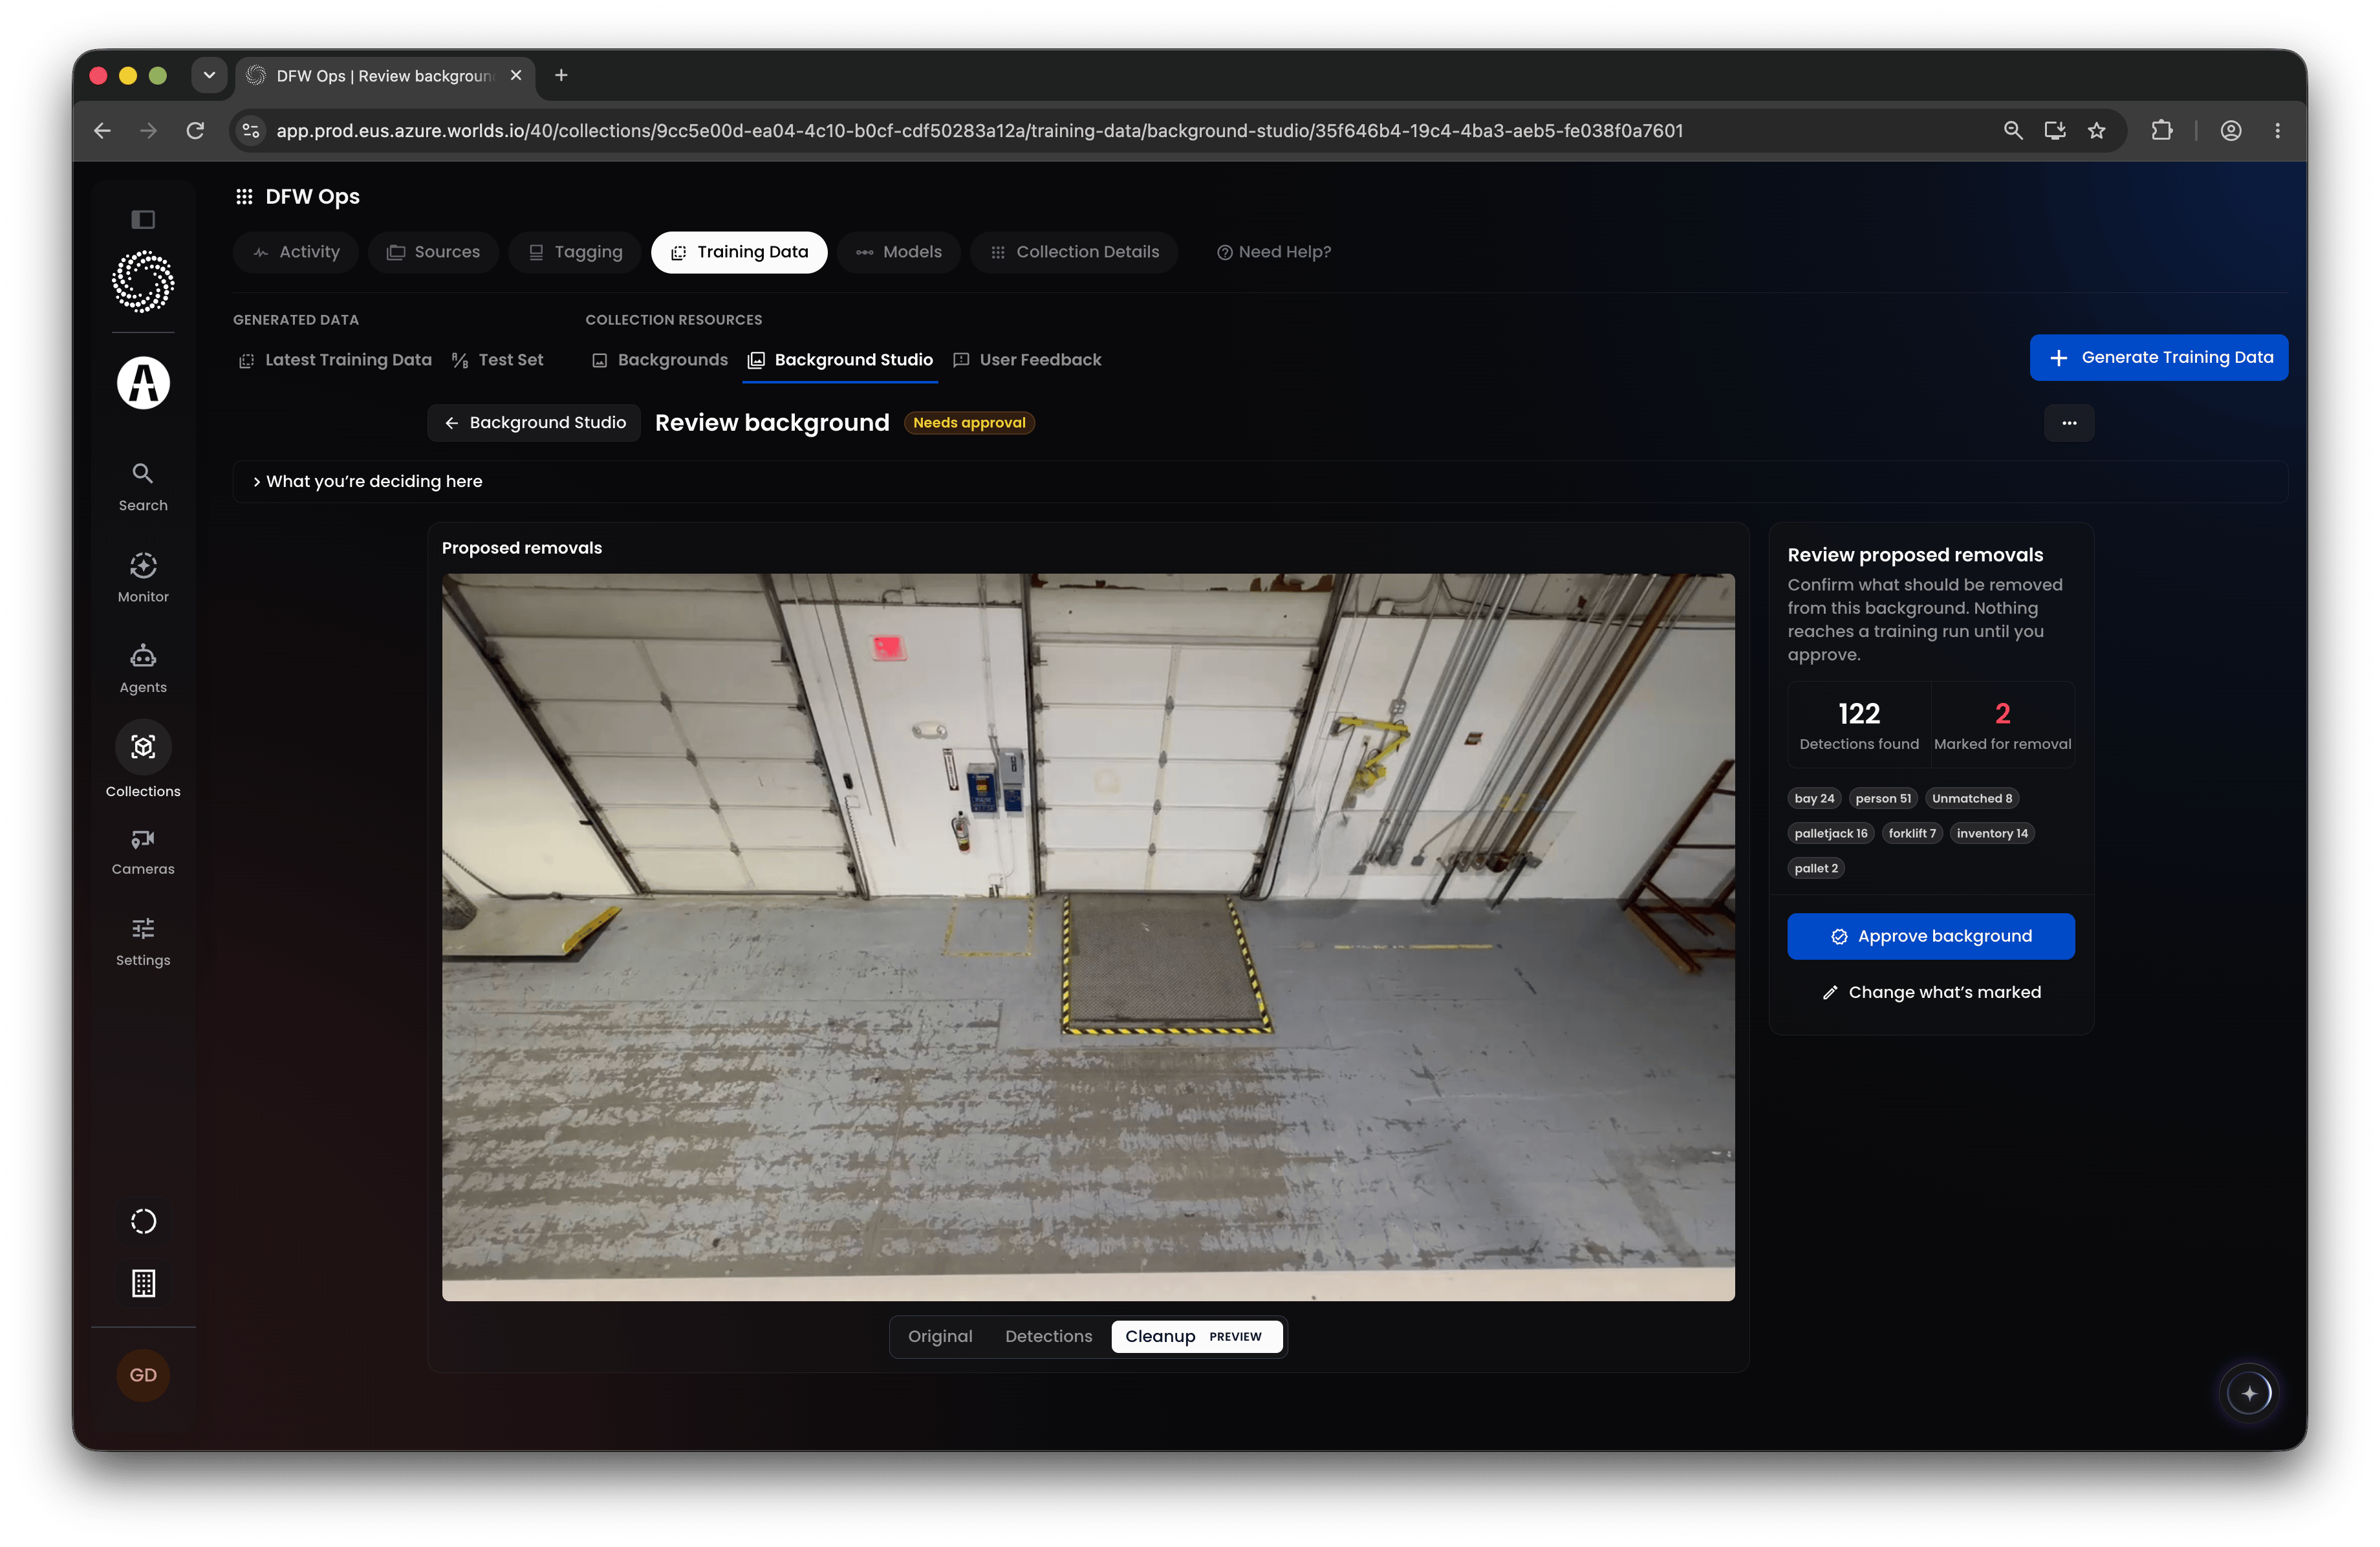
Step 5: Data Generation
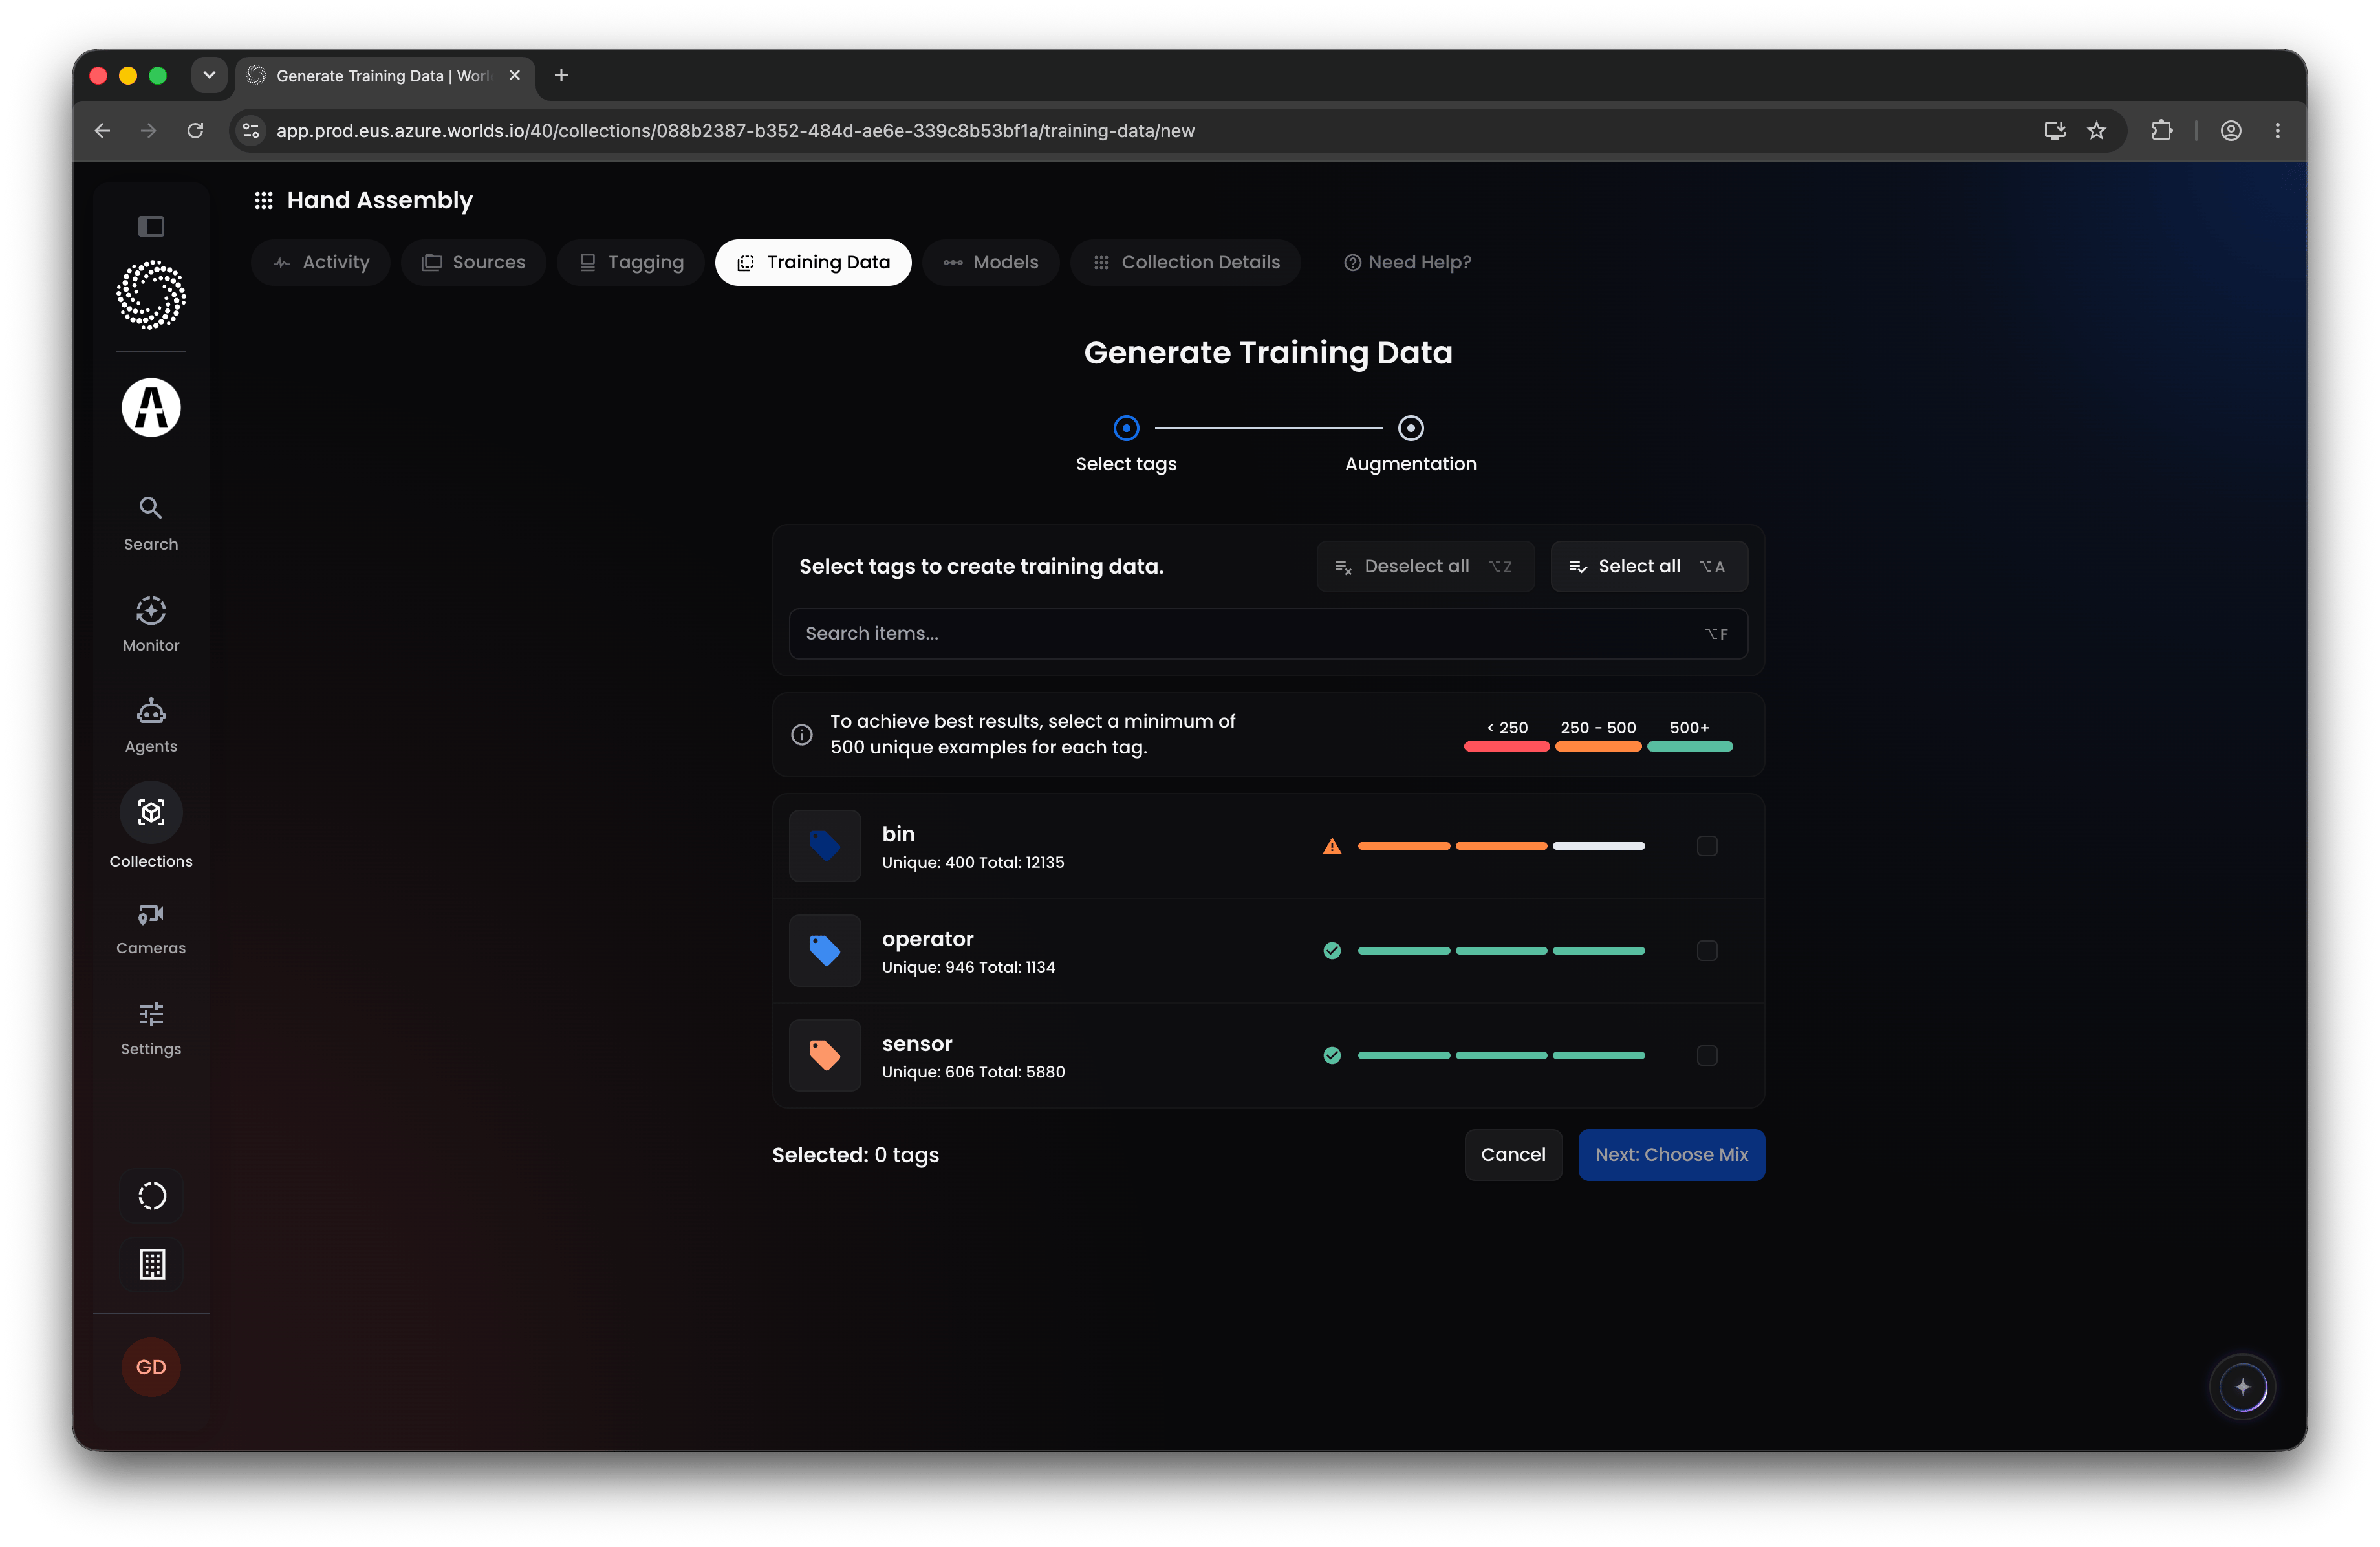
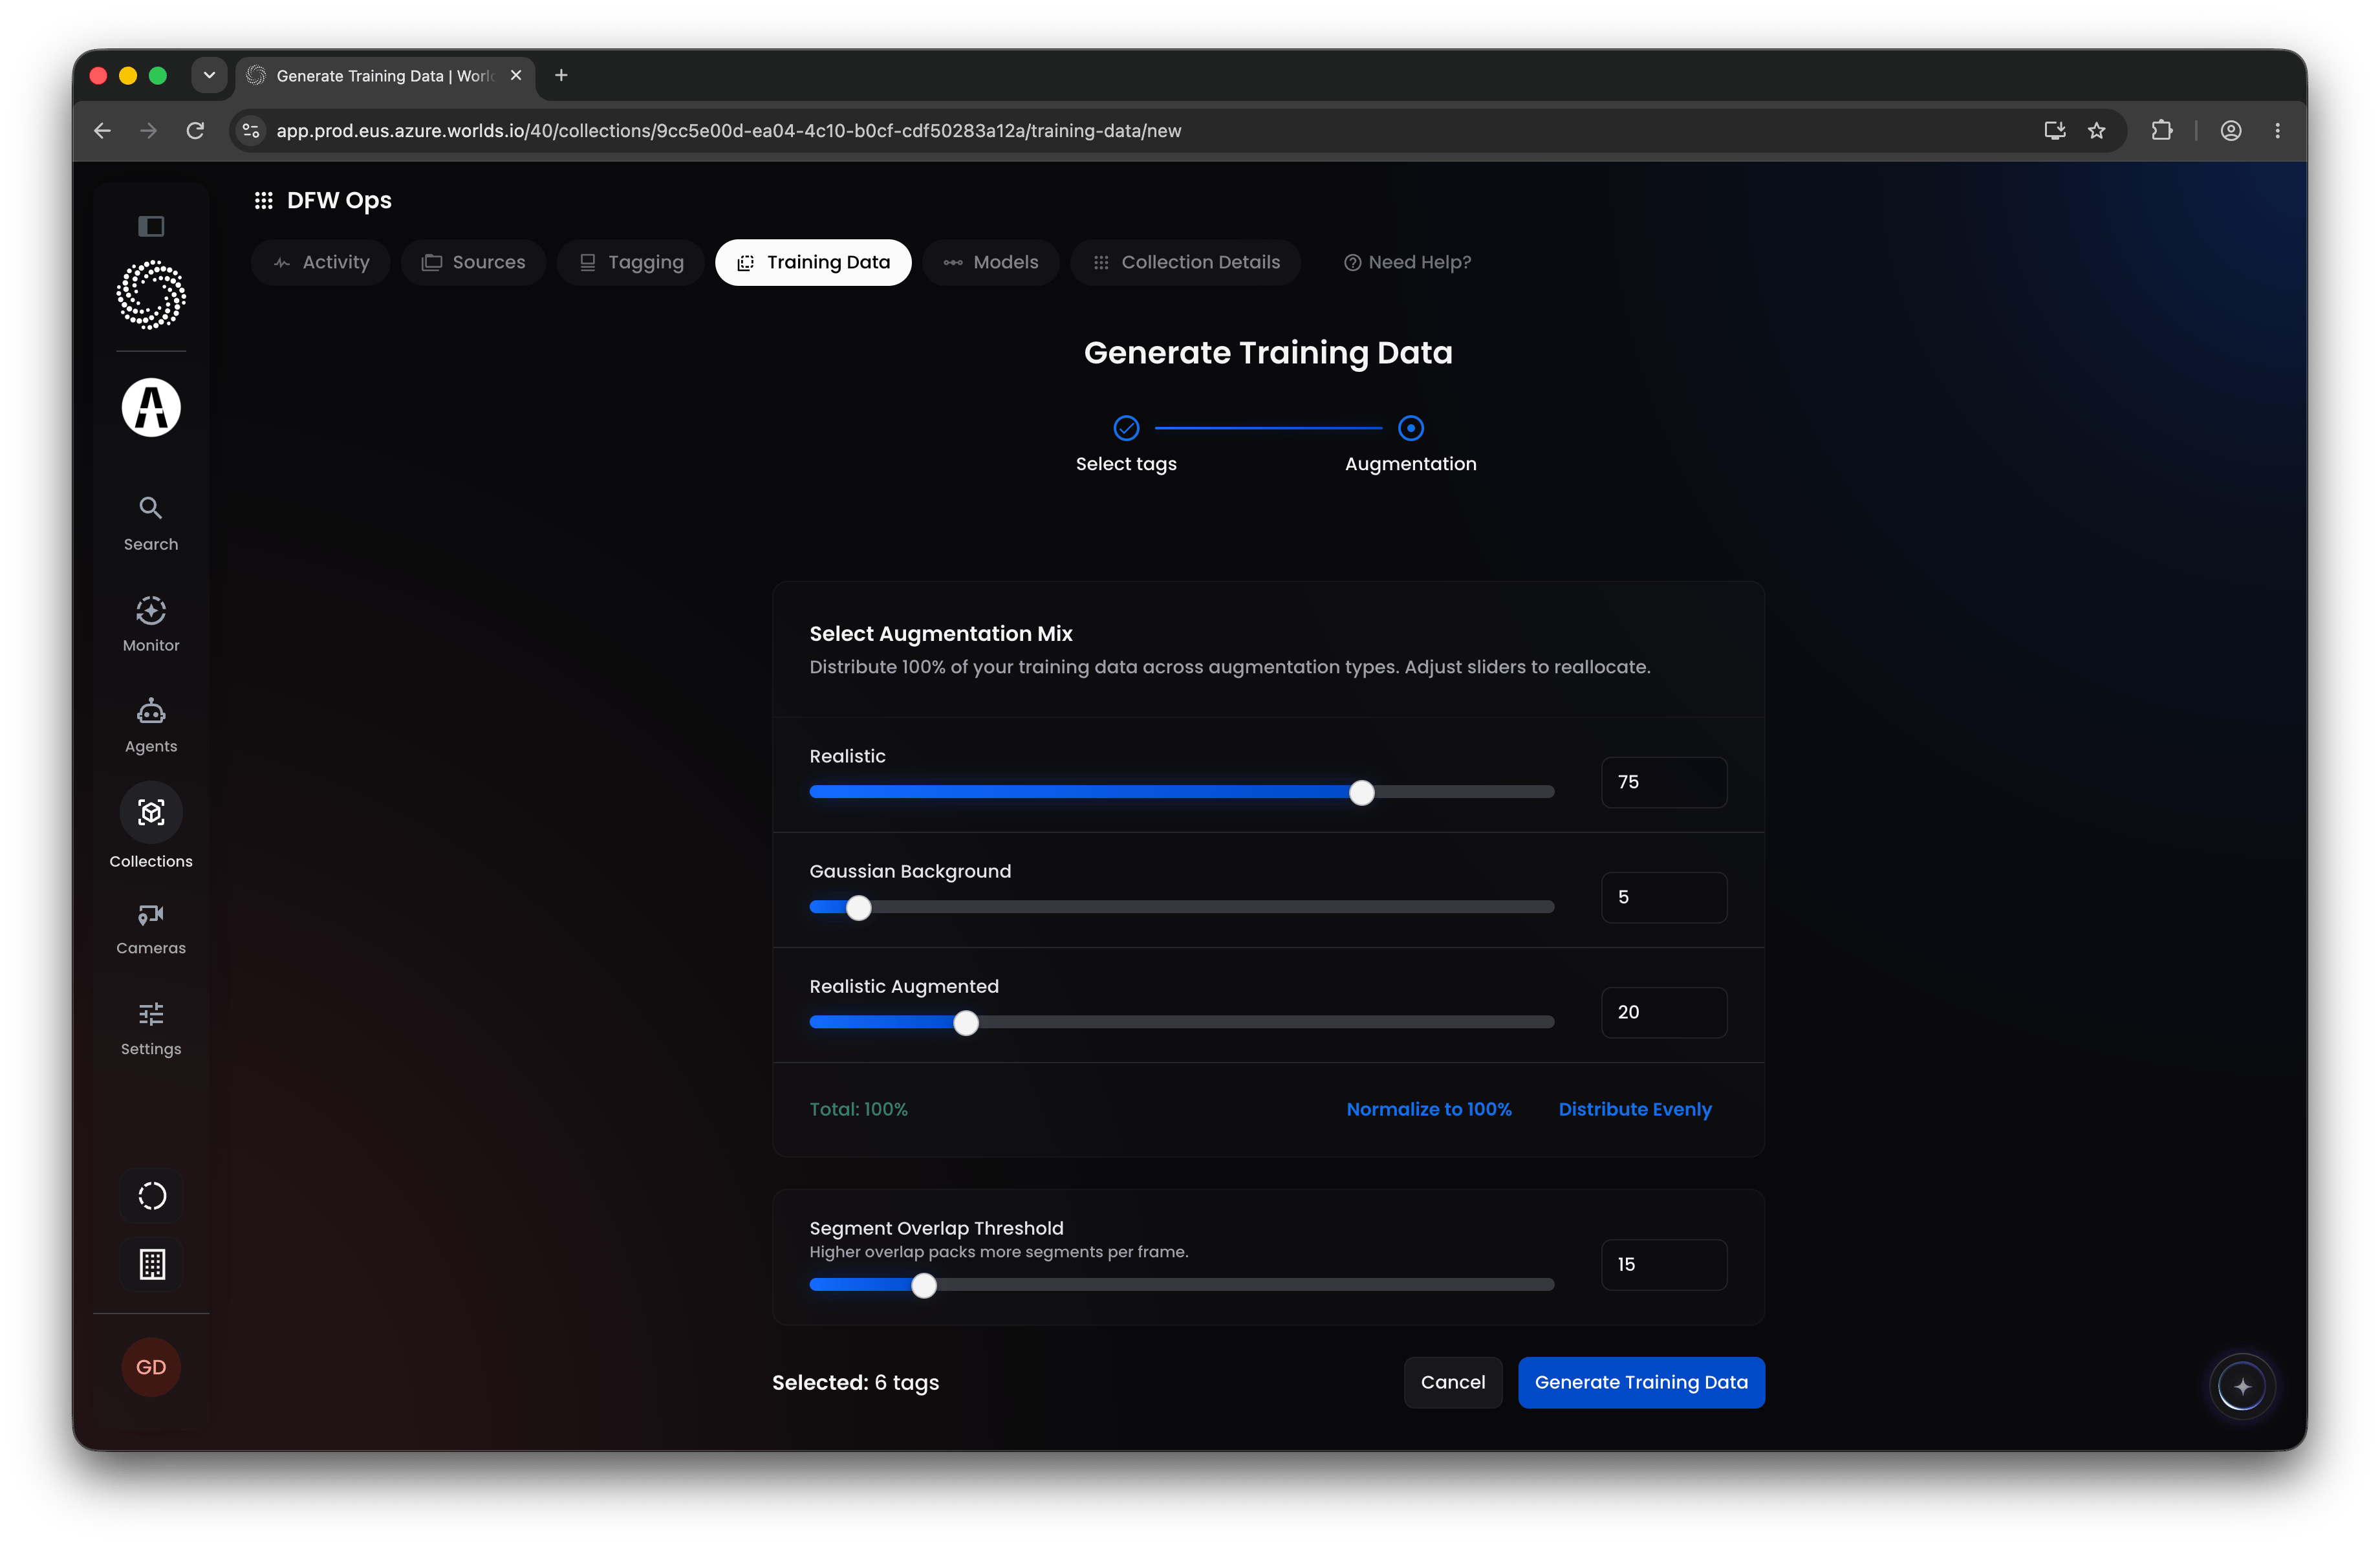
Once all indexed video is tagged, head to the Training Data tab and click Generate Training Data in the top right.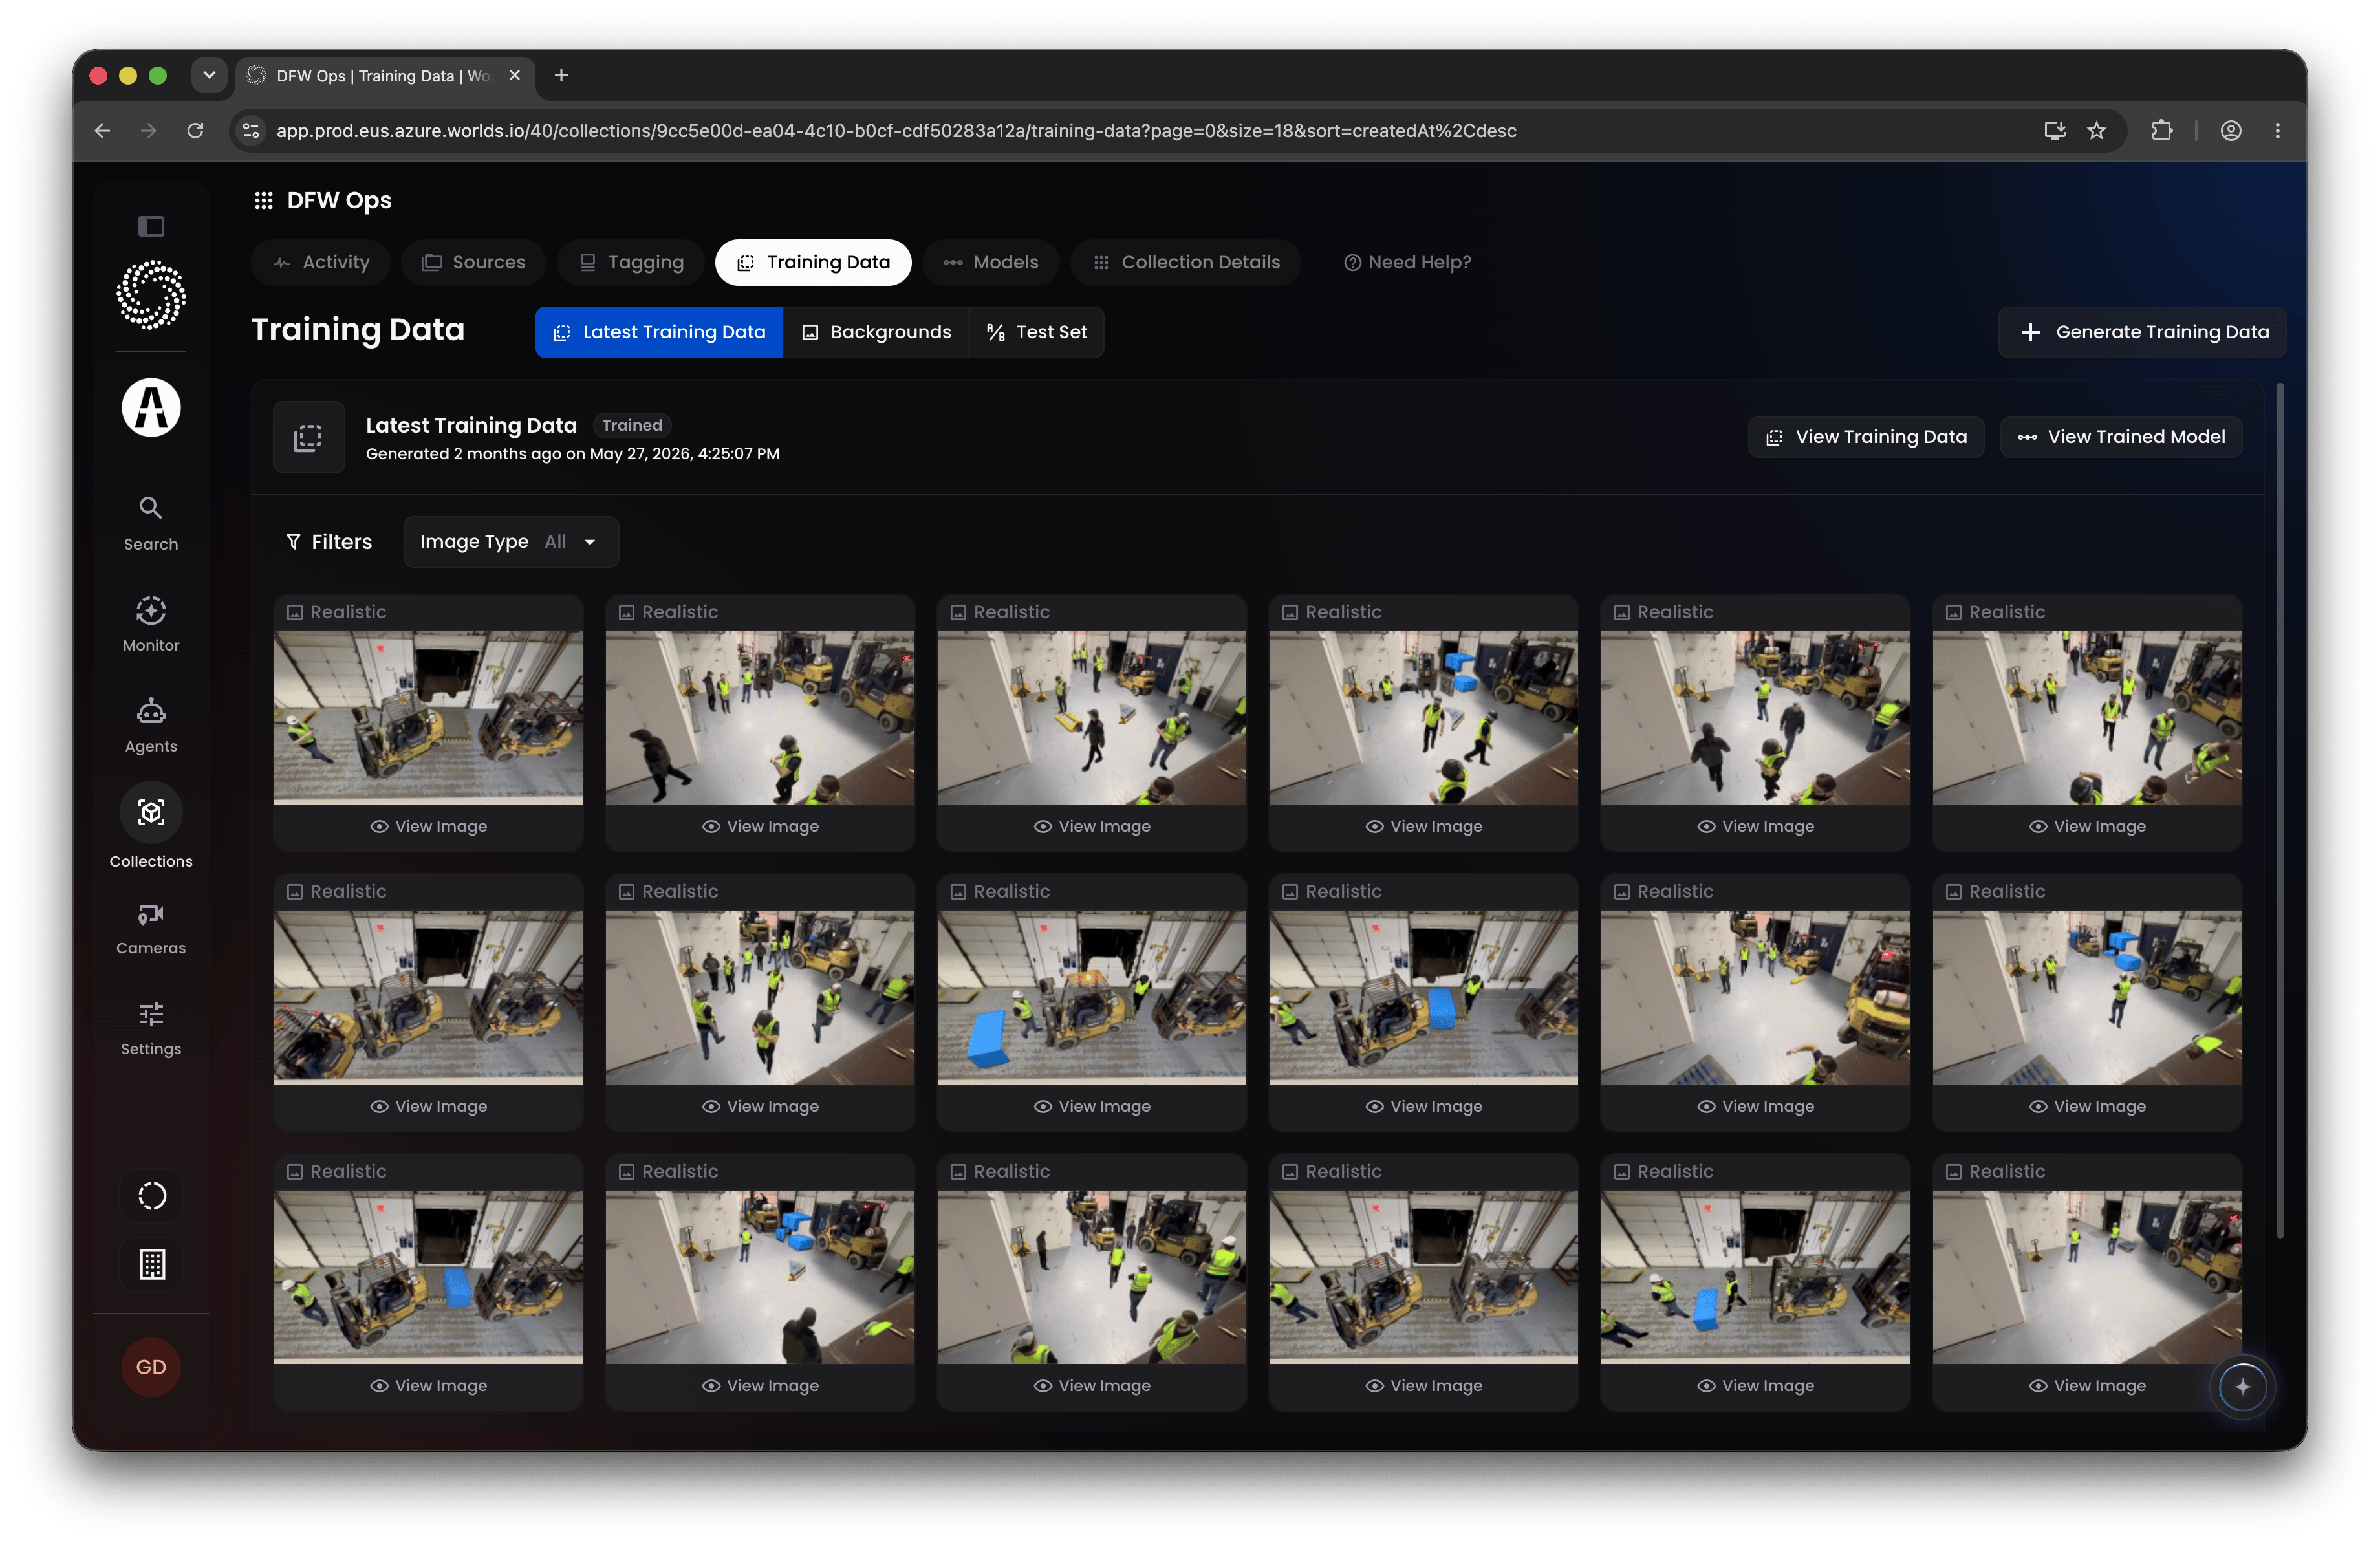
Step 6: Train the Model
Once data generation is complete, return to Worlds and go to the Models page. The Train a New Model button activates once all prerequisite steps in the collection are complete. Note: Tagging and training data generation stay live inputs into this step. Tag more segments at any point, and you can generate a new set of training data from them; iterate on your training data, and you’re enabled to train a new model from it. Clicking Train a New Model also takes some time to process. Once it completes, return to the Models page to evaluate the results. Running a model. After a model is trained, it can be deployed by selecting the model from the Models tab and then clicking the Run Model button in the top-right. You have options to run it:- On live video sources in the collection, or
- On historical video only (uploaded to a folder in the collection, or a single video selected from a live stream)
Step 7: Evaluate the Model
Model metrics. From the Models page, you’ll see a model metrics view listing every model trained in the collection. At the top: overall metrics for F1, Precision, Recall, and mean Average Precision (mAP), plus a chart of model performance over time as each new model gets trained.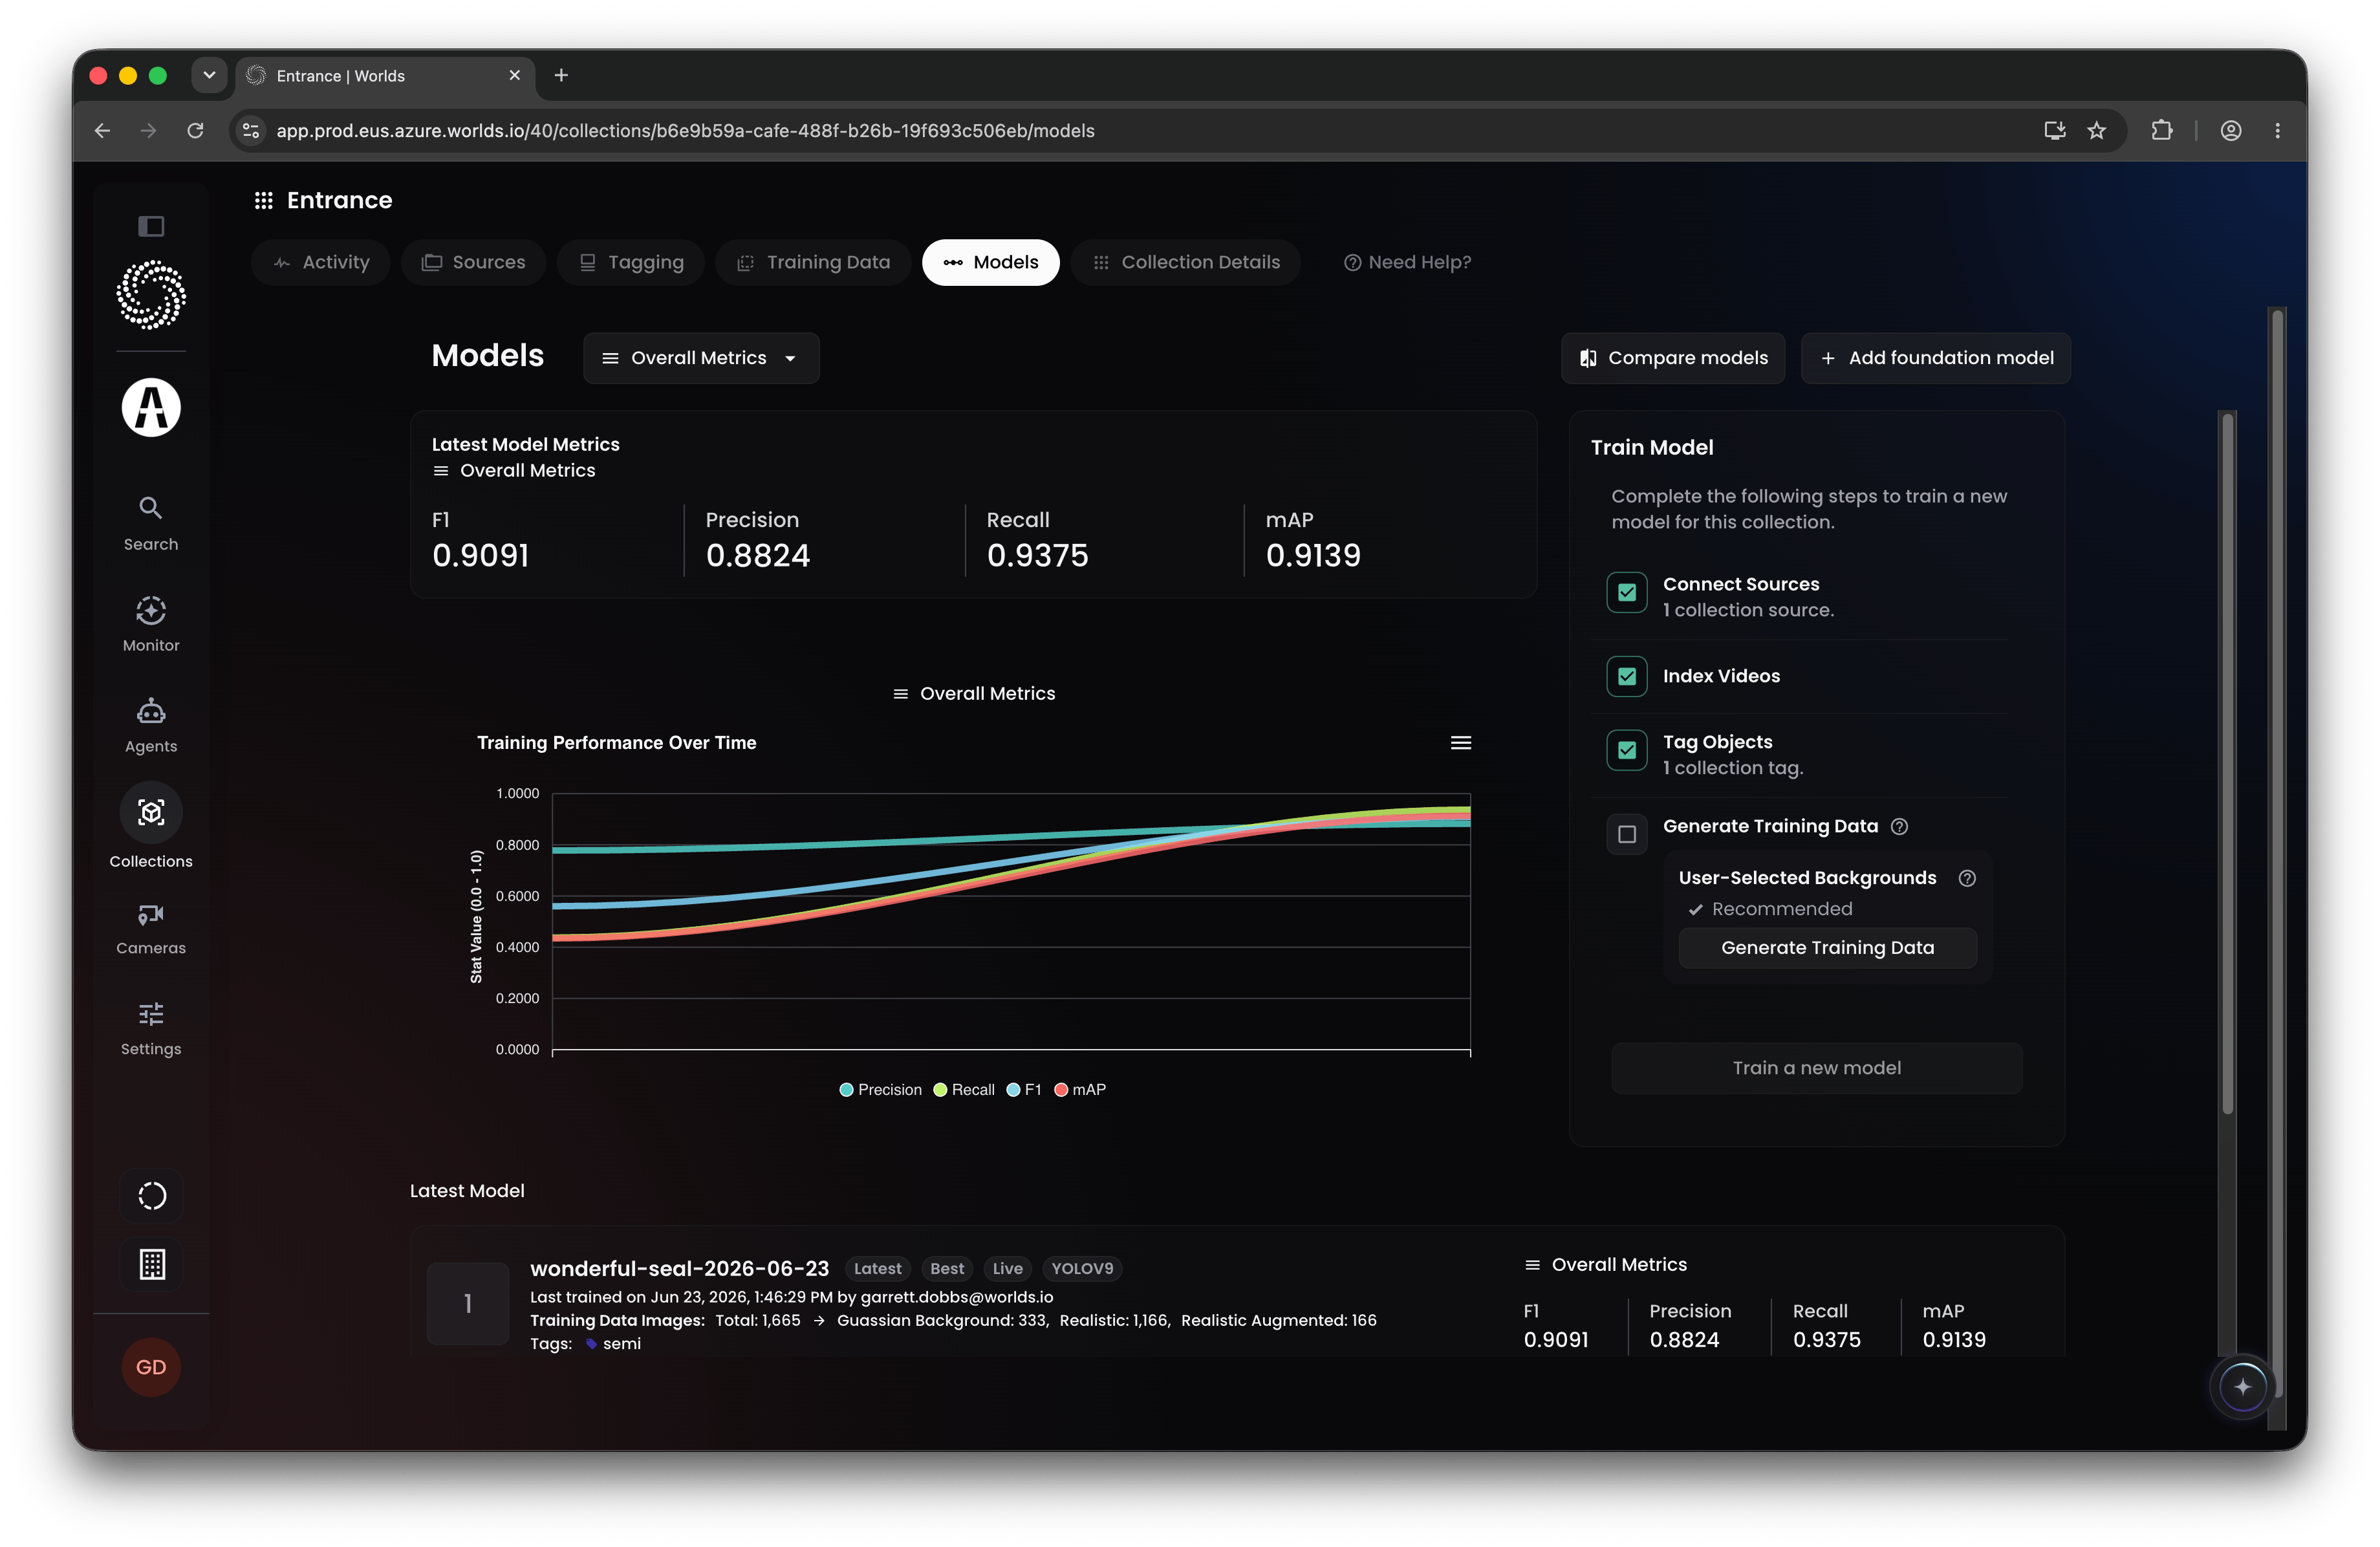
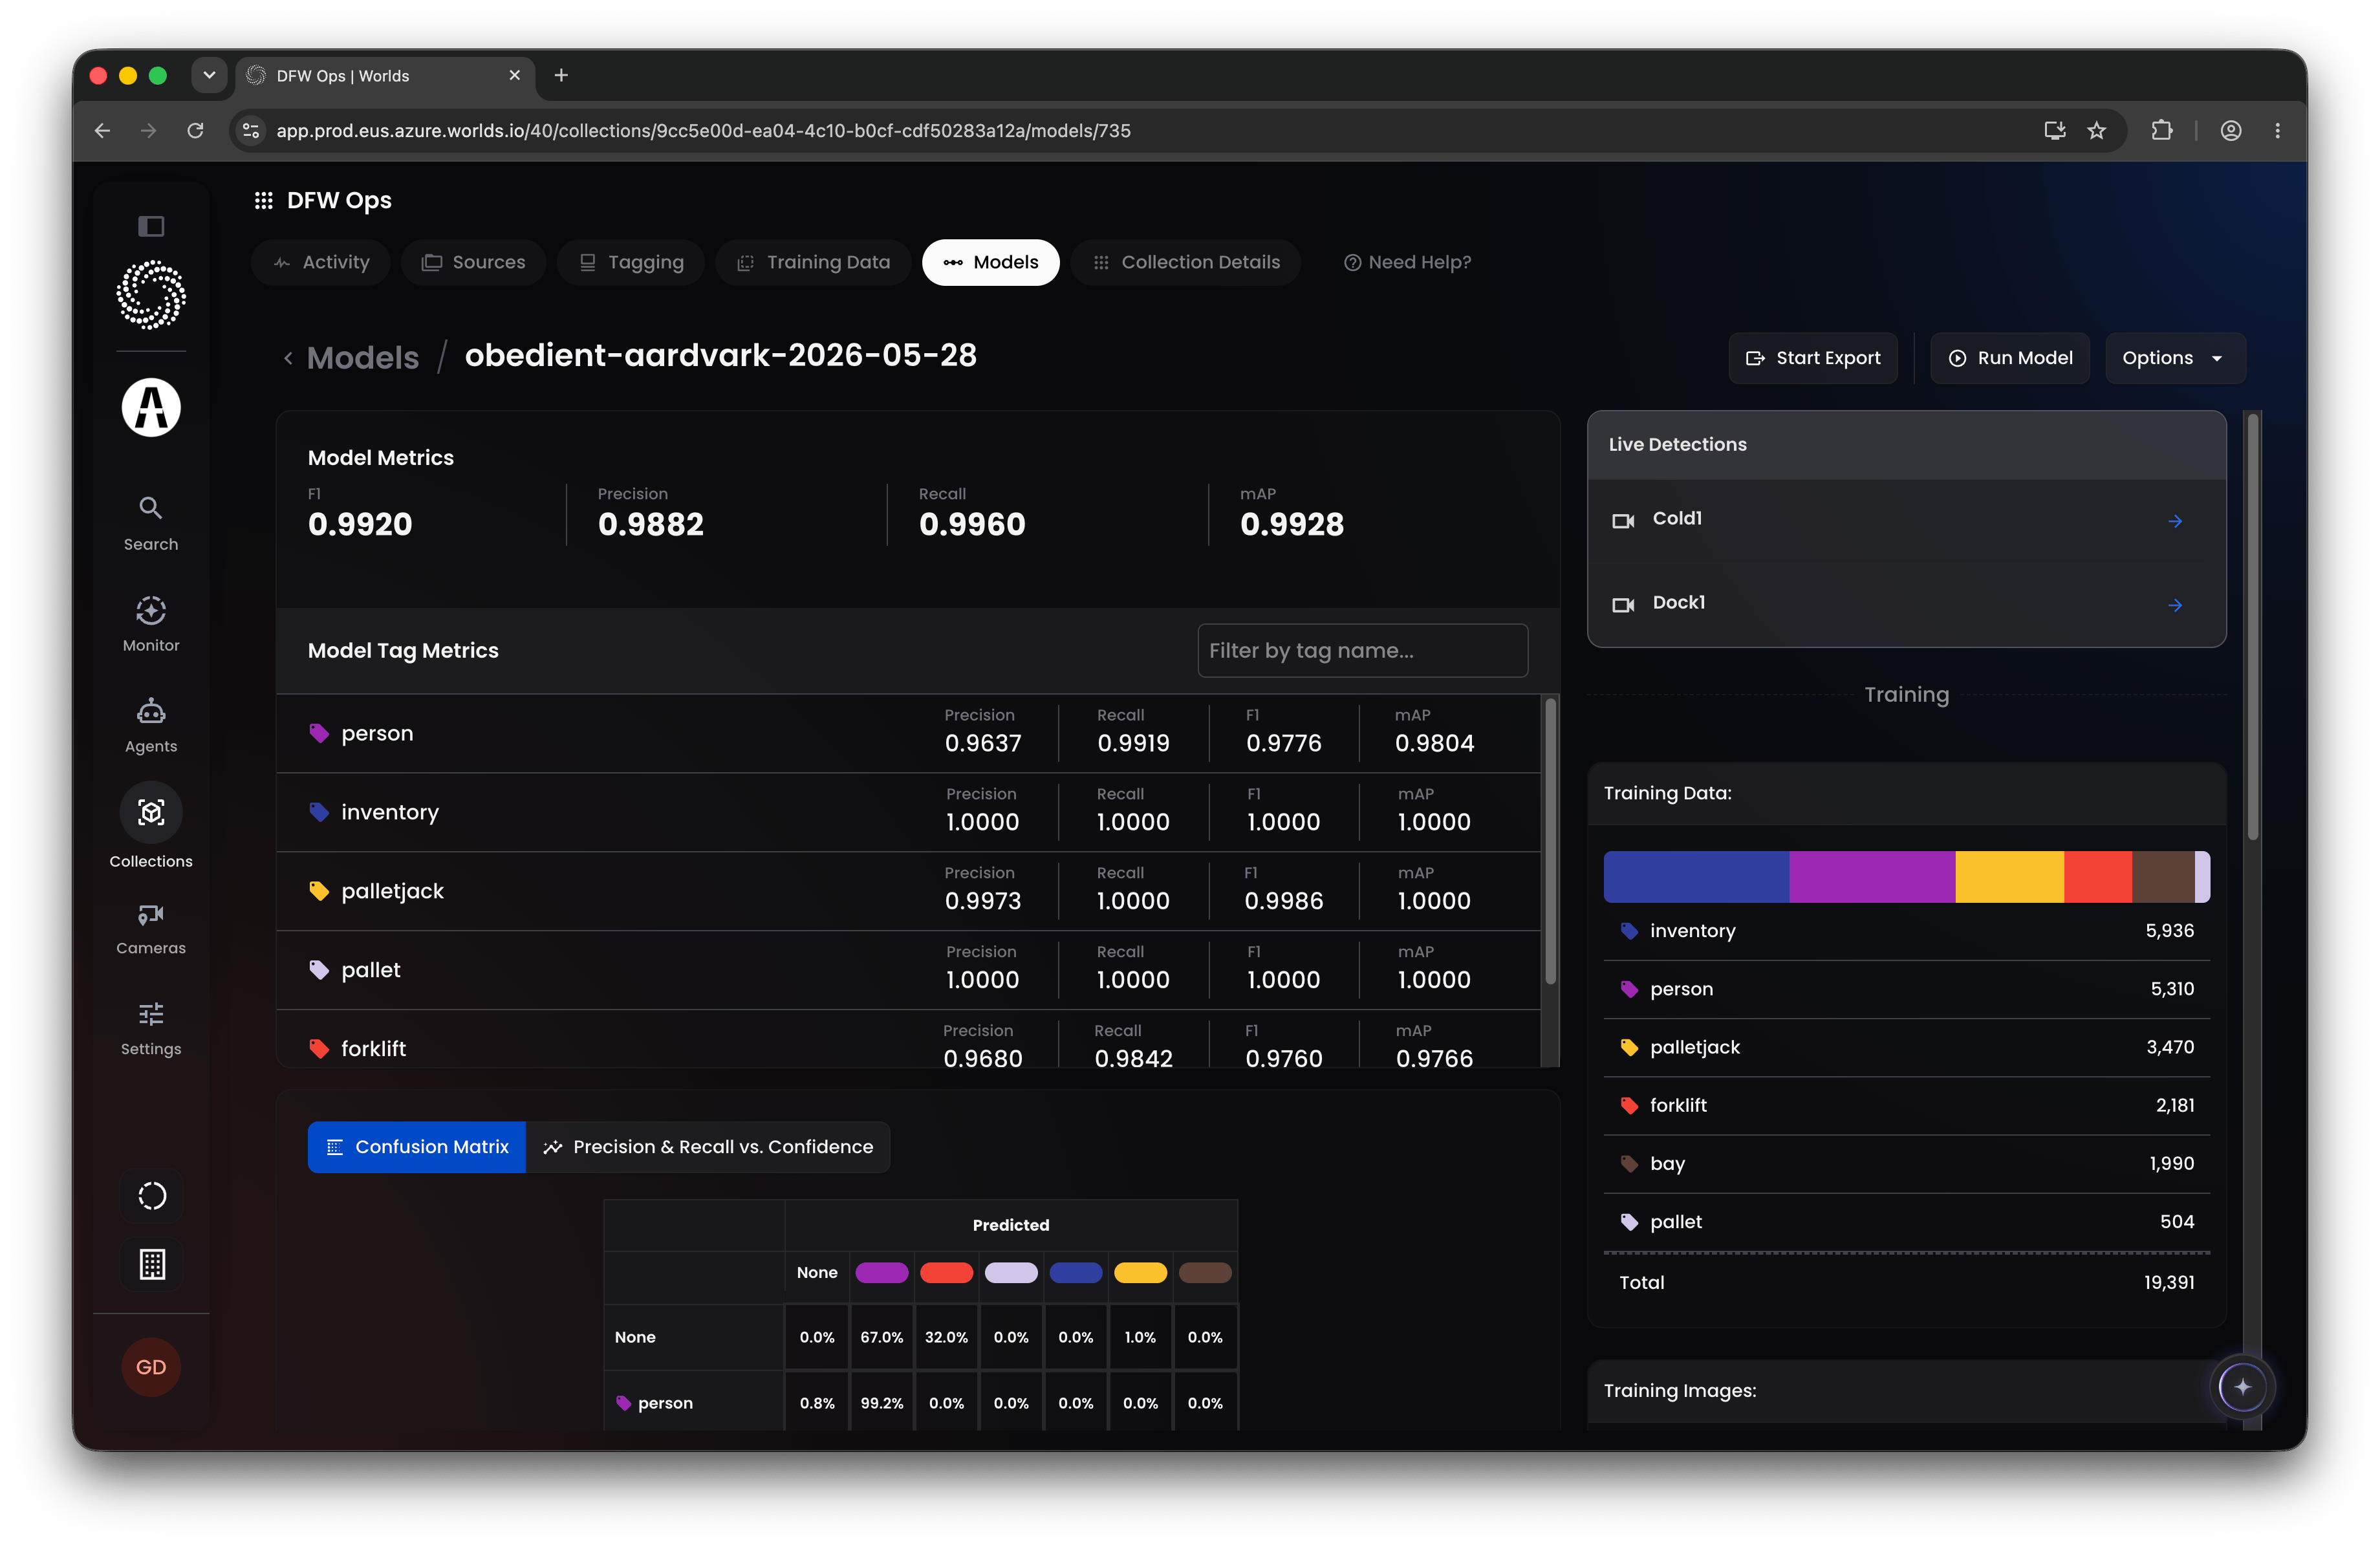
- Confusion Matrix - a detailed breakdown of every object class in the collection and how likely each is to be confused with another, based on the test set from data generation.
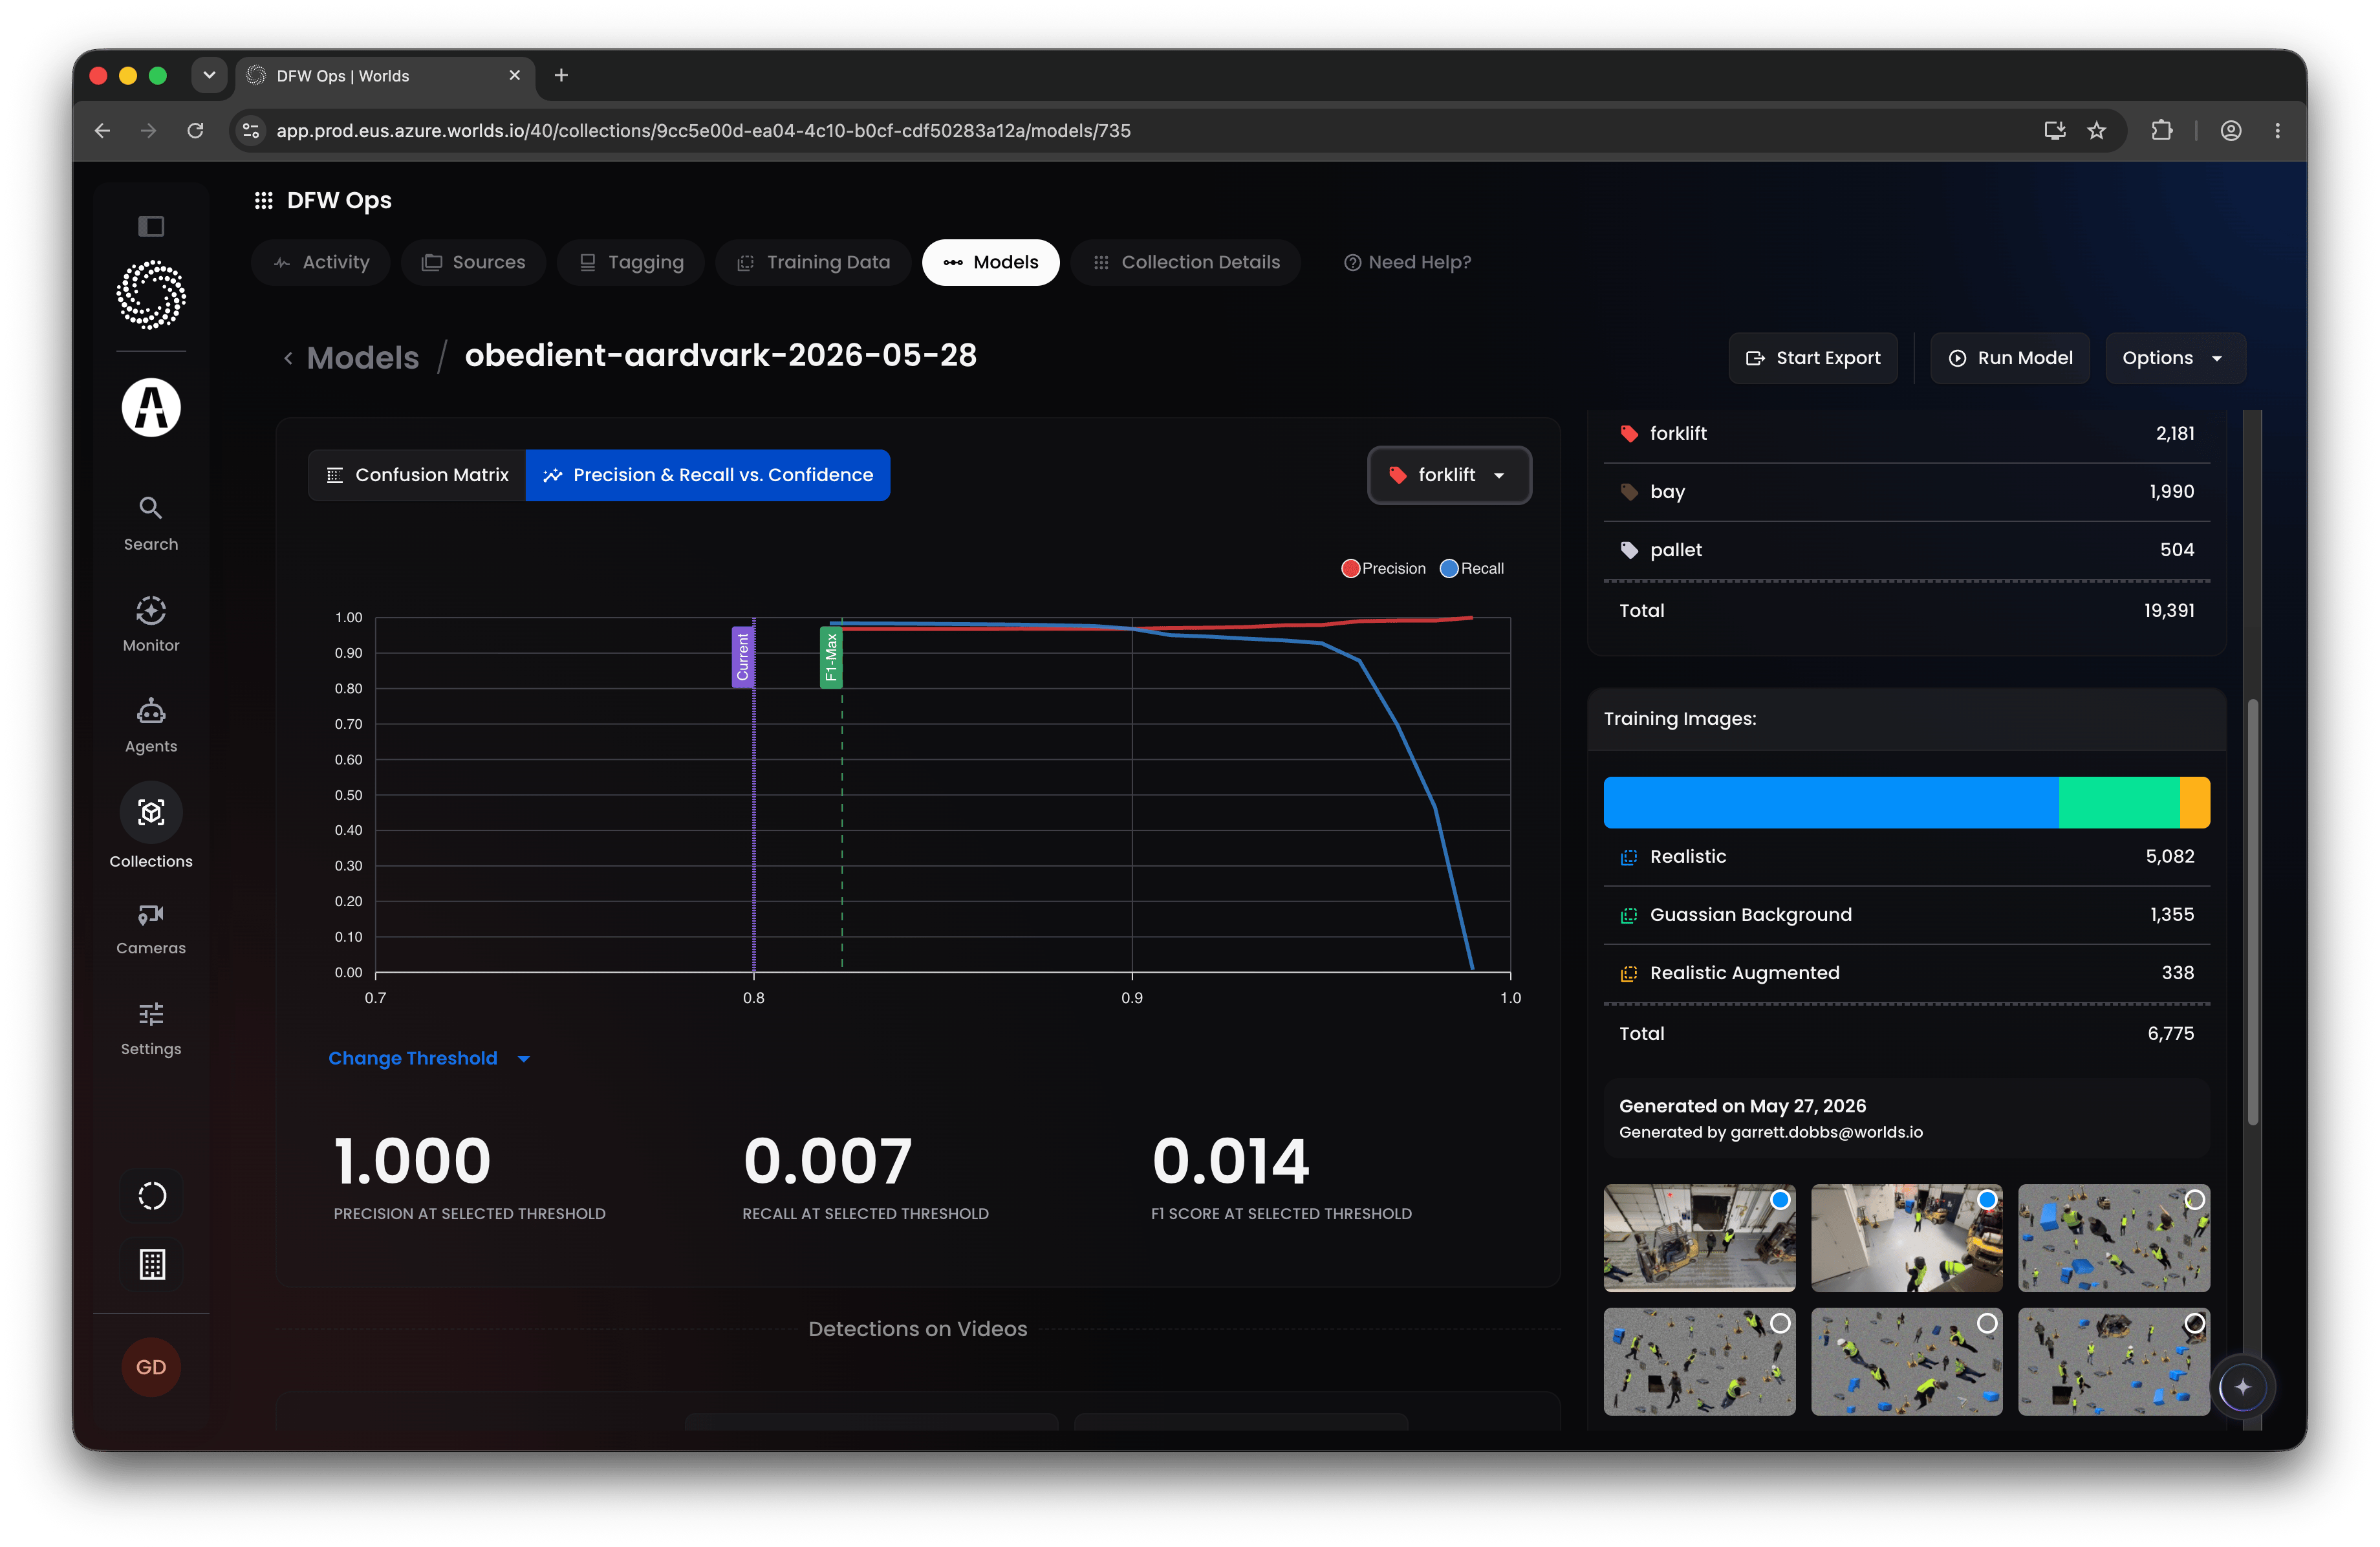
- Precision & Recall - pick a class from the dropdown to see how confidence threshold affects precision and recall at each level. Tip: this view is useful for setting the ideal confidence threshold for a class after the model’s trained and deployed. Adjusting a class’s detection threshold after training can surface detections and tracks you’d otherwise miss, or cut down on false positives, without retraining anything. Thresholds can be adjusted from this chart, or from Options > Configure model in the top-right.
Step 8: Review and Improve
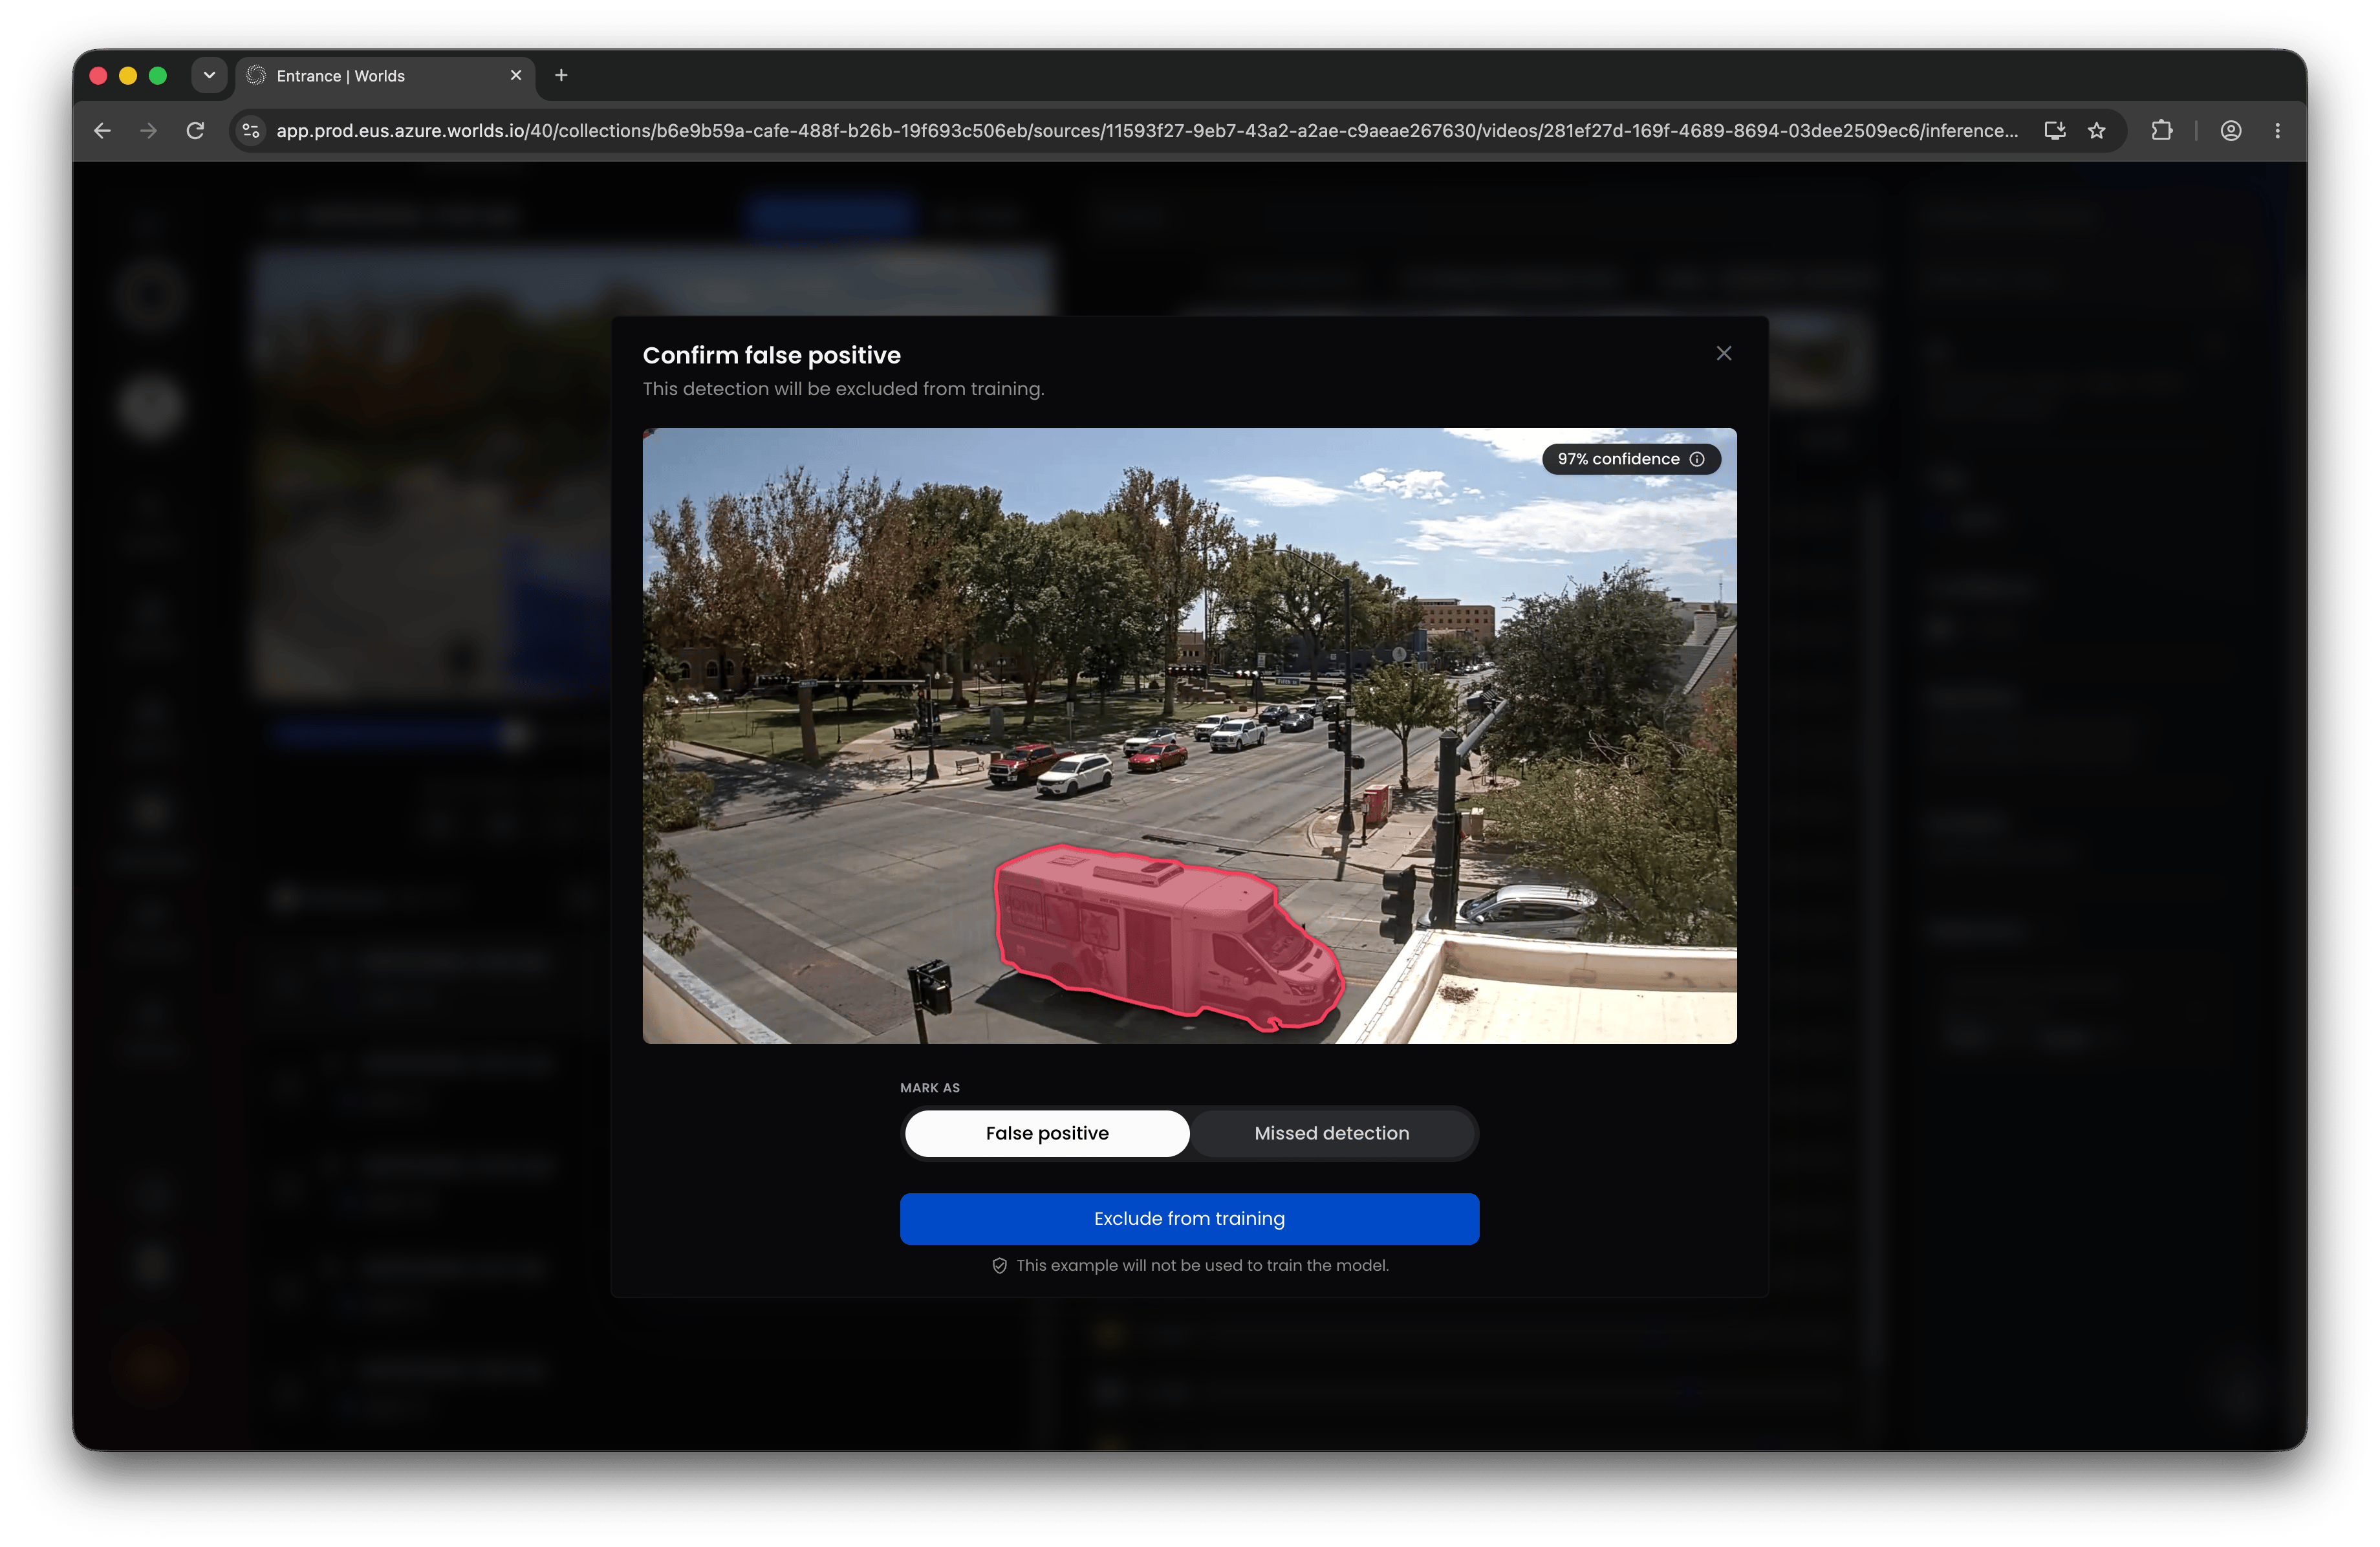
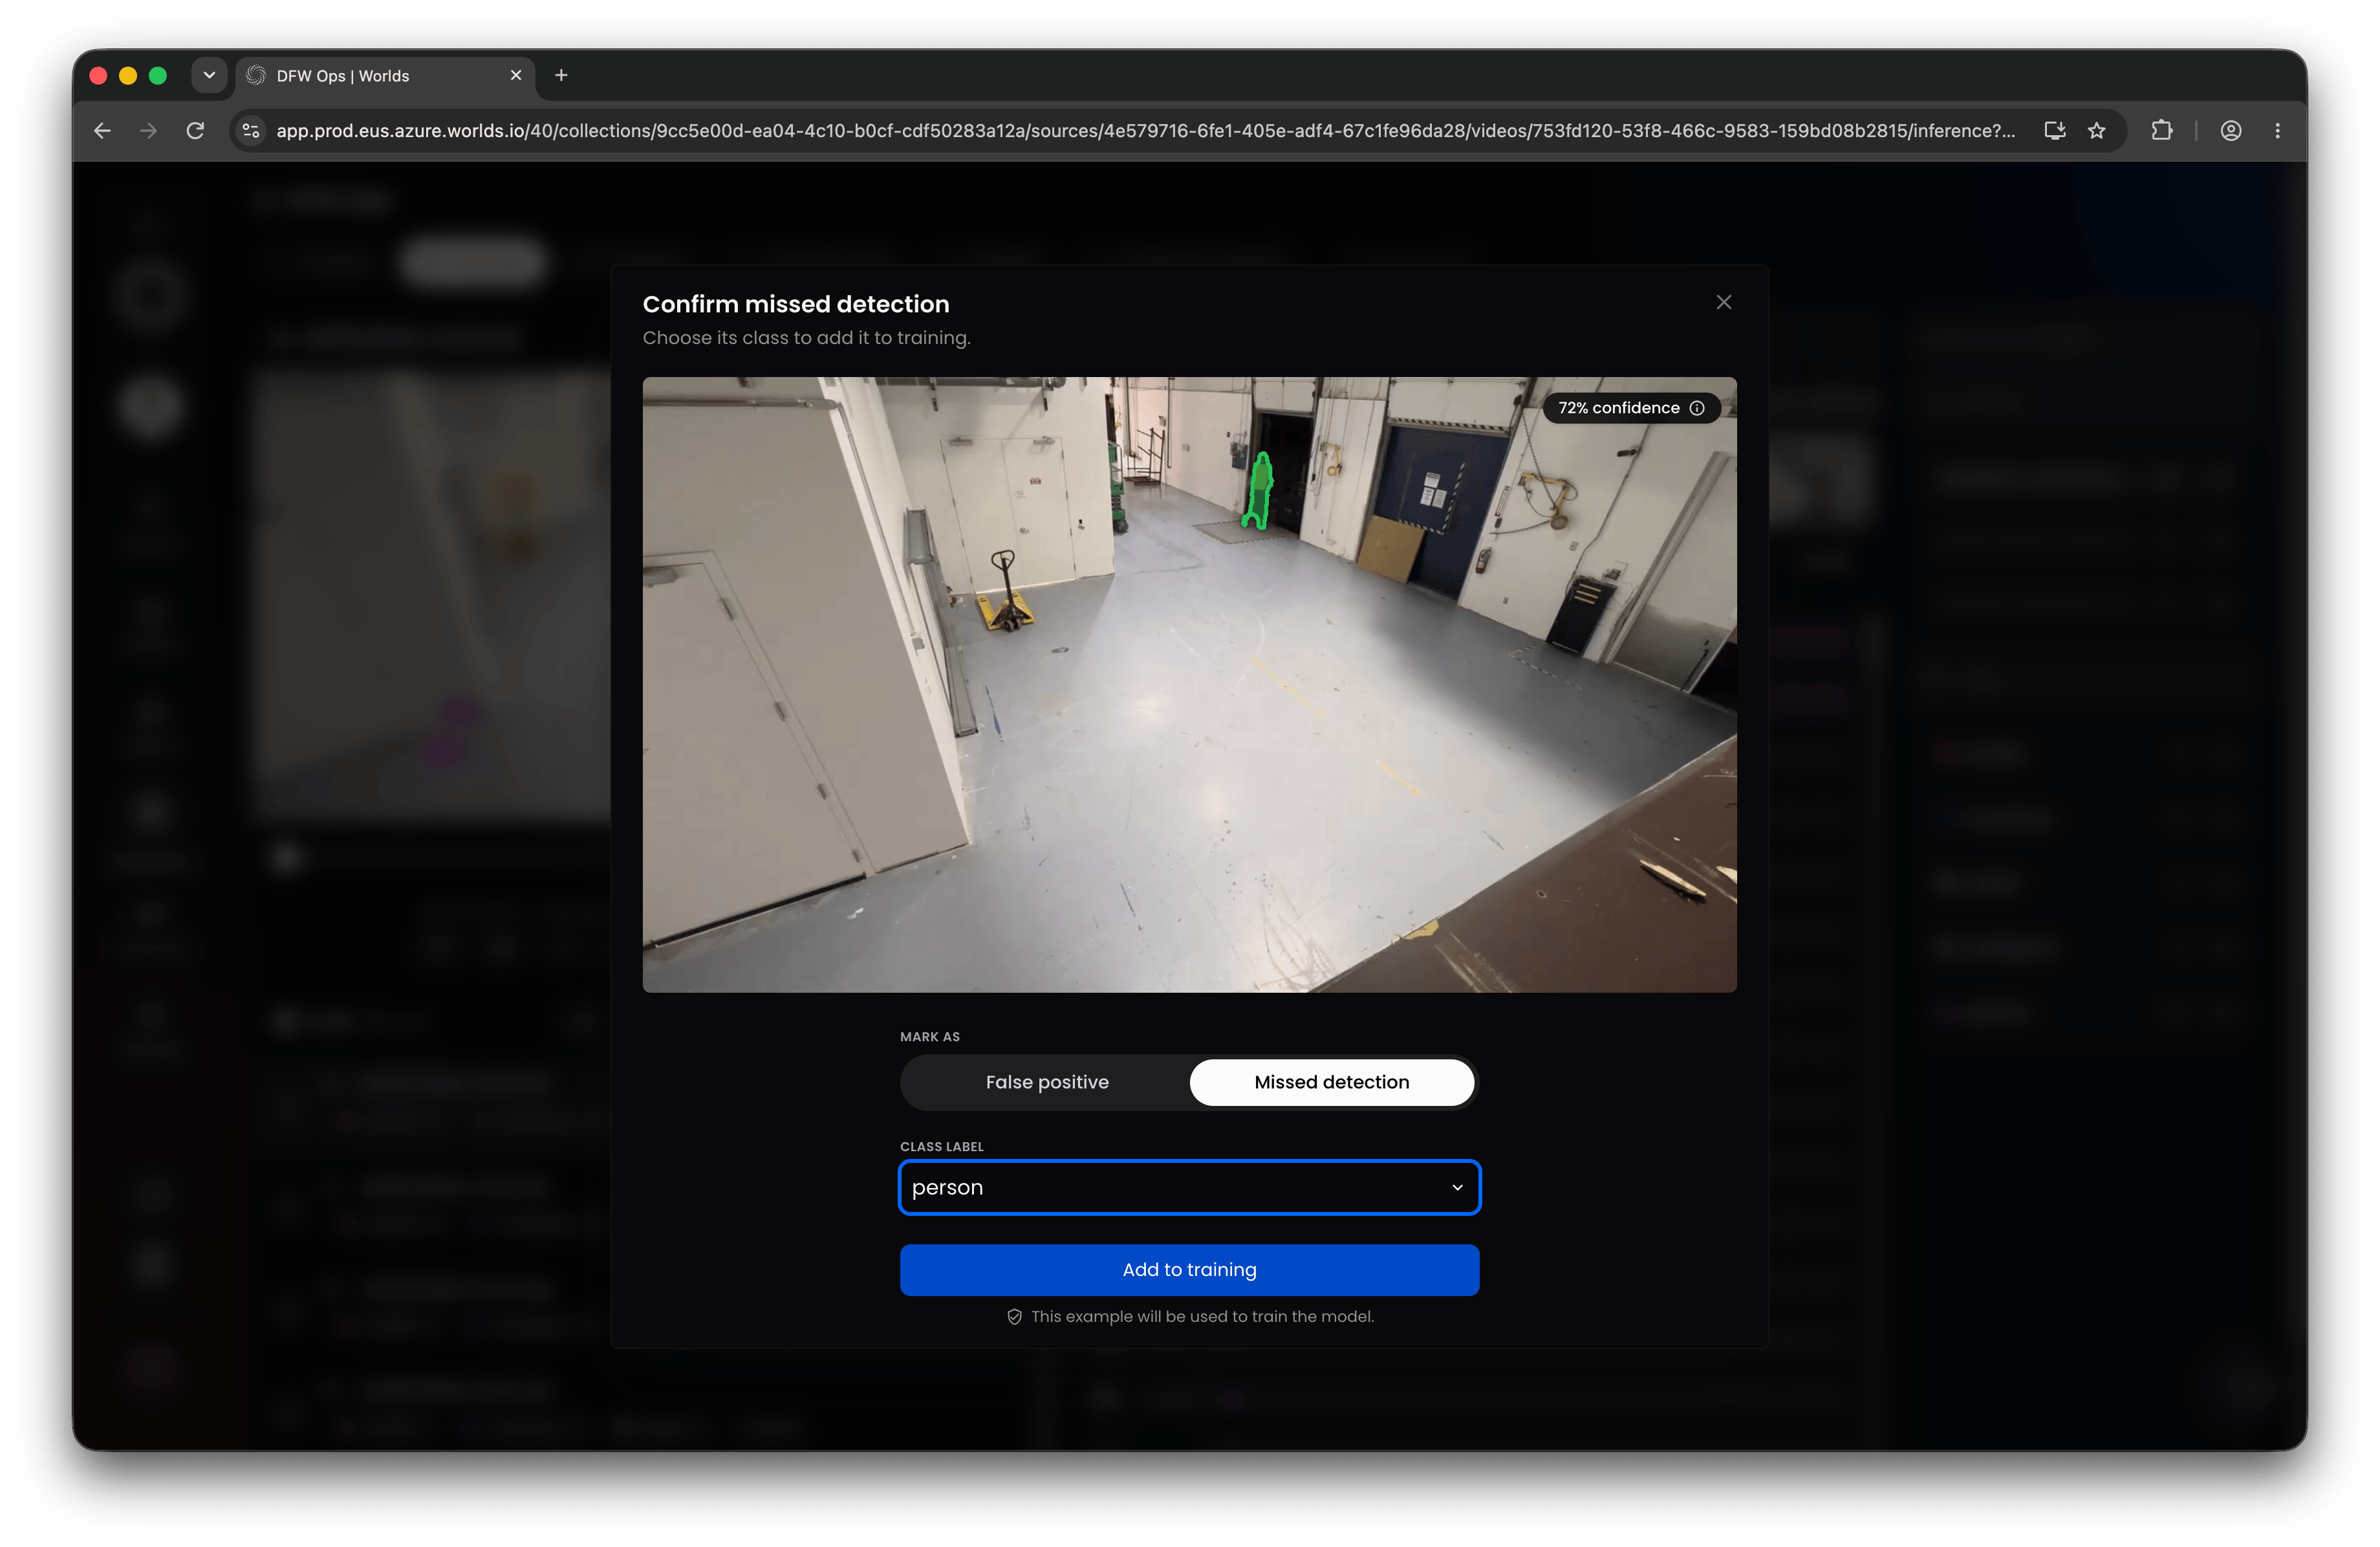
The inference viewer is where you see the full detection output of a deployed model, judge how it’s doing against real footage, and correct what it got wrong. Opening the viewer. To see the inference output of a Detector, from the Sources tab select any video from any camera in the collection against which a model has been run, or from the model click Live Detections for any camera in the top right. If it’s been run against one-off video, find that video listed under Detections on Video on the model’s page and click through to the inference viewer.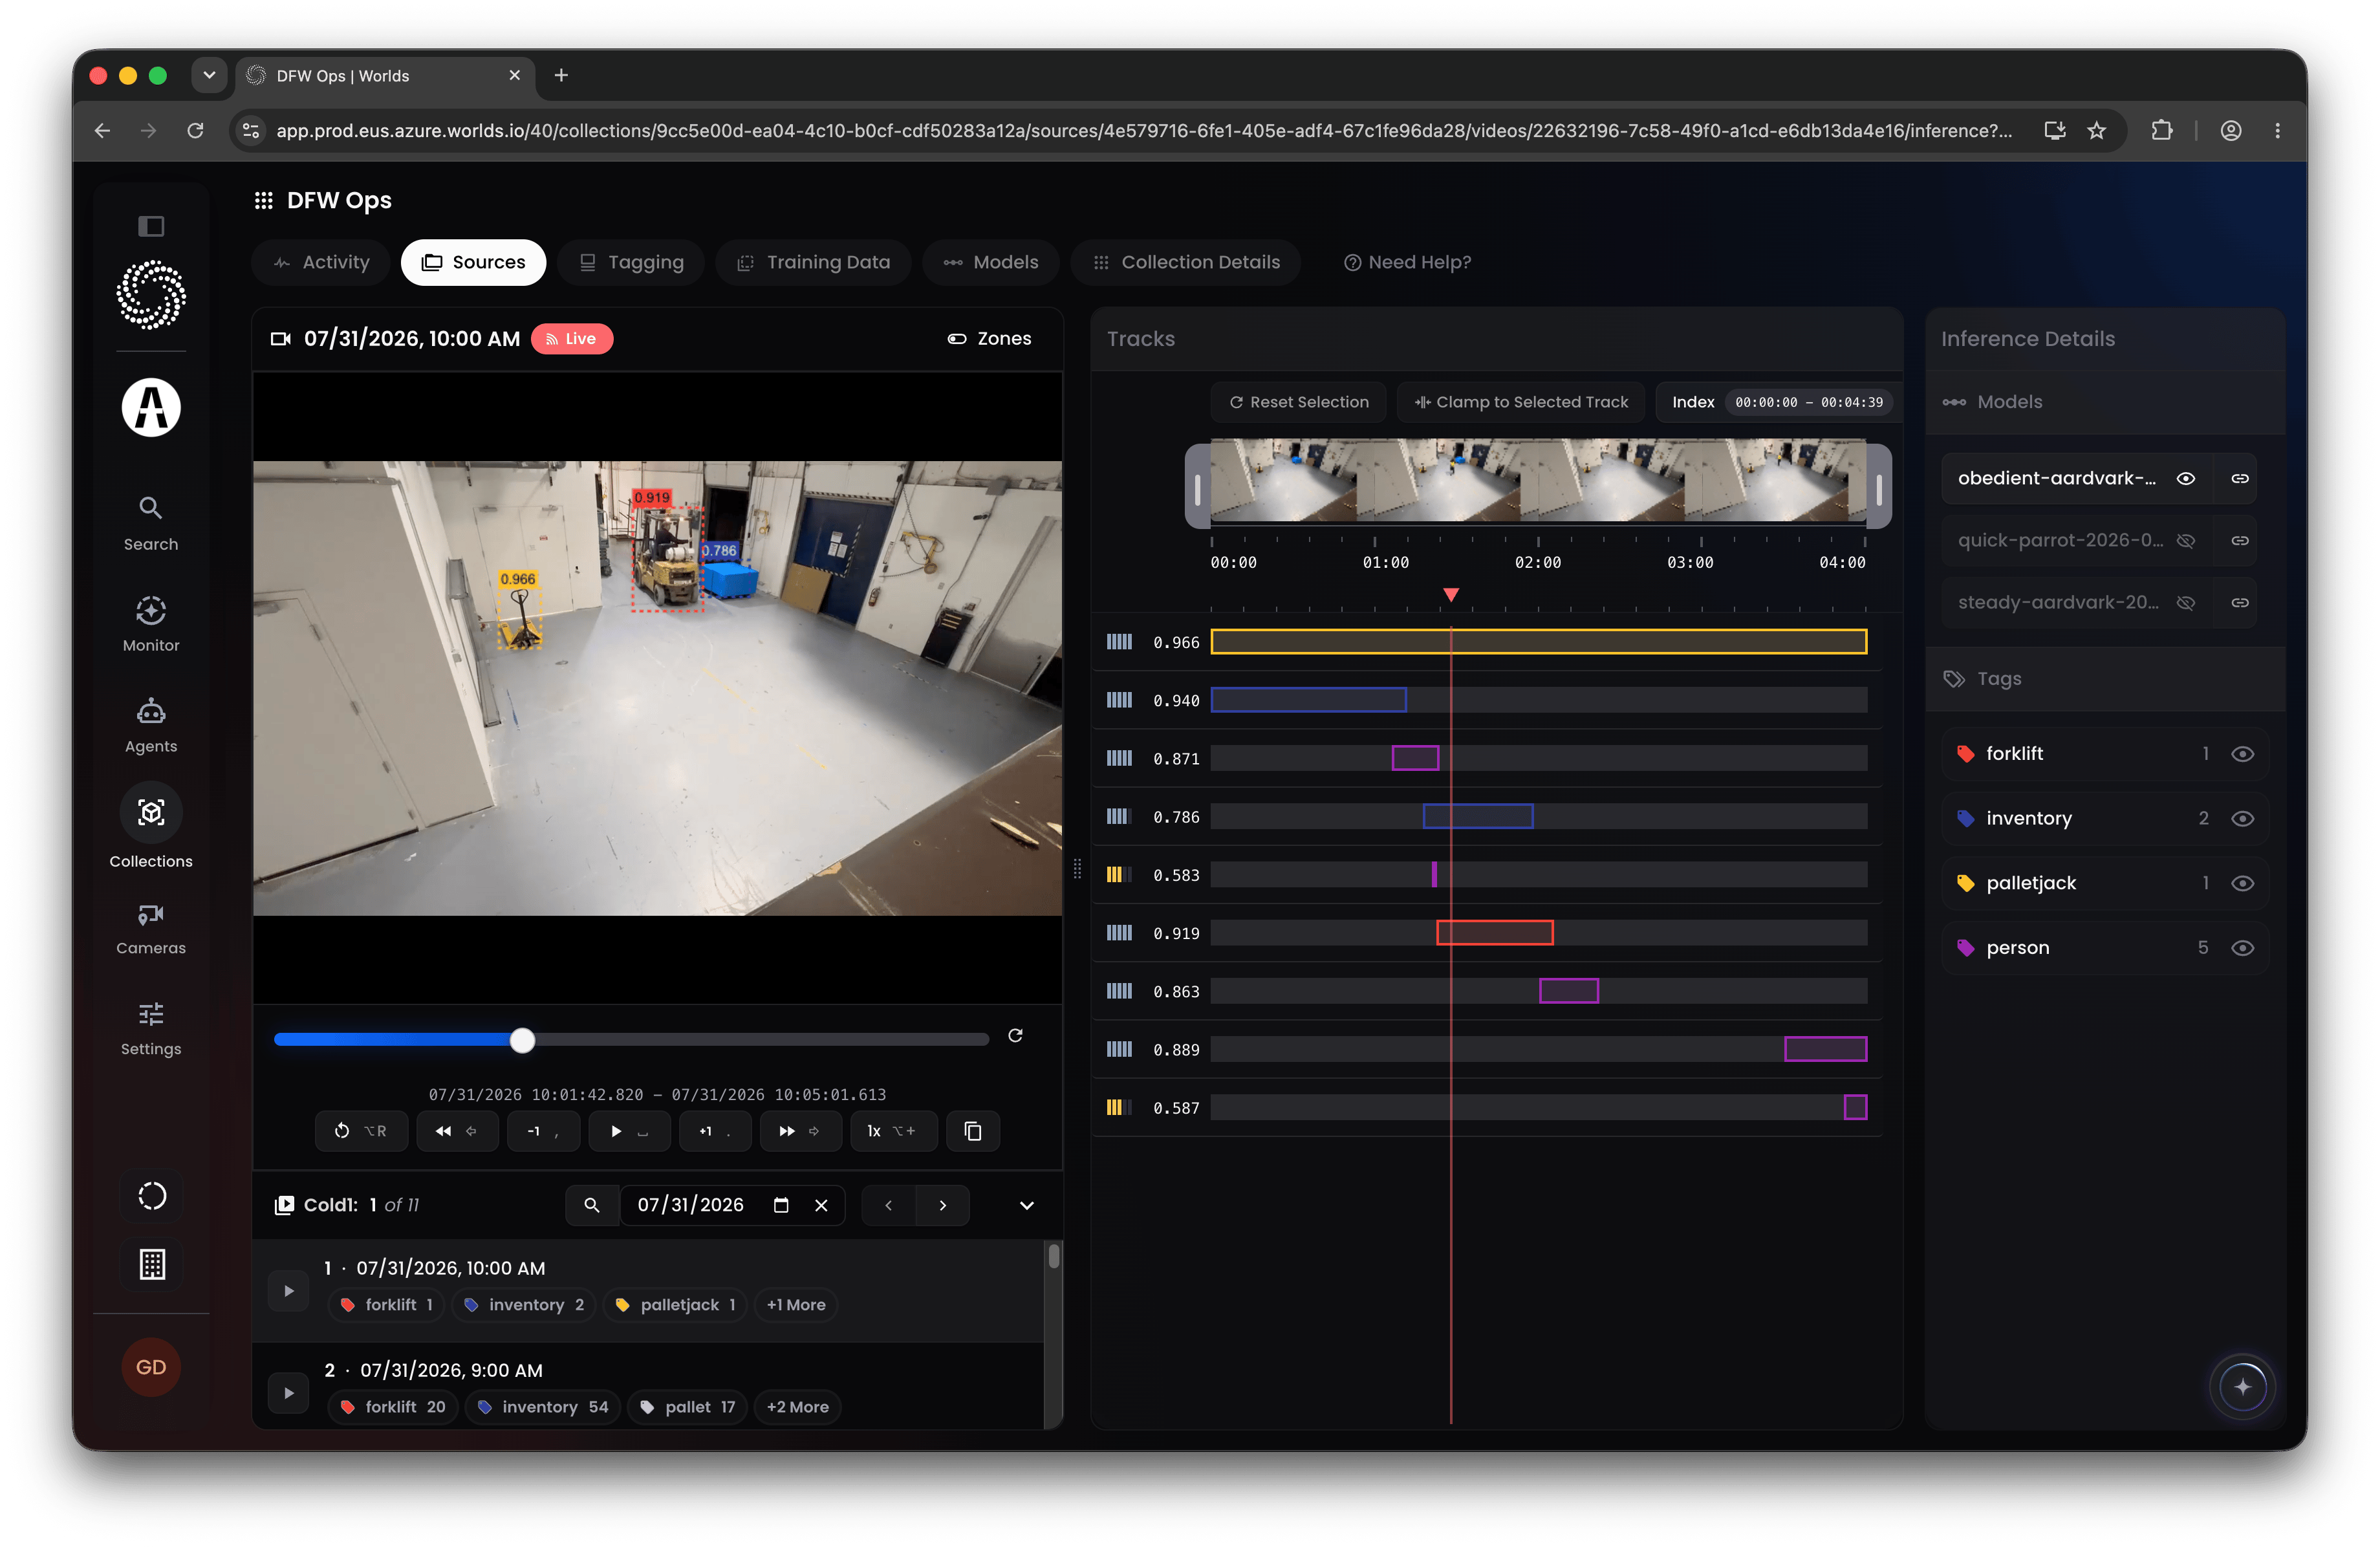
- Click a tag on the right to filter to just that class.
- Click a track to highlight it in video playback, or click further along a track to jump the video to that point in time.
- A solid, continuous block on the timeline means the object was tracked without interruption. A broken-up track means detection was lost and picked back up.
Quick Reference: The Flow
- Collections - group cameras by shared visual context and goal
- Indexing - segment raw video into candidate objects, targeted (Specific) or exhaustive (Everything), reusing past prompts from History
- Tagging - find, review, and label segments into object classes
- Backgrounds - build clean background plates in Background Studio, and approve them
- Generate Training Data - select classes, set augmentation and segment overlap, and let Worlds build the training and evaluation datasets
- Model Training - train a vision model and deploy a detector
- Evaluate the Model - review metrics, precision/recall, and the confusion matrix on the Models page
- Review and Improve - check a model’s detections in detail in the inference viewer, flag false positives and missed detections, then generate training data again